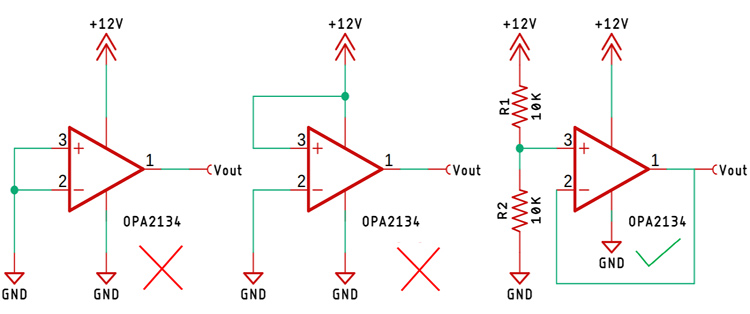
An op-amp plays a very crucial role when it comes to designing circuits with analogue components. But while implementing such op-amp based circuits, there are situations where one or more op-amps are left unused, this causes undesirable behaviour in one or all of those unused op-amps thus impacting total system performance.
To avoid this type of unwanted behaviour, the unused op-amps must be terminated properly, otherwise, it can lead to problems like increased power consumption and added noise.
So, in this tutorial, I am going to discuss
- How to properly terminate an unused op-amp & it’s added benefits.
- How a poorly configured op-amp can lead to various issues in the circuit.
- And in the end, there will be a section dedicated to testing a practical circuit.
So, without further ado, let's get started.
What is terminating an Op-amp?
After hearing the term terminate, if you are thinking about killing the op-amp, let me tell you that’s not it. By terminating an op-amp, I meant to configure an op-amp in a way that enables the device to operate in a stable manner.
Why terminating an op-amp is important?
- Leaving unused op-amp pins floating will create unexpected voltage shifts which may result in unexpected behaviour in the circuit.
- With a proper configuration, RFI noise can be drastically reduced.
- Power consumption & power dissipation in the IC can also be minimized.
What Parameters Should be Considered?
Input common-mode voltage range: Exceeding the input common-mode will cause damage in the input section of the op-amp.
Input differential voltage range: it’s defined as the max voltage range that can be applied between the non-inverting & the inverting input pins. Exceeding these ranges can also damage the input section of the op-amp.
Output Saturation: Output saturation occurs when the output of the op-amp is driven near the supply rails, and a saturated op-amp will always draw more current and also dissipates more power compared to an unsaturated op-amp.
To avoid output saturation and EOS, we need to limit output swing as much as possible. A lower gain setting can prevent output saturation.
Open-loop gain: As any op-amp has a very large open-loop gain, closing the loop is important.
Negative feedback is a very easy and common method to achieve stable output,
That is basically all the parameters that you need to consider before configuring the op-amp.
Testing the Circuit
To test the circuit, we are going to use the popular OPA2134 instrumental amplifier IC from Texas Instruments, but before that let's look at some of the above-mentioned parameters that we need to consider.
Let's look at some of the input specs of this op-amp:

The Table in the datasheet shows the absolute maximum rating of the op-amp, within the table, the input voltage range (V-)-0.7 (V+)+0.7 is specified, this rating is the max input voltage range for the non-inverting and the inverting input of the op-amp which must not be exceeded.
Now that's cleared up, let's look into our first test circuit,
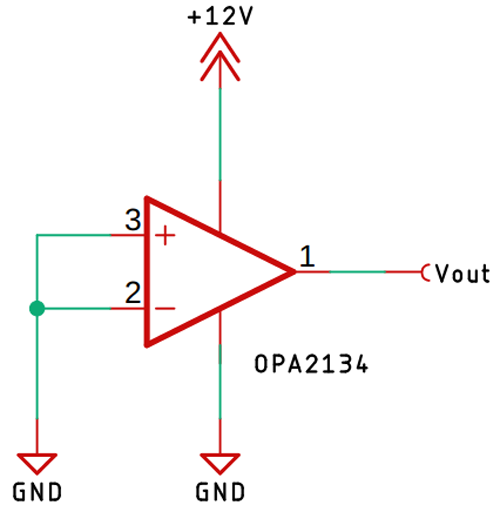
To test the circuit, I am using my meco 450B+ mustimeter, and meco 108B+ mustimeter, here the meco 450B+ mustimer is measuring the current, and the meco 108B+ mustimeter is measuring the output voltage.
The above figure shows you the first test circuit that I am going to test. But first, let's look at how much current the op-amp draws when it's simply powered on.
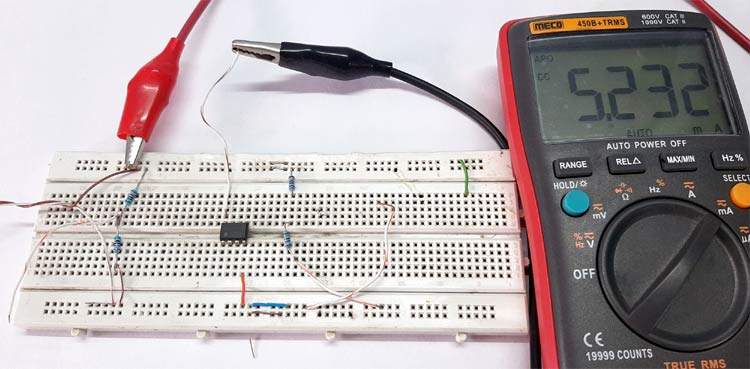
As you can see from the above image it is about 5.23 mA
First configuration:
Since I am using the dual op-amp version of this IC, I have configured one of those as a non-inverting amplifier with a gain of one, and the other pin of the circuit is floating, let’s see how much current it is drawing.
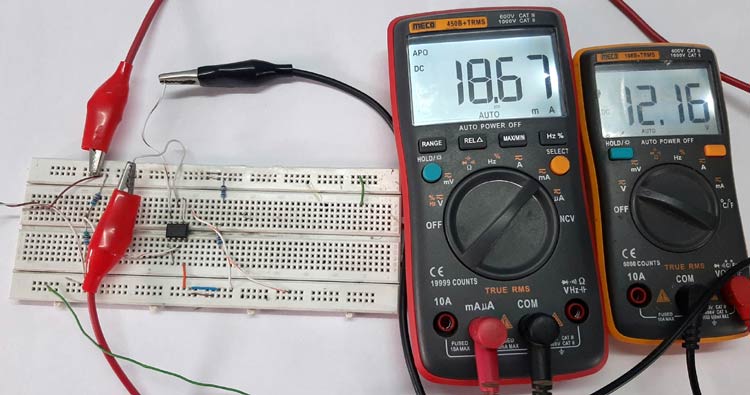
As you can see, the op-amp draws about 18.6 mA of current.
In the first op-amp configuration, non-inverting and the inverting terminal of the op-amp is connected to ground and the output is left floating,
With the configuration done my meco 108B+ mustimeter is connected to the output showing voltage, and my meco 450B+ is connected in series showing current, as you can see from the above image the output is high, and the op-amp now is in a saturated state, thus it's dissipating more power.
This is the case for this particular op-amp in my breadboard with other op-amps. You may see the output of the op-amp is low because of the input offset voltage of the op-amp. In some cases, the output will jump high and then come down low.
In other very high precision instrumental amplifiers, this configuration will surely violate the input common-mode range, so there is a high chance that the input section may get damaged.
Second configuration:
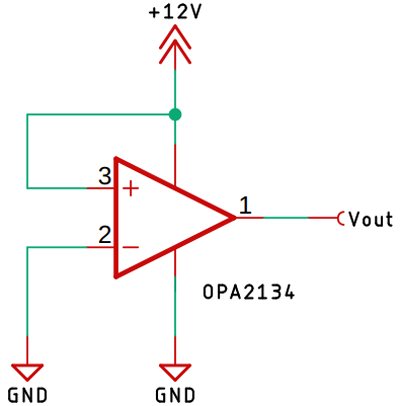
The above configuration is the second most common configuration that you can find on the internet.
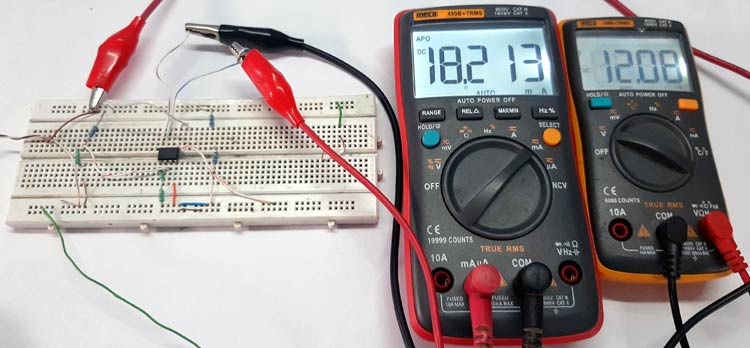
The practical output of this circuit is shown above.
As you can see in this configuration, the op-amp is also in a saturated state, and its drawing current like the first one. In some cases, you may see that the op-amp will draw hundreds of mA of current because the op-amp is violating the input common-mode voltage range for both the inputs.
Third Configuration:
With the second configuration done, we have our last configuration.
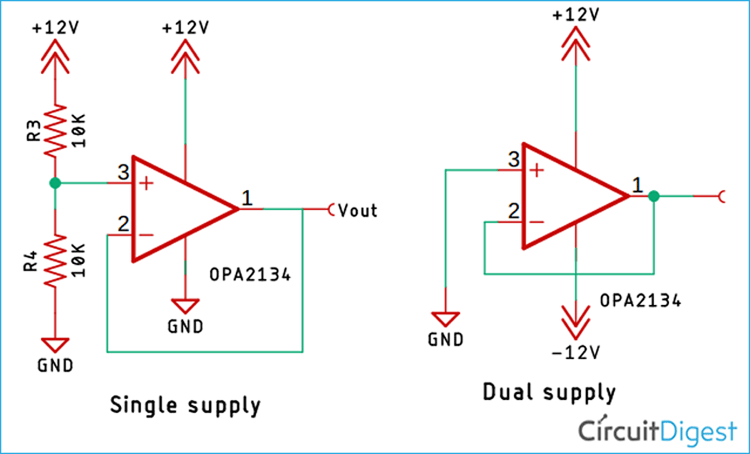
In the above image, the last configuration is shown, in this configuration the non-inverting terminal is connected to a voltage divider, and the op-amp itself is configured as a voltage follower. The practical output is shown below:
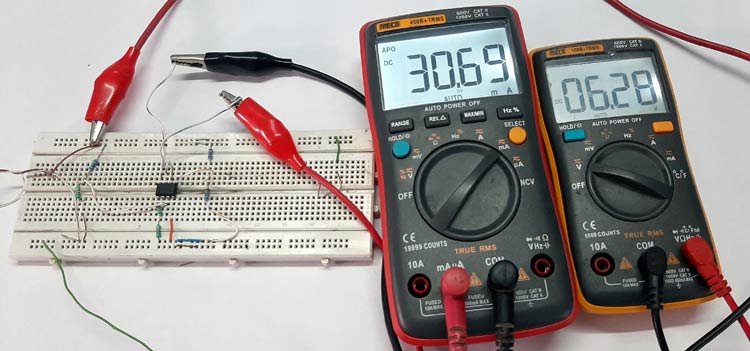
In this configuration, you can see that the output voltage is between the supply voltage, so this configuration makes sure that the input supply falls under the common-mode voltage range.
Although the current consumption is higher for this particular op-amp, with this configuration, it's possible to meet all the major recommended operating conditions specified by the datasheet.
Now it's clear that with the above configuration,
- the op-amp is stable with a low gain
- We have successfully met the input specification recommended by the datasheet
- The output voltage is not saturated
- Power consumption and power is also stable
If you want to know more about this topic, there is some great documentation available from Taxus Instruments and maxim integrated.
I hope you liked this article and learned something new out of it. If you have any doubt, you can ask in the comments below or can use our forums for detailed discussion.


