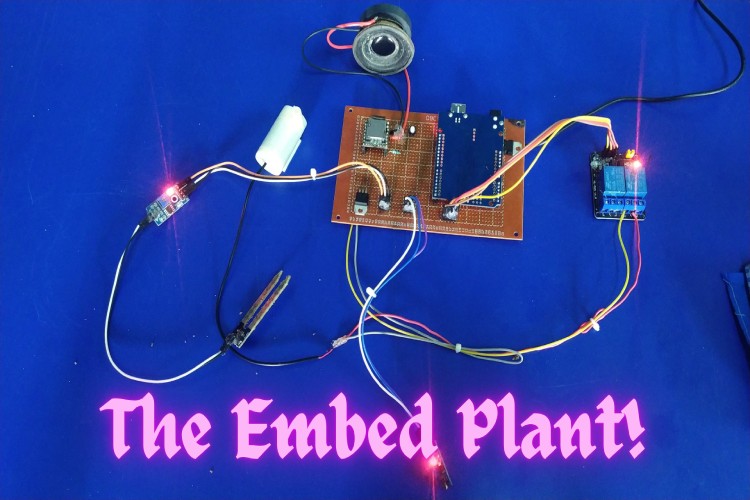
The embed plant is an idea is to make a Smart AI which helps to take care of our plant's health and ready to feed water by monitoring water level. Also, a special feature is added up to make conversation between the plant and controller like humans. I hope this will be a great companion and entertainer for our plants.
Component Choice:
Arduino UNO:
This is very cheap, powerful, and easy to use microcontroller in the market with wide power supply range.
LDR Module:
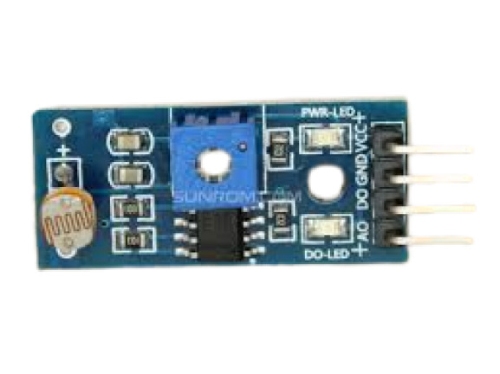
Here I’m using a simple LDR module with both analog(AO) and digital(DO) outputs.
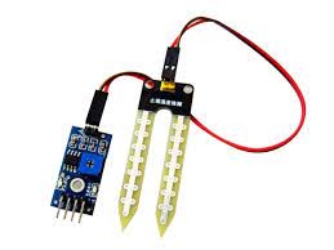
Soil Moisture Sensor:
The soil moisture sensor used to measure the soil conditions based on the water level. This module also has both analog (AO) and digital (DO) output pins.
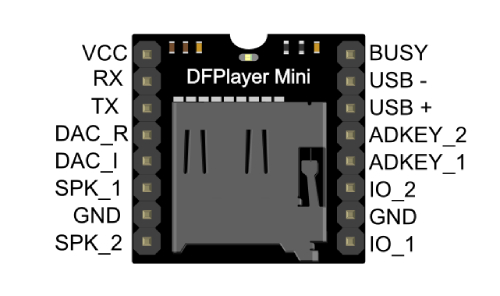
DfMini Audio Player:
This DfMini audio player from DF Robot can access the audio files directly from the SD card. Here I’m using this audio player to play several audio files based on the sensor readings.
This can be easily connected with Arduino using UART.
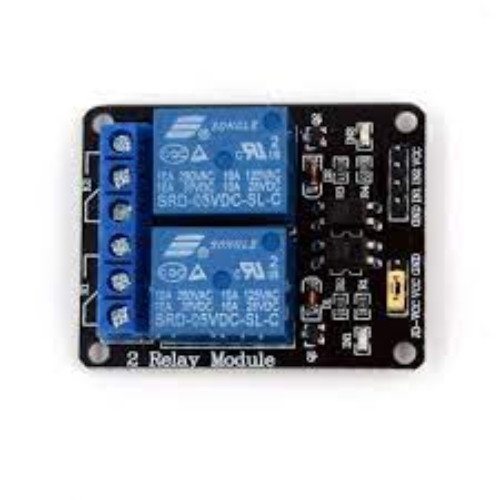
Relay Module:
To control the water pump and AC lamp, I used a two channel opto coupler IC based relay module.
Regulator ICs:
I have purchased L7812CV and L7805CV from DigiKey wesite for my project. The 7812 IC is used to power the Arduino with constant 12Volt supply, and 7805 IC is used to power the rest of the modules like LRD module, Soil Moisture Sensor Module, DfMini audio player and 2channel relay module with constant 5Volt supply.
Water pump:
6Volt DC water pump is used here to feed water to the plant. This motor can fully dip into the water.

General Purpose PCB:
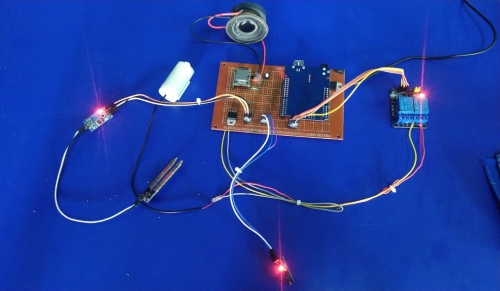
All components are soldered on the general purpose PCB with neat and clear manner.
Hardware:
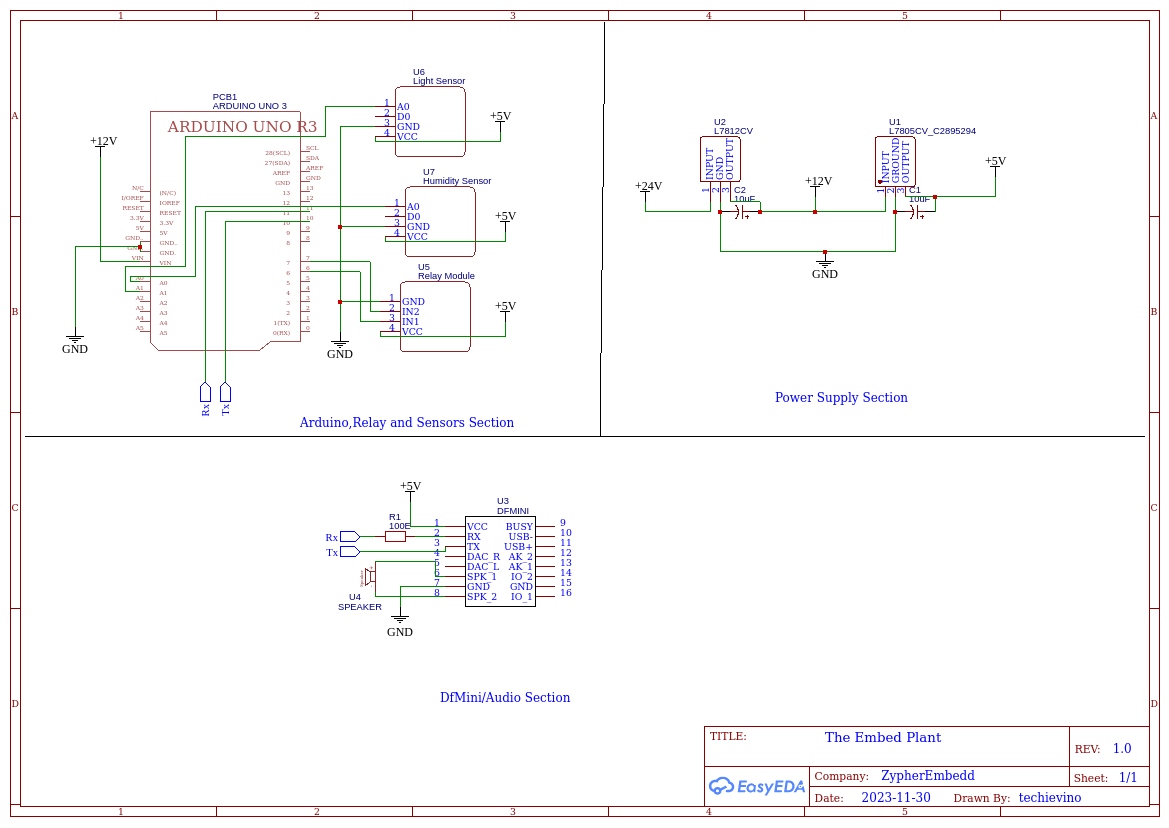
- The LDR sensor’s analog output is connected with A0 pin of Arduino.
- Soil moisture sensor’s output is connected with A1 pins of Arduino.
- DfMini audio player module connected with Arduino using UART connection.
- A small 100 ohms resistor is added in between RX of DfMini player and Arduino’s TX to reduce some noise in the sense of data transmission.
- Here, a 24 volt 2Amp adapter is used to power-up the entire module.
- The regulators lm7812cv and lm7805cv are used to power-up Arduino module and audio player module, respectively.
Audio Files:
Here, I'm using 7 audio files for various actions like,
0001 --- Plant intro.
0002 --- Bot intro.
0003 --- Plant thanks giving.
0004 --- Thrust State.
0005 --- Quenched State.
0006 --- Sunset (Light On).
0007 --- Morning (Light Off).
Image:
Software:
Here, the entire system is built with Arduino IDE software, which is easy to use.
Online text to speech convertor is used to make those 7 audio files mentioned above.
Code :
   /*
Here, we have a smart plant monitoring and evening light control system with voice assistant which can communicate with plant!
*/

#include "Arduino.h"
#include "SoftwareSerial.h"
#include "DFRobotDFPlayerMini.h"

#define LightSensor      A0
#define WaterLevelSensor A1
#define LightRelay       6
#define MotorRelay       7

SoftwareSerial mySoftwareSerial(10, 11);

DFRobotDFPlayerMini DFMini;

void setup() {

 pinMode(LightSensor,      INPUT);
 pinMode(WaterLevelSensor, INPUT);

 pinMode(LightRelay, OUTPUT);
 pinMode(MotorRelay, OUTPUT);
 digitalWrite(LightRelay, HIGH);
 digitalWrite(MotorRelay, HIGH);

 mySoftwareSerial.begin(9600);
 Serial.begin(115200);

 Serial.println();
 Serial.println(F("DFRobot DFPlayer Mini Demo"));
 Serial.println(F("Initializing DFPlayer ... (May take 3~5 seconds)"));

 if (!DFMini.begin(mySoftwareSerial)) {  //Use softwareSerial to communicate with mp3.
   Serial.println(F("Unable to begin:"));
   Serial.println(F("1.Please re-check the connection!"));
   Serial.println(F("2.Please insert the SD card!"));
   while (true) {
     delay(0);            // Code to compatible with ESP8266 watch dog.
   }
 }
 Serial.println(F("DFPlayer Mini online."));

 DFMini.volume(30);  //Set volume value. From, 0 to 30.
 DFMini.play(1);
 delay(5000);
 DFMini.play(2);
 delay(8000);
 DFMini.play(3);
 delay(4000);
}

void loop() {

 int  LightValue       = analogRead(LightSensor);
 int  WaterLevel       = analogRead(WaterLevelSensor);
 bool LightRelay_State = digitalRead(LightRelay);
 bool MotorRelay_State = digitalRead(MotorRelay);
 //Serial.println(WaterLevel);
 if (LightValue >= 450) LightsOn(LightRelay_State);

 else if (LightValue <= 400) LightsOff(LightRelay_State);

 if (WaterLevel >= 520) MotorOn(MotorRelay_State);

 else if (WaterLevel <= 520) MotorOff(MotorRelay_State);
}

void LightsOn(bool LightRelay_State) {

 if (LightRelay_State == false) {
   return;
 }
 else {
   delay(1500);
   DFMini.play(6);
   delay(8000);
   digitalWrite(LightRelay, LOW);
   Serial.println("Lights On!");
 }
}
void LightsOff(bool LightRelay_State) {
 if (LightRelay_State == true) {
   return;
 }
 else {
   delay(1500);
   DFMini.play(7);
   delay(9000);
   digitalWrite(LightRelay, HIGH);
   Serial.println("LightsOff!");
 }
}

void MotorOn(bool MotorRelay_State) {
 if (MotorRelay_State == false) {
   return;
 }
 else {
   delay(1500);
   DFMini.play(4);
   delay(8000);
   digitalWrite(MotorRelay, LOW);
   Serial.println("Motor is set to On!");
 }
}
void MotorOff(bool MotorRelay_State) {

 if (MotorRelay_State == true) {
   return;
 }
  else {
   delay(1500);
   DFMini.play(5);
   delay(6000);
   digitalWrite(MotorRelay, HIGH);
   Serial.println("Motor is set to Off!");
 }
}
Program Workflow:
Here mainly, we should include 2 libraries for using DfMini audio player.
Software Serial library is used for dfmini’s serial communication and DFRobotDFPlayerMini. Library is used to work with audio files loaded in the SD card.
#include "Arduino.h"
#include "SoftwareSerial.h"
#include "DFRobotDFPlayerMini.h"
Pin definitions
#define LightSensor      A0
#define WaterLevelSensor A1
#define LightRelay       6
#define MotorRelay       7
Software Serial and DfMini object
SoftwareSerial mySoftwareSerial(10, 11);

DFRobotDFPlayerMini DFMini;
Setup part
The sensors are set up as an input and the relay module is set up as an output. The relay module I'm using here is an opto-coupler based one. So initially, we should make it HIGH to turn OFF and make it LOW to turn ON later. The hardware serial is set up with, 115200 baud rate. The Software Serial is set up as 9600 to work with DfMini player.
 pinMode(LightSensor, INPUT);
 pinMode(WaterLevelSensor, INPUT);
 pinMode(LightRelay, OUTPUT);
 pinMode(MotorRelay, OUTPUT);

 digitalWrite(LightRelay, HIGH);
 digitalWrite(MotorRelay, HIGH);

 mySoftwareSerial.begin(9600);
 Serial.begin(115200);
First, we should check whether the DfMini audio module is online or not. By checking the status of the SD card or the UART connection, we can easily conclude the status of the audio module. This code will move further only if the audio module is online.
 Serial.println(F("DFRobot DFPlayer Mini Demo"));
 Serial.println(F("Initializing DFPlayer ... (May take 3~5 seconds)"));

 if (!DFMini.begin(mySoftwareSerial)) {
//Use softwareSerial to communicate with mp3.
   Serial.println(F("Unable to begin:"));
   Serial.println(F("1.Please recheck the connection!"));
   Serial.println(F("2.Please insert the SD card!"));
   while (true) {
     delay(0);        // Code to compatible with ESP8266 watch dog.
   }
 }
 Serial.println(F("DFPlayer Mini online."));
After the process of checking audio module, we can simply play the audio file by mentioning its file name. The file name should always be a number.
DFMini.volume(30);  //Set volume value. From, 0 to 30.
 DFMini.play(1);
 delay(5000);
 DFMini.play(2);
 delay(8000);
 DFMini.play(3);
 delay(4000);
These delay between every file is mandatory, otherwise it will play next files faster without any delay.
Loop part
- In this loop part, the sensor’s analog values are continuously monitored using an analog Read function and stored in a variable for later use.
- Then the readings from the sensors are checked by the simple if and else conditions, and it will call the corresponding functions for further actions.
void loop() {

int  LightValue       = analogRead(LightSensor);
int  WaterLevel       = analogRead(WaterLevelSensor);
 bool LightRelay_State = digitalRead(LightRelay);
 bool MotorRelay_State = digitalRead(MotorRelay);
//Serial.println(WaterLevel);
 if (LightValue >= 450) LightsOn(LightRelay_State);

 else if (LightValue <= 400) LightsOff(LightRelay_State);

 if (WaterLevel >= 520) MotorOn(MotorRelay_State);

 else if (WaterLevel <= 520) MotorOff(MotorRelay_State);
}
Light Actions
Here, the following functions Lights On and Lights Off are used to control the electric pulp based on the LDR sensor’s analog value. These two functions first check the status if the output is already triggered or not.
In the LightsOn function, if the light relay state is already triggered, there is no need to make it ON. The same way, if the light relay is in the OFF state, there is no need to make it off again.
void LightsOn(bool LightRelay_State) {
 if (LightRelay_State == false) {
   return;
 }
else {
   delay(1500);
   DFMini.play(6);
   delay(8000);
   digitalWrite(LightRelay, LOW);
   Serial.println("Lights On!");

}

void LightsOff(bool LightRelay_State) {
 if (LightRelay_State == true) {
  return;
 }
 else {
   delay(1500);
   DFMini.play(7);
   delay(9000);
   digitalWrite(LightRelay, HIGH);
   Serial.println("LightsOff!");
 }
}
Motor Actions
The following functions, Motor On and Motor Off are working similarly as we discuss above.
void MotorOn(bool MotorRelay_State) {
 if (MotorRelay_State == false) {
   return;
 }
 else {
   delay(1500);
   DFMini.play(4);
   delay(8000);
   digitalWrite(MotorRelay, LOW);
   Serial.println("Motor is set to On!");
 }
}
void MotorOff(bool MotorRelay_State) {

 if (MotorRelay_State == true) {
   return;
 }
  else {
   delay(1500);
   DFMini.play(5);
   delay(6000);
   digitalWrite(MotorRelay, HIGH);
   Serial.println("Motor is set to Off!");
 }
}
Here, the delays between every audio file is specifying its file duration.
For example,
  DFMini.play(6);
  delay(8000);
Here, 8 seconds delay is used to wait until the audio file 6 is being played for 8 seconds. Otherwise, it will not be fully played.
These audio files are simply generated by the free online TTS (Text to Speech) convertor. We can use any website for this, which is free.
Schematic:
Future Scope:
- In the future, I'm going to make a fully functional version like it can sense and upload the NPK level, turbidity level, and other nutrients level to the user. This can be very helpful in the sense of smart agriculture.
- 3D printed case to be designed to make it more product like look.
- Custom printed circuit board.
/*
Here, we have a smart plant monitoring with evening light control system with custom voices through DfMini Player!
*/
#include "Arduino.h"
#include "SoftwareSerial.h"
#include "DFRobotDFPlayerMini.h"
#define LightSensor A0
#define WaterLevelSensor A1
#define LightRelay 6
#define MotorRelay 7
SoftwareSerial mySoftwareSerial(10, 11);
DFRobotDFPlayerMini DFMini;
void setup() {
pinMode(LightSensor, INPUT);
pinMode(WaterLevelSensor, INPUT);
pinMode(LightRelay, OUTPUT);
pinMode(MotorRelay, OUTPUT);
digitalWrite(LightRelay, HIGH);
digitalWrite(MotorRelay, HIGH);
mySoftwareSerial.begin(9600);
Serial.begin(115200);
Serial.println();
Serial.println(F("DFRobot DFPlayer Mini Demo"));
Serial.println(F("Initializing DFPlayer ... (May take 3~5 seconds)"));
if (!DFMini.begin(mySoftwareSerial)) { //Use softwareSerial to communicate with mp3.
Serial.println(F("Unable to begin:"));
Serial.println(F("1.Please recheck the connection!"));
Serial.println(F("2.Please insert the SD card!"));
while (true) {
delay(0); // Code to compatible with ESP8266 watch dog.
}
}
Serial.println(F("DFPlayer Mini online."));
DFMini.volume(30); //Set volume value. From, 0 to 30.
DFMini.play(1);
delay(5000);
DFMini.play(2);
delay(8000);
DFMini.play(3);
delay(4000);
}
void loop() {
int LightValue = analogRead(LightSensor);
int WaterLevel = analogRead(WaterLevelSensor);
bool LightRelay_State = digitalRead(LightRelay);
bool MotorRelay_State = digitalRead(MotorRelay);
//Serial.println(WaterLevel);
if (LightValue >= 450) LightsOn(LightRelay_State);
else if (LightValue <= 400) LightsOff(LightRelay_State);
if (WaterLevel >= 520) MotorOn(MotorRelay_State);
else if (WaterLevel <= 520) MotorOff(MotorRelay_State);
}
void LightsOn(bool LightRelay_State) {
if (LightRelay_State == false) {
return;
}
else {
delay(1500);
DFMini.play(6);
delay(8000);
digitalWrite(LightRelay, LOW);
Serial.println("Lights On!");
}
}
void LightsOff(bool LightRelay_State) {
if (LightRelay_State == true) {
return;
}
else {
delay(1500);
DFMini.play(7);
delay(9000);
digitalWrite(LightRelay, HIGH);
Serial.println("LightsOff!");
}
}
void MotorOn(bool MotorRelay_State) {
if (MotorRelay_State == false) {
return;
}
else {
delay(1500);
DFMini.play(4);
delay(8000);
digitalWrite(MotorRelay, LOW);
Serial.println("Motor is set to On!");
}
}
void MotorOff(bool MotorRelay_State) {
if (MotorRelay_State == true) {
return;
}
else {
delay(1500);
DFMini.play(5);
delay(6000);
digitalWrite(MotorRelay, HIGH);
Serial.println("Motor is set to Off!");
}
}

