Did you know that on average 2000 to 5000 liters of water is needed to produce 1 kilogram of rice? Water has always been vital for agriculture, sustaining crop growth and ensuring food production. However, in the face of climate change and increasing water pollution, the need to conserve water has become more critical than ever. With these challenges at hand, it is imperative to prioritize water conservation measures to safeguard agricultural sustainability and secure our food supply for the future. Today we are going to make a simple yet effective project, that can monitor the water requirements of a plant and automatically water it only when required. This way we can not only save water but can also make sure to only provide adequate water to the plants to get the best yield.
In this project, we will constantly monitor the soil moisture level using a capacitive sensor. When the moisture level goes below a certain level, the microcontroller Arduino Nano will turn on the pump and water the plants. While the demonstration of this project is done using a small flower pot, it can easily be scaled to large hectors of land and potentially have a bigger impact on water consumption and yield.
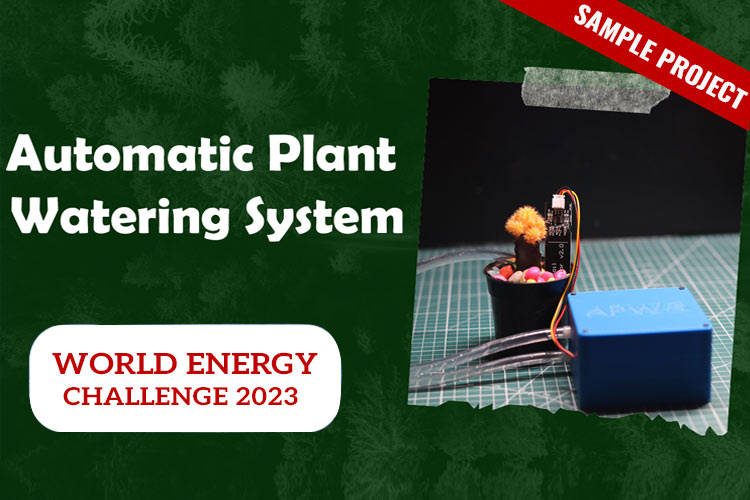
Note: This project is submitted as a sample for World Energy Challenge 2023, by Circuit Digest Staff.
Features of Automatic Plant Watering System
- Fully Autonomous.
- Capacitive soil moisture sensor for better sensitivity.
- Highly integrated Motor driver with ultra-low power mode.
- Full bridge motor driver with 3.5A peak current capabilities and maximum input voltage of 36V.
- Configurable Current Drive Regulation.
Components Used to Build APWS
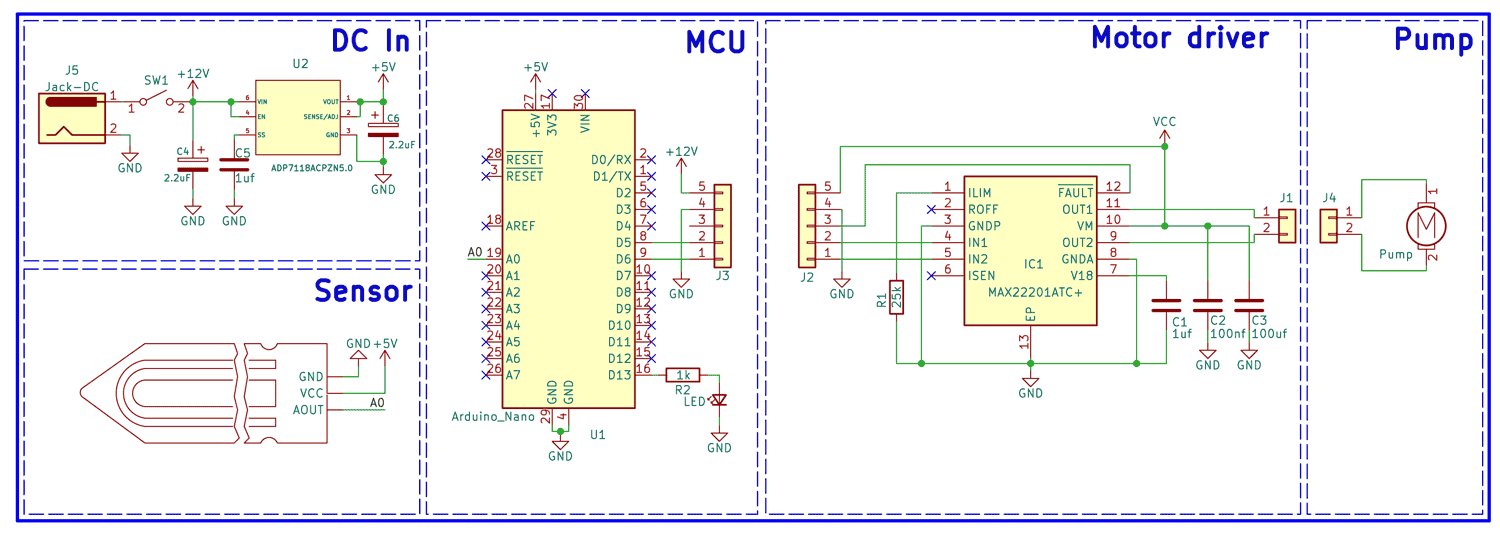
All the parts you will require to build the APWS are listed below. The exact value of each component can be found in the schematics or the BOM.
- Arduino Nano x1
- ADP7118ACPZN5.0 5V LDO x1
- MAX22201 Brushed motor driver from Analog devices x1.
- LM4040DEX 3.3V Voltage Regulator x1
- Capacitive Soil moisture sensor x1.
- 12V water pump x1.
- SMD Resistors
- SMD Capacitors
- Wires
- Custom PCB
- 3D printed enclosure.
- Other tools and miscellaneous.
APWS Complete Circuit Diagram
The complete circuit diagram for the Automatic Plant Watering System is shown below.
Expansion PCB for MAX22201
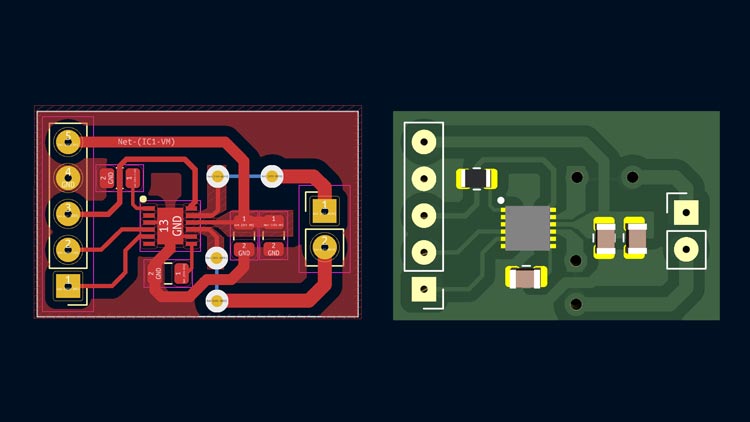
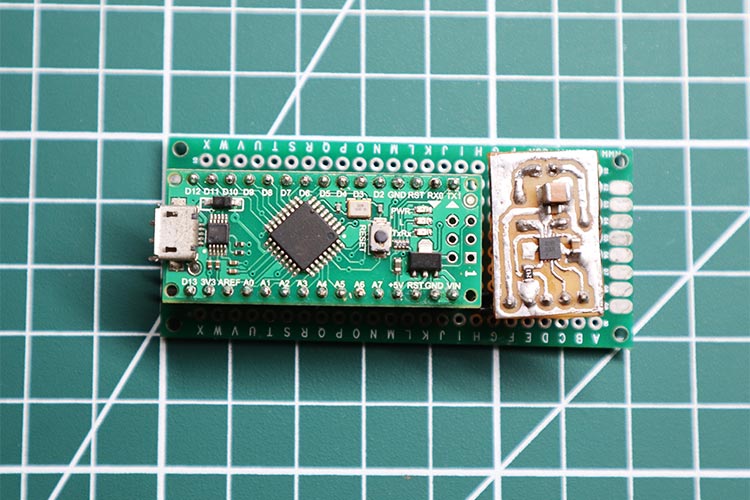
Because the MAX22201 is an SMD component and its footprint is pretty small, which makes it hard to handle, I have created a small expansion PCB for it. You can mount the MAX22201 and its supporting components on the PCB. Standard 2.54mm header pins are provided for power input, microcontroller interface and for connecting motos leads. Since its fairly a small board and only has few components, I have decided to make the PCB myself instead of manufacturing it. Even though the small footprint of MAX22201 makes it challenging, the home-made PCB turned out to be fine and working very well.
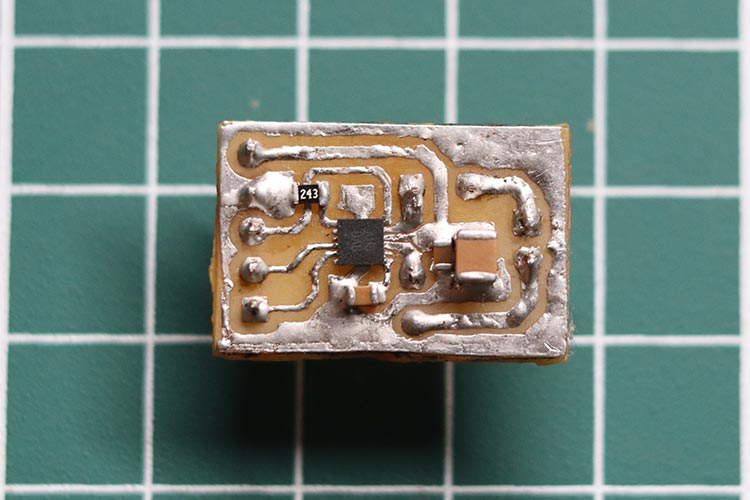
Here is the full assembled project. The Arduino and the MAX22201 expansion boards are mounted to a common PCB. The whole control circuitry is powered using a ADP7118 5V LDO.
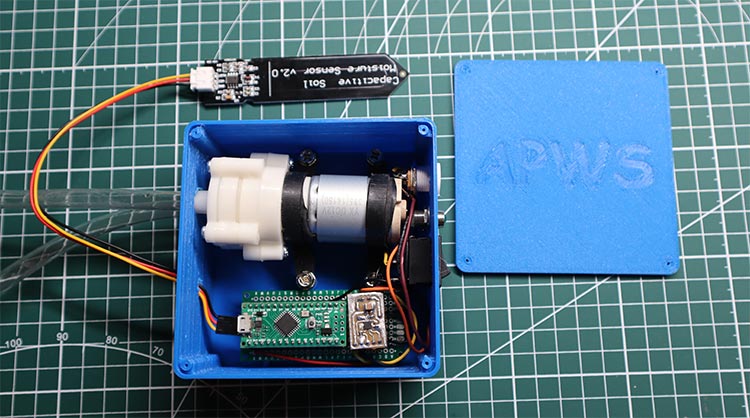
And here is the full setup inside the enclosure.
3D Printed Parts
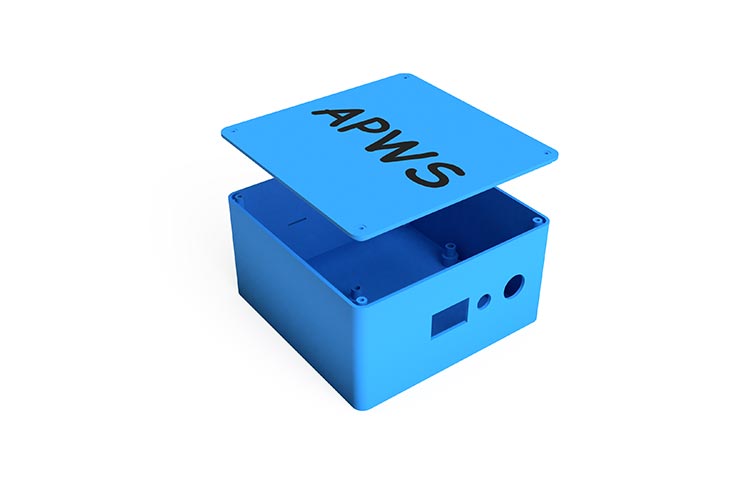
I have designed a small and compact enclosure for the APWS. It is printed with PLA with a infill percentage of 20. The Enclosure will not only make the project compact and easy to install, but it will also protect the circuit and the pump from dust and other debris.
Arduino Code for the APWS
Now let’s look at the code. Just like the circuit the code is also very simple. We only need a few lines of code to control the APWS. We are only using 4 GPIOs in total. One for soil moisture sensor, two for motor control and the last one for LED indication. In the code first we have declared some variables for the sensor reading and calibration. After that in the setup function we have initialised the motor control and LED control pins as outputs.
const int AirValue = 616;   //replace the value from calibration in air
const int WaterValue = 335;  //replace the value from calibration in water
int soilMoistureValue = 0;
int soilmoisturepercent=0;
void setup() {
  pinMode(5, OUTPUT); // MAX22201 IN1
  pinMode(6, OUTPUT); // MAX22201 IN2
  pinMode(13, OUTPUT); // LED output
  /*
  Put the mototr driver into sleep mode during startup.
  When both IN1 and IN2 inputs are low for longer than tSLEEP (2.2ms max), the MAX22201 enters low-power sleep mode.
  In this mode, outputs are three-stated and the device current consumption is ISLEEP (6.5μA max).
  */
  digitalWrite(5, LOW);
  digitalWrite(6, LOW);
  digitalWrite(13, LOW);
}
In the loop function, we are using the analogRead function to read the moisture level from the sensor using the analog pin A1. Once the reading is taken it is converted to percentage. After the conversion, the Arduino will turn on or off the motor according to the moisture level. We can turn of the motor by simply pulling the motor control pins to ground. But to turn on we must wake the MAX22201 from its power saving mode. For that we must pull both of the control pins HIGH for at least 400us. Once the MAX22201 is active we can turn on the pump by pulling one control pin to ground, while keeping the other in HIGH state. We can change the direction of rotation by changing the levels of these control pins.
void loop() {
soilMoistureValue = analogRead(A0);  //Read Value from sensor
soilmoisturepercent = map(soilMoistureValue, AirValue, WaterValue, 0, 100);
if(soilmoisturepercent < 50)  // Soil is dry, Turn on motor
{
  /* For the MAX22201 to exit Sleep mode and power on the device, drive IN1 and IN2 high for at least 400μs. */
  digitalWrite(5, HIGH);
  digitalWrite(6, HIGH);
  delay(1);
  /* Once the MAX22201 is active turn on the motor. You can change the rotation direction by invering the states of IN1 and IN2. */
  digitalWrite(5, LOW);
  digitalWrite(6, HIGH);
  digitalWrite(13, HIGH);
}
else if(soilmoisturepercent >85) // Soil is moist, Turn off motor
{
  /* Turn off the motor and put MAX22201 to sleep Mode. */
  digitalWrite(5, LOW);
  digitalWrite(6, LOW);
  digitalWrite(13, LOW);
}
   delay(400); //Wait for few milliseconds and then continue the loop.
}
Once the soil moisture is above a certain level, here it is set to 85%, the Arduino will pull both the control pins to ground. This will turn of the motor and will put the MAX22201 to sleep to save power. Whenever the soil moisture level drops below the set amount, this process will repeat and will keep the moisture level in between the set levels.
Supporting Files
You can download all the necessary files from the Circuit Digest GitHub repo.
/***************************************************
Code for Automatic Plant Watering System (APWS)
****************************************************/
const int AirValue = 540; //replace the value from calibration in air
const int WaterValue = 250; //replace the value from calibration in water
int soilMoistureValue = 0;
int soilmoisturepercent=0;
void setup() {
Serial.begin(9600);
pinMode(5, OUTPUT); // MAX22201 IN1
pinMode(6, OUTPUT); // MAX22201 IN2
pinMode(13, OUTPUT); // LED output
/*
Put the mototr driver into sleep mode during startup.
When both IN1 and IN2 inputs are low for longer than tSLEEP (2.2ms max), the MAX22201 enters low-power sleep mode.
In this mode, outputs are three-stated and the device current consumption is ISLEEP (6.5μA max).
*/
digitalWrite(5, LOW);
digitalWrite(6, LOW);
digitalWrite(13, LOW);
}
void loop() {
soilMoistureValue = analogRead(A0); //Read Value from sensor
soilmoisturepercent = map(soilMoistureValue, AirValue, WaterValue, 0, 100);
Serial.println(soilmoisturepercent);
if(soilmoisturepercent < 50) // Soil is dry, Turn on motor
{
/*
for the MAX22201 to exit Sleep mode and power on the device, drive IN1 and IN2 high for at least 400μs.
*/
digitalWrite(5, HIGH);
digitalWrite(6, HIGH);
delay(1);
/*
Once the MAX22201 is active turn on the motor. You can change the rotation direction by invering the states of IN1 and IN2.
*/
digitalWrite(5, LOW);
digitalWrite(6, HIGH);
digitalWrite(13, HIGH);
}
else if(soilmoisturepercent >85) // Soil is moist, Turn off motor
{
/*
Turn off the mototr and put MAX22201 to sleep Mode.
*/
digitalWrite(5, LOW);
digitalWrite(6, LOW);
digitalWrite(13, LOW);
}
delay(400); //Wait for few milliseconds and then continue the loop.
}

