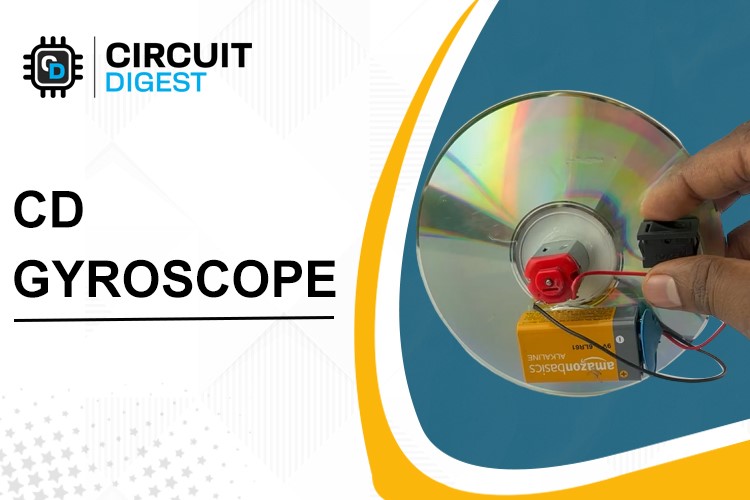
Have you ever wanted to try building your own gyroscope? Well, you're in luck! In this blog post, we'll guide you through the steps to make a gyroscope using just a few simple materials.
How does a Gyroscope work?
A gyroscope is a sensor that measures and maintains orientation and angular velocity. It is commonly used in various applications such as navigation systems, robotics, aerospace, and virtual reality devices.
The math behind a gyroscope has to do with how it stays upright. When you spin the small CD attached to the motor, it starts to spin really fast. This creates something called "angular momentum," which is like a special kind of energy that makes things spin around.
The bigger CD is attached to the small CD and motor, so it also starts to spin around. This makes the whole gyroscope spin around as well. But even if you move the gyroscope around, it stays upright because of something called "torque."
Torque is a special kind of force that makes things rotate. When you move the gyroscope around, it experiences torque that causes it to rotate around a different axis. The rate of precession is proportional to the amount of torque applied and the angular momentum of the gyroscope.
The equation for torque is
T = I * α,
Where T = torque applied,
I = moment of inertia (a measure of how difficult it is to rotate an object), and
α = angular acceleration.
So in simpler terms, the faster the small CD spins and the bigger the CDs are, the harder it is to move the gyroscope around because it has a lot of angular momentum.
I hope that helps make it easier to understand!
What you’ll need:
- 1 small DC motor
- 1 big CD
- 1 counterweight
- 1 9V battery
- 1 switch
- Hot glue or double-sided tape
- Small bolt (optional)
Attach CD to Motor

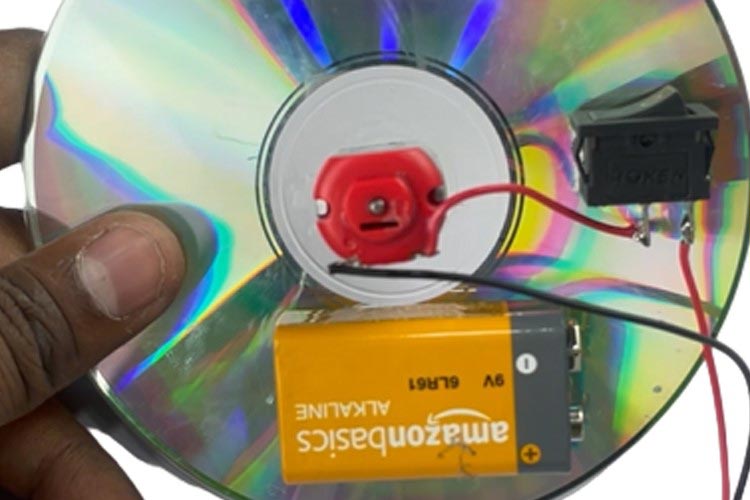
First, take the CD and attach it to the DC motor in the way which is shown in the image above. You can do this using some hot glue or double-sided tape. Make sure the CD is centered on the motor's shaft so that it will spin smoothly.
Attach Counter weight to Motor Shaft
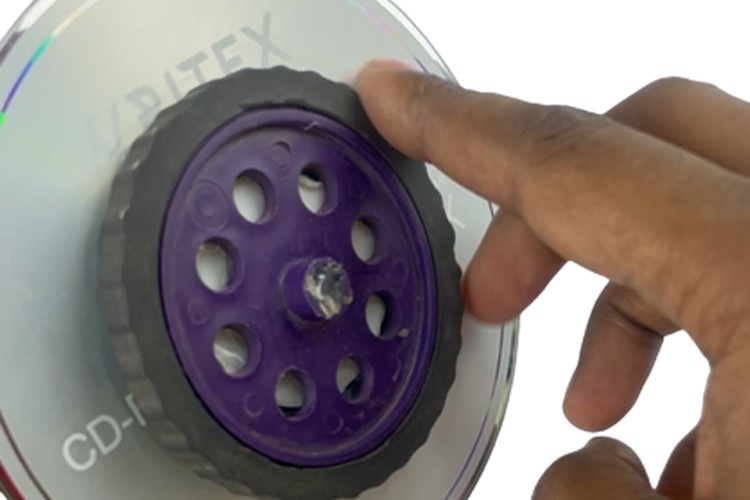
Next, take the counterweight and attach it to the shaft of the motor. You can use a small bolt or some more hot glue to secure the motor shaft to the counter weight. I have used a wheel as a counterweight but it’s not necessary. You can use anything which has a symmetrical shape as the counterweight, but you need to do some trial and error.
Circuit Diagram
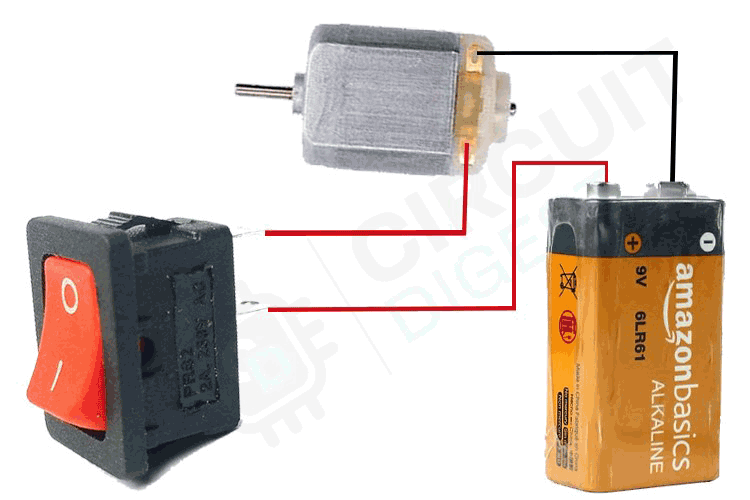
Now it's time to wire everything up! First, connect the switch to the 9V battery. Then, connect the positive wire from the battery to the positive terminal on the motor. Connect the negative wire from the battery to the negative terminal on the motor.
Test Your Gyroscope
Once everything is wired up, you can test out your gyroscope by turning on the switch. The motor should start spinning the smaller CD, and the larger CD should rotate around it. You've just created your very own gyroscope!
Experiment!
One of the coolest things about gyroscopes is their ability to maintain their orientation and rotation even when they're disturbed. You can experiment with your gyroscope by tilting it to one side and watching it slowly right itself. Try using different sizes and shapes of CDs to see how they affect the gyroscope's behavior.
Building your own homemade CD gyroscope is a fun and educational project that you can do in just a few hours. Try to make this project and tell us what you learned!
Projects using DC Motor
Explore the exciting world of robotics and learn how to control DC motors with Arduino and the versatile L293D Motor Driver IC. In this blog post, we'll guide you through the step-by-step process of setting up the motor driver, connecting it to your Arduino board, and programming it to control the speed and direction of your DC motors. Unleash your creativity and bring your robotic projects to life with this essential knowledge!
Take a deep dive into motor control as we unveil the secrets of constructing an efficient H-Bridge motor driver circuit using MOSFETs. Our comprehensive blog post will guide you through the circuit building process, shed light on the underlying principles of H-Bridge operation, and empower you to effortlessly control the direction and speed of your DC motors. Expand your technical expertise and unleash the true potential of motor control in your projects with this invaluable knowledge.
Are you ready to take your motor control skills to new heights? Join us as we delve into the exciting world of interfacing DC motors with the powerful AVR Microcontroller Atmega16. In our insightful blog post, we'll guide you through the entire process, from establishing a seamless connection to programming the Atmega16 for precise control over the speed and direction of your DC motors. Discover how this integration opens up endless possibilities for your projects, allowing you to unleash the true potential of motor control. Get ready to elevate your technical prowess and create remarkable innovations with AVR Microcontroller Atmega16 and DC motors.

