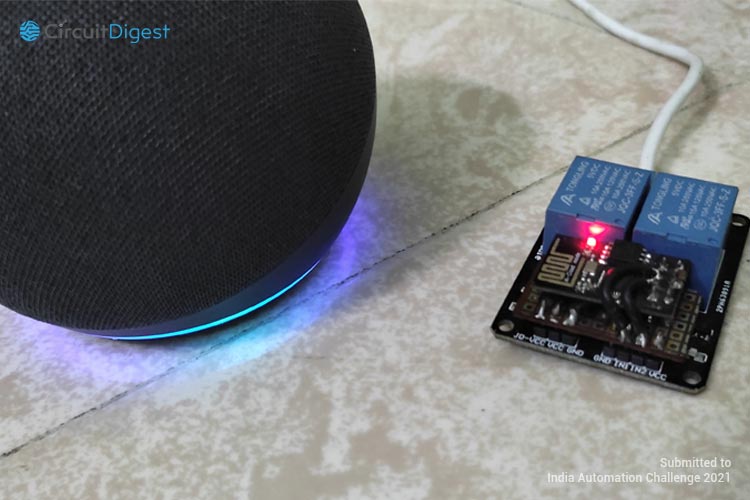
Automating products impacting one's daily routine saves time, cost and reduces one's hassle to monitor it continuously. Automated switches as described here are one great example. Integrating it with a voice assistant gives us a way more comfiness. Consider having to enter your home with a bag full of groceries. One has to learn martial arts to be able to switch ON the lights of a dark room along with full impending weight of the groceries(pun intended). That's where our Alexa switch comes into play. The main pitch for the Project is to control(ON/OFF) the devices with voice control. It is very common nowadays to use home assistants like Alexa, google assistant, etc. And if we want to switch ON/OFF the devices of our home with that home assistants, it costs more to install new smart devices. So comes the Alexa-Switch that we can connect it to the devices that we want, and switch ON/OFF the device with the voice control. We can choose the name we want for the device. Here I used Fan, Light as the name of the device.
Previously, we have integrated Alexa Voice Assistant with Arduino, Raspberry Pi and NodeMCU to build many interesting projects:
- Voice controlled Home automation using Amazon Alexa on Raspberry Pi
- Alexa Controlled Home Automation using Arduino and ESP-01 Wi-Fi Module
- How to Build an Amazon Alexa Speaker using Raspberry Pi
- Alexa Voice Controlled LED using Raspberry Pi and ESP12
- How to build an IoT-based Voice Controlled Smart Rocket Igniter
- Arduino Based TV Remote: Control any TV or Set Up Box Channels with Alexa
Components Required for Alexa Switch
Project Used Hardware
- 2 Relay module,
- ESP01,
- AMS1117
Project Used Software
- Arduino IDE
Project Hardware Software Selection
2 Relay module - to switch ON/OFF the device when the signal is received.
ESP01 - it is the microcontroller used for collecting information from Alexa and tells the Relay to turn ON/OFF.
AMS1117 - to convert 5v to 3.3v, as it is the right voltage for the microcontroller.
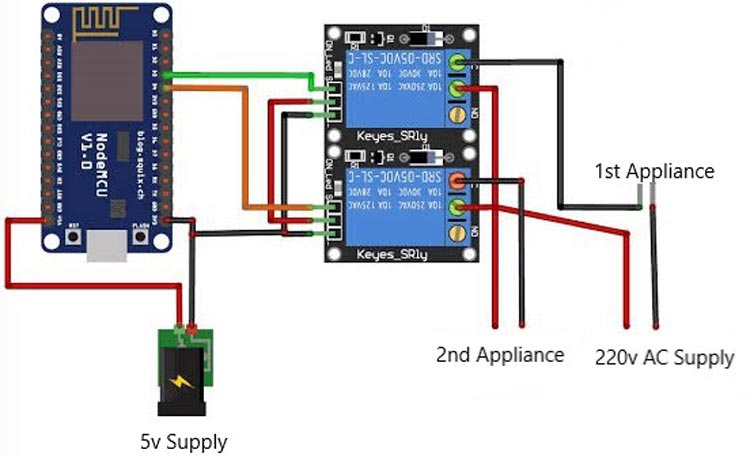
Circuit Diagram
The 5v supply is connected to AMS1117 and it is connected to the Vcc and ground of the ESP01 to power the ESP01 microcontroller and to turn ON/OFF the Relay. The devices are connected to the Relay.
#include <Arduino.h>
#include <ESP8266WiFi.h>
#include <WebSocketsClient.h>
#include <ArduinoJson.h>
#include <StreamString.h>
#include <DNSServer.h>
#include <ESP8266WebServer.h>
#include <WiFiManager.h>
WebSocketsClient webSocket;
WiFiClient client;
#define MyApiKey "d170ba86-9fd1-4bf8-90f0-8dd02b0c2a39" // TODO: Change to your sinric API Key. Your API Key is displayed on sinric.com dashboard
#define MySSID "mani" // TODO: Change to your Wifi network SSID
#define MyWifiPassword "qwerty123" // TODO: Change to your Wifi network password
#define HEARTBEAT_INTERVAL 300000 // 5 Minutes
uint64_t heartbeatTimestamp = 0;
bool isConnected = false;
// deviceId is the ID assgined to your smart-home-device in sinric.com dashboard.
void turnOn(String deviceId) {
  if (deviceId == "5d146e15e32b137cab0dcb36") // Device ID of first device
  {
    Serial.print("Turn on device id: ");
    Serial.println(deviceId);
    digitalWrite(0, LOW);
  }
  else if (deviceId == "5d14dd35e32b137cab0dcc26") // Device ID of second device
  {
    Serial.print("Turn on device id: ");
    Serial.println(deviceId);
    digitalWrite(2, LOW);
  }
}
void turnOff(String deviceId) {
   if (deviceId == "5d146e15e32b137cab0dcb36") // Device ID of first device
   {
     Serial.print("Turn off Device ID: ");
     Serial.println(deviceId);
     digitalWrite(0, HIGH);
   }
   else if (deviceId == "5d14dd35e32b137cab0dcc26") // Device ID of second device
   {
     Serial.print("Turn off Device ID: ");
     Serial.println(deviceId);
     digitalWrite(2, HIGH);
  }
  else {
     Serial.print("Turn off for unknown device id: ");
     Serial.println(deviceId);
  }
}
void webSocketEvent(WStype_t type, uint8_t * payload, size_t length) {
  switch(type) {
    case WStype_DISCONNECTED:
      isConnected = false;
      Serial.printf("[WSc] Webservice disconnected from sinric.com!\n");
      break;
    case WStype_CONNECTED: {
      isConnected = true;
      Serial.printf("[WSc] Service connected to sinric.com at url: %s\n", payload);
      Serial.printf("Waiting for commands from sinric.com ...\n");
      }
      break;
    case WStype_TEXT: {
        Serial.printf("[WSc] get text: %s\n", payload);
        // Example payloads
        // For Switch or Light device types
        // {"deviceId": xxxx, "action": "setPowerState", value: "ON"}
        // For Light device type
        // Look at the light example in github
        DynamicJsonBuffer jsonBuffer;
        JsonObject& json = jsonBuffer.parseObject((char*)payload);
        String deviceId = json ["deviceId"];
        String action = json ["action"];
        if(action == "setPowerState") { // Switch or Light
            String value = json ["value"];
            if(value == "ON") {
                turnOn(deviceId);
            } else {
                turnOff(deviceId);
            }
        }
        else if (action == "SetTargetTemperature") {
            String deviceId = json ["deviceId"];
            String action = json ["action"];
            String value = json ["value"];
        }
        else if (action == "test") {
            Serial.println("[WSc] received test command from sinric.com");
        }
      }
      break;
    case WStype_BIN:
      Serial.printf("[WSc] get binary length: %u\n", length);
      break;
  }
}
void setup() {
  Serial.begin(115200);
WiFiManager wifiManager;
wifiManager.autoConnect("AutoConnectAP");
Serial.println("connected...yeey :)");
  // server address, port and URL
  webSocket.begin("iot.sinric.com", 80, "/");
  // event handler
  webSocket.onEvent(webSocketEvent);
  webSocket.setAuthorization("apikey", MyApiKey);
  // try again every 5000ms if connection has failed
  webSocket.setReconnectInterval(5000);
  pinMode(0, OUTPUT);
  pinMode(2, OUTPUT);
  digitalWrite(0, HIGH);
  digitalWrite(2, HIGH);
}
void loop() {
  webSocket.loop();
  if(isConnected) {
      uint64_t now = millis();
      // Send heartbeat in order to avoid disconnections during ISP resetting IPs over night.
      if((now - heartbeatTimestamp) > HEARTBEAT_INTERVAL) {
          heartbeatTimestamp = now;
          webSocket.sendTXT("H");
      }
  }
}


