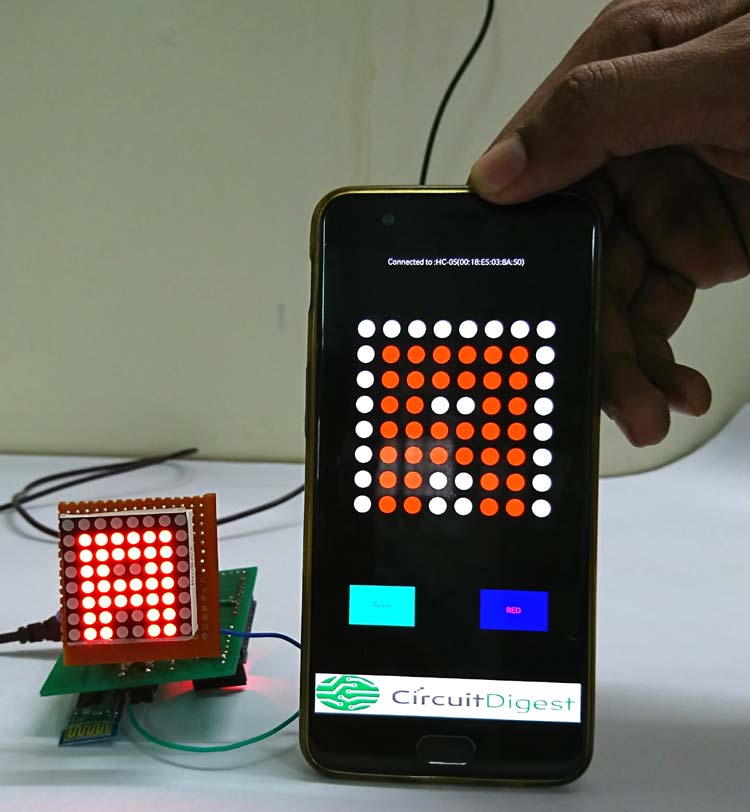
Be it the long stretched highways or your doctors front door, we have sign boards placed everywhere to provide us information. But these sign boards are often boring and cannot be configured as per our interest from time to time. So in this project we are going to build a Bluetooth controlled Sign board using an 8*8 Matrix display. A unique feature of this project is its android application which allows the user to control all the 64 LEDs individually from the mobile phone. This enables the user to create custom designs with ease and display it on the LED display, sounds interesting right?!! So let’s get started...
Materials Required:
- Arduino Pro mini
- MAX7219
- HC-05 Bluetooth Module
- 8*8 LED Matrix Display
- 20k Resistor
- DC Barrel Jack
Circuit Diagram:
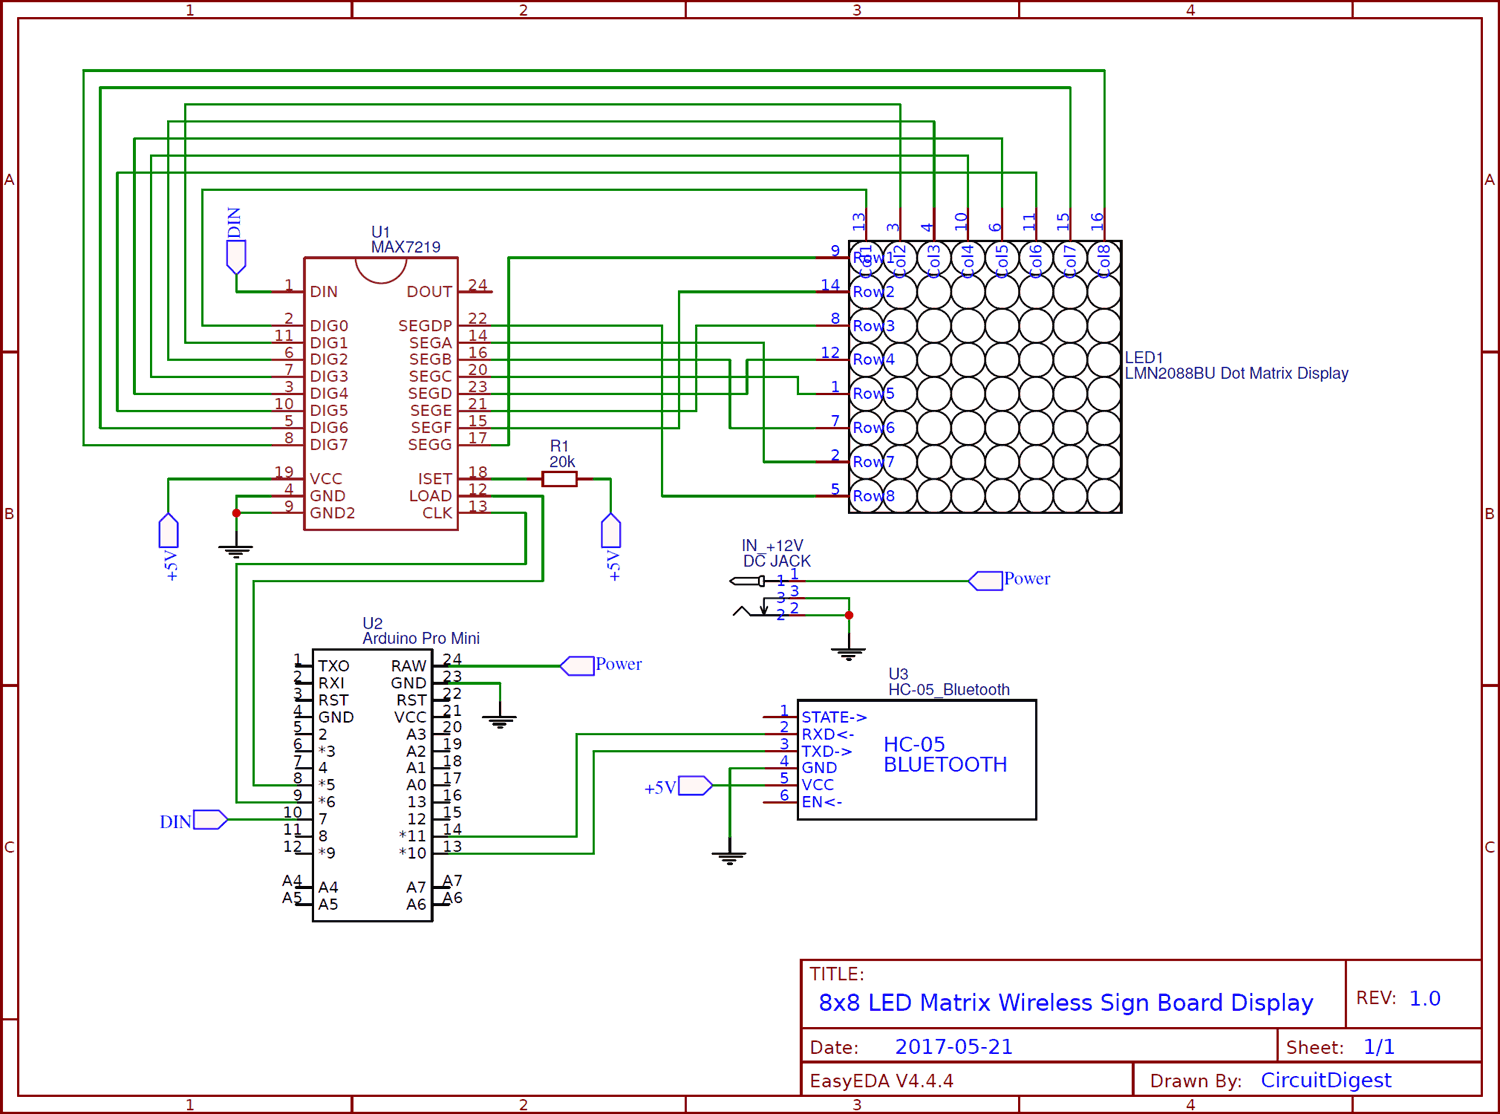
The circuit Diagram this Bluetooth controlled LED board built using the EasyEDA application. We will use the same schematics to develop a PCB from it and fabricate it using EasyEDA.
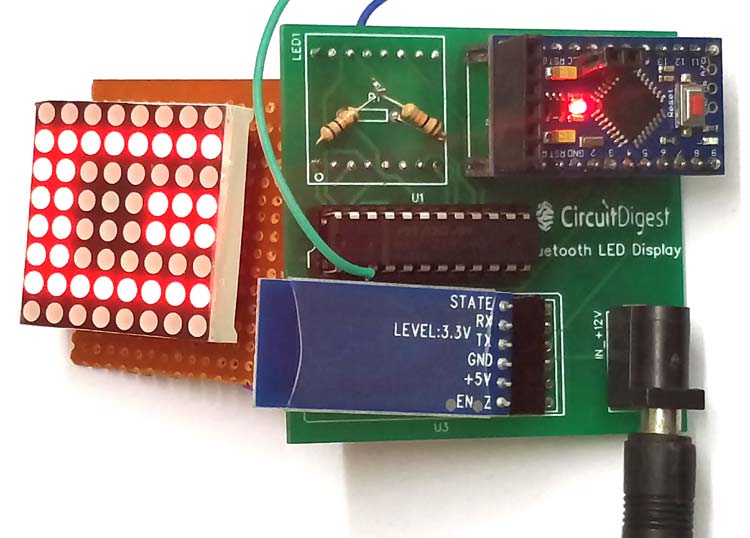
The circuit is pretty straight forward. The whole project is powered by a 12V adapter, which is directly given to the Raw pin of the Arduino Board. This Raw voltage is then regulated to +5V which is supplied to the Bluetooth module and the MAX7219 IC. The Tx and Rx pins of the Bluetooth module is connected to D11 and D10 of the Arduino to enable serial connection.
The digital pins D5 to D7 is connected to the MAX7219 IC to send and receive data through SPI communication. The ISET pin of MAX7219 is pulled high through a 20k Resistor.
For this project I have fabricated a PCB, you can get the design file of the PCB and use the same or build the circuit on a breadboard. However due to the its complexity it is recommended to either buy a 8x8 Display module or use the PCB
8x8 matrix is very useful display module and can be used in many cool projects:
- Controlling 8x8 LED Matrix with Raspberry Pi
- Scrolling Text Display on 8x8 LED Matrix using Arduino
- 8x8 LED Matrix using Arduino
- 8x8 LED Matrix Interfacing with AVR Microcontroller
Creating the Android Application using Processing:
Before we can start programming our Arduino, we should know what type of data we will receive form the mobile phone to respond back to it. So let’s take a look at how the Android application is created and how you can use it on your smartphone to control the 8x8 LED matrix.
The Android application for this project was created using the Processing software. It is an Open-Source development application and can be easily downloaded and put to use for developing interesting projects using Arduino or other Microcontrollers since it can develop android application and system applications. We have already done few projects using Processing and you can check them out by clicking on the links below.
- DIY FM Radio Using Processing
- Virtual Reality/ Gesture control using Arduino
- Private Chat room using Arduino.
- Arduino Radar System using Processing APP and Ultrasonic Sensor
- Real Time Face Detection and Tracking using Arduino
- DIY Speedometer using Arduino and Processing
- Ping Pong Game using Arduino Accelerometer
- Biped Robot Using Arduino
- DIY Arduino Thermal Imaging Camera
Getting back to topic, it is impossible for me explain the complete code of the android application so you would have to learn processing by yourself and then look at the code to understand how it works. Hence for people who are willing to skip the process of learning Processing can download the android application from the below link
Below is the interface of our Android Application:
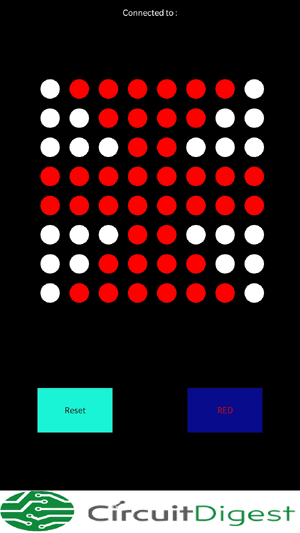
The APK file can be directly installed on any android application and launched like any other application. But make sure your HC-05 Bluetooth device is named as “HC-05”, because only then it will work.
Understanding the Processing Code:
People who are interested to know what happens behind the screen can read further, other can skip down to the next heading. Basically the Android application connects to a Bluetooth device called “HC-05” during start-up and display a set of 64 LEDs in form of circles. Then when the user presses the circle the circle turns red and the circle number is sent to Arduino through Bluetooth, on receiving the circle’s number the Arduino turns on the LED. Let’s look into the important lines of the Processing program to understand better. The complete code of the Android application can be downloaded from the below link.
We use classes and objects to display 64 LEDs so that we can address each one easily. As you can see in the below code, we use a for loop to iterate from 1 to 64 using an array. This was each LED will have its own value of X position, Y position and colour and we can change them easily.
//dipslay all leds
for (int i=1; i<=64; i++)
  led_array[i].display();
  //All leds displayed

class Led{
  float X_Pos;
  float Y_Pos;
  color colour;

  //CONSTRUTOR
  Led (float tempx, float tempy, color tempc){
    X_Pos = tempx;
    Y_Pos = tempy;
    colour = tempc;
  }
  void display()
  {
    fill(colour);
    ellipse(X_Pos, Y_Pos, led_dia, led_dia);
  }
}
The LED’s are loaded on the screen on the same order of that of the display. Each LED is separated by a distance equal to the diameter of the LED, this way we can easily distinguish which LED is currently selected by the user. As shown in the below program we create an array in which each element holds the information of the X,Y position and colour of the LED.
void load_leds(){
  led_array = new Led[65];
  int a=1;

  for (int j=0; j<=7; j++){
    float y = height/6 + j*(led_dia*1.5);
  for (int i=0; i<=7; i++)
  {
    float x = (width/6) + i*(led_dia*1.5); //fill(255);
    //ellipse(x, y, led_dia, led_dia);
    led_array[a] = new Led(x,y,color(255,255,255));
    a++;
  }
  }
}
The main step in the program is to check if the user has pressed any LED and if yes we have to change the colour of the LED and send the LED number through Bluetooth. Since now we can address to the location and colour of each LED easily we can do this by just comparing the X,Y values of where the user has pressed with the X,Y value of the LEDs. If the values merger into each other then we change the state of the LED and also send the number through Bluetooth as shown below.
//check if mouse over led //If yes send the led number
for (int i=1; i<=64; i++)
{
  if( (mouseX < (led_array[i].X_Pos + led_dia/2)) && (mouseX > (led_array[i].X_Pos - led_dia/2)) && (mouseY < (led_array[i].Y_Pos + led_dia/2))  && (mouseY > (led_array[i].Y_Pos - led_dia/2)))
  {led_array[i] = new Led(led_array[i].X_Pos, led_array[i].Y_Pos, led_color);
  byte[] data = {byte(i)};
  bt.broadcast(data);
  }
}
Apart from this, the program can also Reset the complete LED by turning off them all and also you can either make an LED turn red (ON) or white (OFF) so we also have an toggle button for that. The toggle button is displayed and waits for the input. If pressed the respective action will be taken. The code to do the same is shown below as function which is called inside the draw loop.
void load_buttons()
{
  rectMode(CENTER);
  textAlign(CENTER,CENTER);
  noStroke();
  fill(#1BF2D4);
  rect(width/2-width/4,height/1.3,width/4,height/12); fill(0); text("Reset",width/2-width/4,height/1.3); //button 1

  if (red==true)
  {  fill(#080F89); rect(width/2+width/4,height/1.3,width/4,height/12);fill(255,0,0); text("RED",width/2+width/4,height/1.3);} //button 2
  if (red==false)
  {fill(#080F89); rect(width/2+width/4,height/1.3,width/4,height/12);fill(255); text("WHITE",width/2+width/4,height/1.3);} //button 2
}

void read_buttons()
{
    if (mousePressed && click_flag==true)
  {
  color_val = get(mouseX, mouseY);
  click_flag=false;
  if (color_val==-14945580)
  {
   byte[] data = {0};
   bt.broadcast(data);
   println("RESET");load_leds(); //load all led in position and colour
  }

  if (color_val==-16248951)
  {
   byte[] data = {100};
   bt.broadcast(data);
   if (red == true)
   red = false;
   else if (red == false)
   red = true;

   println("TOGGLE");
   }

  color_val=0;
  }
}
Programming your Arduino:
The complete Arduino program for this Bluetooth controlled wireless Board project is given at the bottom of this screen; you can use it directly and upload it on your board. The important lines in the program are explained below.
The Bluetooth module is connected to pin 10 and 11, hence we have to use the software serial to enable serial communication on these pins and then we can listen for data from these pins. We get the data received from the Bluetooth module and save it in a variable called incoming. If the value of incoming is “0” we will turn off all the LED using the code below
if (BT.available())
  {
    incoming = BT.read();
    Serial.println(incoming);

    if (incoming==0)
      m.clear(); // Clears the display
Using the values of incoming we have to determine which LED the user has pressed on the mobile phone and weather to turn ON or OFF that LED. So we check if the value is equal to 100. If the value is 10, then it means the user has asked to toggle the colour of the LED. So we toggle the variable red to know whether the LED should be turned on or off.
else if (incoming == 100)//Check if we should on or off the LED
    {
      if (red == true)
      red= false;
      else if (red == false)
      red= true;
        Serial.print("RED:");  Serial.println(red);
    }
Finally if the value is than 65 it means that the user has pressed on a LED. Based on the number from 1 to 64 we have to determine which LED the user has pressed. To toggle that LED we will need the value of Row and Column of that LED which is calculated and stored on variable X and Y respectively and shown on the code below. Finally based on the value of variable red we either turn on or turn off the LED as per the user request
else if (incoming<=64)
    { //Calculate where to ON ro OFF the LED
      toggle=true;
    Y = incoming / 8;
    X = incoming - (Y * 8);

    if (incoming%8 == 0)
      {X = 8; Y -= 1;}

    Serial.println(X - 1);
    Serial.println(Y);
    if(red==true)
    m.setDot((X - 1), (Y), true); //LED ON
    else if (red == false)
    m.setDot((X - 1), (Y), false); //LED OFF
    }
Circuit and PCB Design using EasyEDA:
To design this Bluetooth Controlled Matrix display, we have chosen the online EDA tool called EasyEDA. I have previously used EasyEDA many times and found it very convenient to use since it has a good collection of footprints and it is open-source. After designing the PCB, we can order the PCB samples by their low cost PCB fabrication services. They also offer component sourcing service where they have a large stock of electronic components and users can order their required components along with the PCB order.
While designing your circuits and PCBs, you can also make your circuit and PCB designs public so that other users can copy or edit them and can take benefit from your work, we have also made our whole Circuit and PCB layouts public for this circuit , check the below link:
https://easyeda.com/circuitdigest/8x8-led-matrix-display-control-with-bluetooth
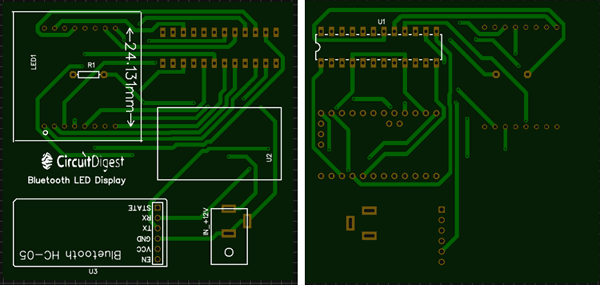
You can view any Layer (Top, Bottom, Topsilk, bottomsilk etc) of the PCB by selecting the layer form the ‘Layers’ Window.
You can also view the PCB, how it will look after fabrication using the Photo View button in EasyEDA:
Calculating and Ordering Samples online:
After completing the design of this Bluetooth Controlled Matrix PCB, you can order the PCB through JLCPCB.com. To order the PCB from JLCPCB, you need Gerber File. To download Gerber files of your PCB just click the Fabrication Output button in EasyEDA editor page, then download from the EasyEDA PCB order page.
Now go to JLCPCB.com and click on Quote Now or Buy Now button, then you can select the number of PCBs you want to order, how many copper layers you need, the PCB thickness, copper weight, and even the PCB color, like the snapshot shown below:
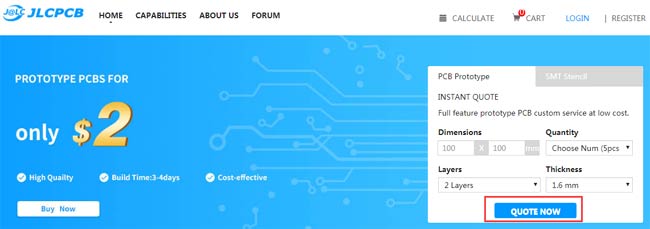
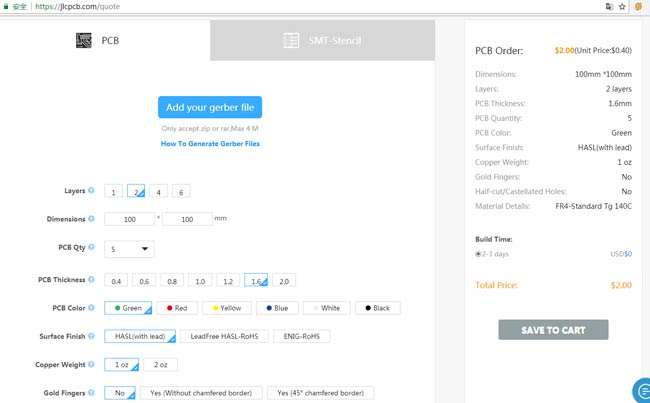
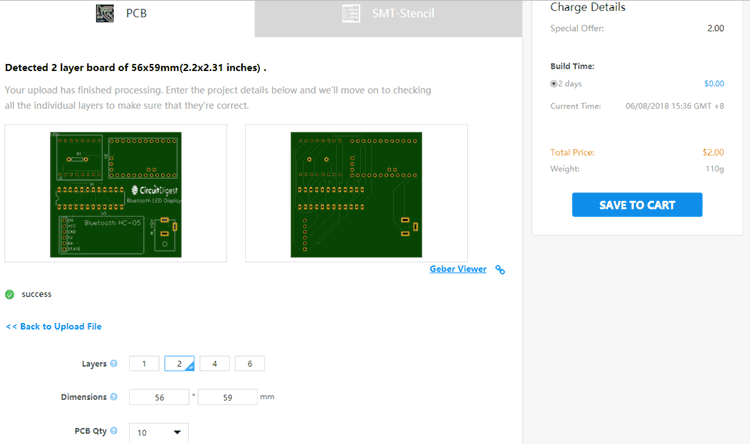
After you have selected all of the options, click “Save to Cart” and then you will be taken to the page where you can upload your Gerber File which we have downloaded from EasyEDA. Upload your Gerber file and click “Save to Cart”. And finally click on Checkout Securely to complete your order, then you will get your PCBs a few days later. They are fabricating the PCB at very low rate which is $2. Their build time is also very less which is 48 hours with DHL delivery of 3-5 days, basically you will get your PCBs within a week of ordering.
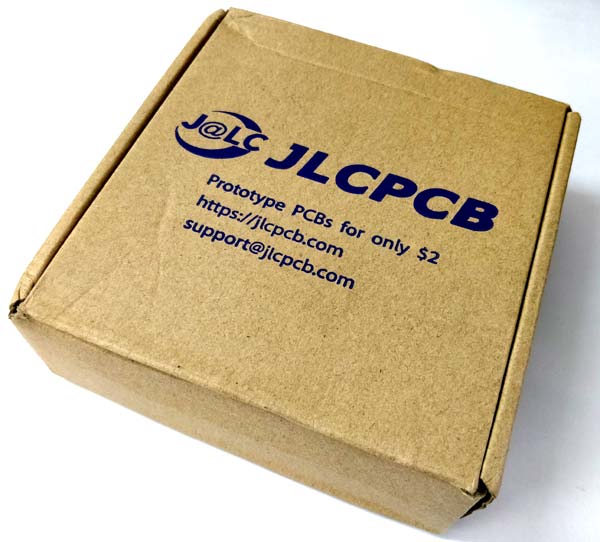
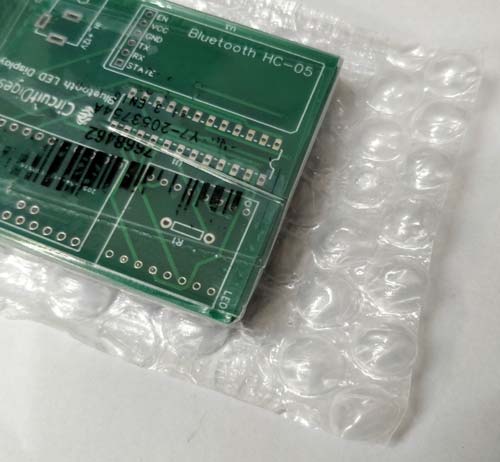
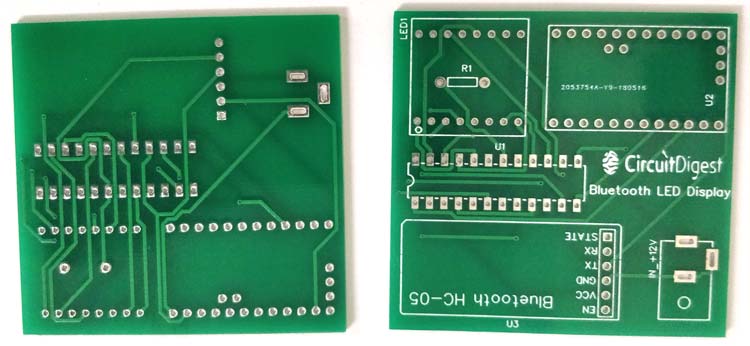
After few days of ordering PCB’s I got the PCB samples in nice packaging as shown in below pictures.
And after getting these pieces I have soldered all the required components over the PCB.
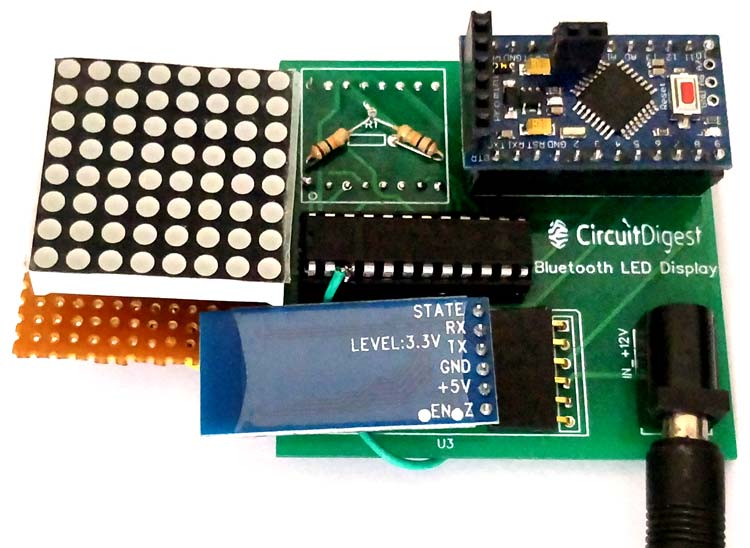
In my PCB, I made a blunt mistake by selecting the wrong footprint for the 8*8 Display module, hence I had to use an Perf board to mount the display as shown in the picture. But now the footprint is updates in the PCB and you can order the corrected PCB and mount the display module with ease.
Working of Bluetooth Sign board display:
Once you’re ready with the Hardware either through getting the PCB or making the connection on breadboard, use the Arduino program given at the end of the page and upload it to your Arduino Board. The android application APK file is also provided above, use it and install the application on your preferred Android device.
Power the hardware and search for HC-05 device name on your phone to pair with it. The pass key will be 1234 by default. After that, open the application that we just installed. The application should display “connected to HC-05” at the top of the screen, then you will be able to touch the LED on the screen and notice that the same LED is being turned on in the board as well.
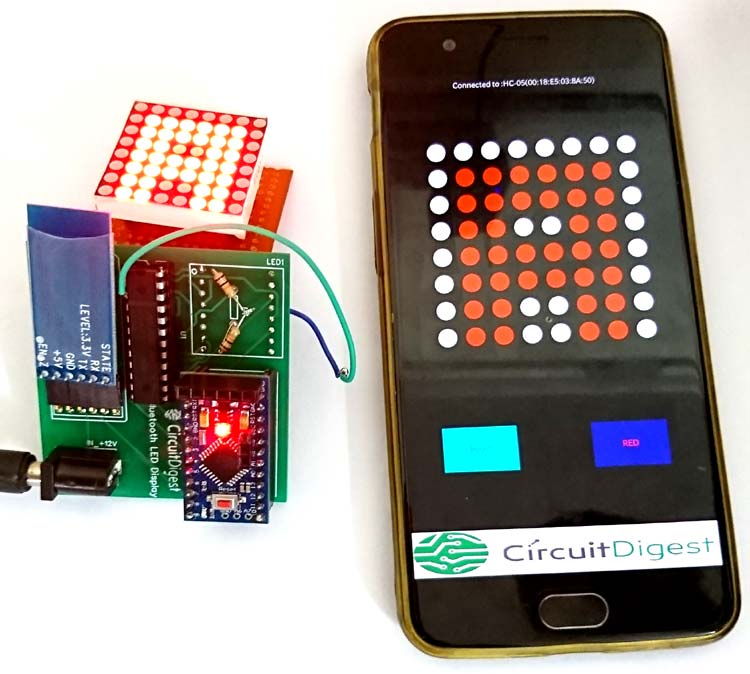
You can also turn off all the LED by pressing the Reset button and decide to turn on or off a particular LED by pressing on the Toggle button. By default which ever LED you press will be turned on. The complete working of the project can be found in the video below. If you have any problem in getting it to work use the comments box below or write on our forums for more technical help. Hope you understood the tutorial and enjoyed building it.
/*
8*8 LED Sign Board display
B.Aswinth Raj
www.circuitdigest.com
library: GitHub | riyas-org/max7219 https://github.com/riyas-org/max7219
*/
#include <MaxMatrix.h>
#include <SoftwareSerial.h>// import the serial library
SoftwareSerial BT(10, 11); // RX, TX
int DIN = 7; // DIN pin of MAX7219 module
int CLK = 6; // CLK pin of MAX7219 module
int CS = 5; // CS pin of MAX7219 module
int maxInUse = 1;
boolean red = true;
boolean toggle = true;
MaxMatrix m(DIN, CS, CLK, maxInUse);
void setup()
{
BT.begin(9600); //start the Bluetooth communication at 9600 baudrate
Serial.begin(9600);
// BT.println("Bluetooth working");
m.init(); // MAX7219 initialization
m.setIntensity(8); // initial led matrix intensity, 0-15
m.clear(); // Clears the display
}
int incoming;
int Y = 0;
int X = 0;
void loop()
{
if (BT.available())
{
incoming = BT.read();
Serial.println(incoming);
if (incoming==0)
m.clear(); // Clears the display
else if (incoming == 100)//Check if we should on or off the LED
{
if (red == true)
red= false;
else if (red == false)
red= true;
Serial.print("RED:"); Serial.println(red);
}
else if (incoming<=64)
{ //Calculate where to ON ro OFF the LED
toggle=true;
Y = incoming / 8;
X = incoming - (Y * 8);
if (incoming%8 == 0)
{X = 8; Y -= 1;}
Serial.println(X - 1);
Serial.println(Y);
if(red==true)
m.setDot((X - 1), (Y), true); //LED ON
else if (red == false)
m.setDot((X - 1), (Y), false); //LED OFF
}
}
}



it gives a good idea about Arduino