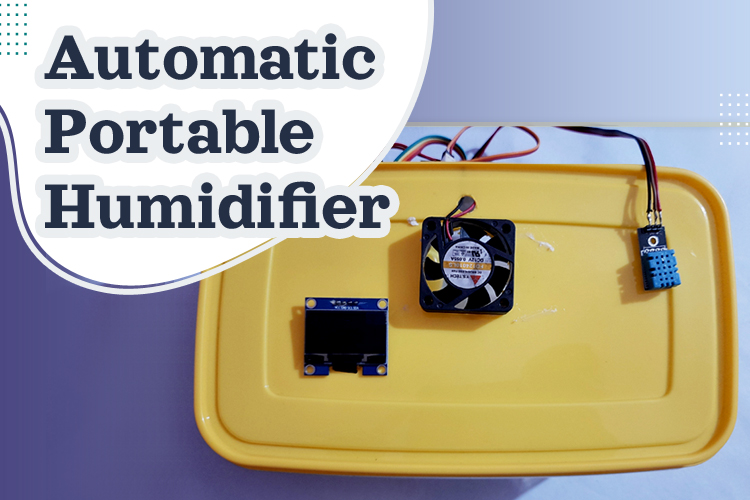
Humidifier is a device used to increase the relative humidity of a closed area to ensure enough moisture in the area. Especially during winters, when the heater is turned on, it causes the relative humidity of the air to decrease. In this diy project, we are going to build an automatic humidifier, which can maintain the relative humidity of the atmospheric air by using sensor mechanism. We are also using a display to show the relative humidity (RH) in terms of percentage of moisture in the air. Apart from Arduino and LCD, we are also using DHT11 sensor to read the atmospheric humidity values. If it finds that relative humidity is lower than the required limit, it turns on the humidifier, and vice versa.
Components Required for Building a Portable Humidifier
- Ultrasonic humidifier
- Arduino Nano
- 5V Relay
- 7805
- 25V,1000uf Electrolytic capacitor
- 12V,2 AMP AC-DC Adapter
- DHT11 Sensor
- USB Female socket
- Perf Board
- Connecting wires
Working of the Portable Humidifier
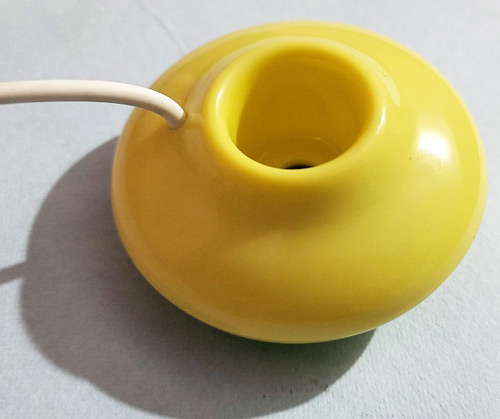
Portable humidifier can produce a warm/cool mist by using a metal diaphragm vibrating at high frequency. The sound vibrations propel moisture into the air. The mist produced in the humidifier is almost immediately absorbed into the air. The humidifier needs to be floated on water bed to produce the mist. The working of the humidifier that we are going to build can be understood by below block diagram:
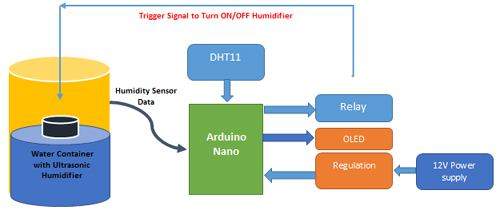
As shown in the above block diagram, the ultrasonic humidifier is placed on the water surface in the container. The humidifier floats on the water. Since we need to sense the humidity, the DHT11 humidity sensor is connected with Arduino Nano and an OLED display is connected to display the real-time values. Moreover, depending on the humidity value, we need to trigger the relay, which in turn switches the humidifier to ON/OFF. So, the humidifier value is compared with a reference value, and depending on the humidity values, the humidifier is turned ON/OFF. Main features of this dehumidifier are given below:
- Type: Floating/Ultrasonic
- Power: USB, 5V DC
- Working Current: 500Ma
- Noise level: ≤36db
Portable Humidifier Circuit Diagram
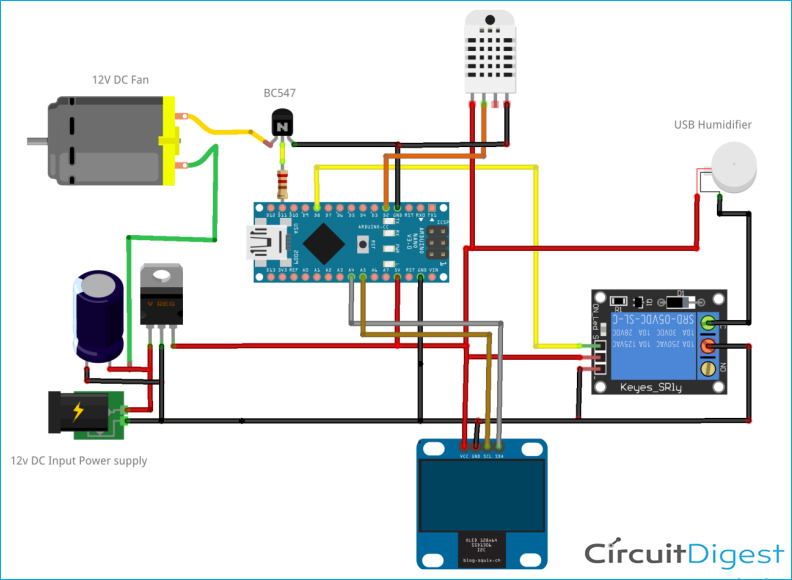
Complete schematic for building a DIY Humidifier using Arduino is given here:
Let us learn the circuit diagram in detail. As shown, first of all a 12V DC power supply is converted into 5V DC power supply using 7805 Regulator and Capacitive filter. Then this power is supplied to Arduino Nano, OLED, DHT11 and Relay circuits. The data pin of DHT11 is connected to the Digital input pin of Arduino as shown and configured in the code. The OLED display is connected to Arduino via the I2C Pins which are A4, A5 pin of Arduino. Similarly, the digital output pins of Arduino are connected to the Relay and BJT for DC Fan driving.
Soldering the components on Perfboard:
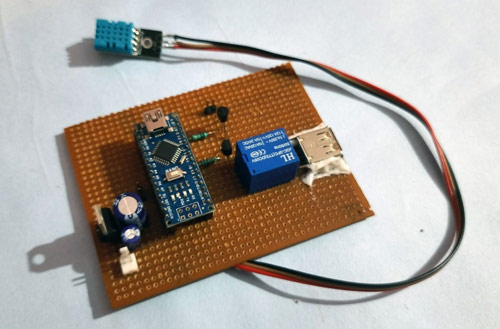
To make the project setup mobile and more compatible, I soldered all the components on the perfboard as shown in the below image:
Programming Arduino Nano for Humidifier
After completion of successful hardware connection as per the circuit diagram, now it’s time to flash the code to Arduino. The complete code is given at the end of the document. Here we are explaining the entire code line by line.
So, the first step is to include the entire required library in the code, which are “SoftwareSerial.h”, “wire.h”, “Adafruit_SH1106.h” and “DHT.h” in this project. “SoftwareSerial.h” and “wire.h” are inbuilt and “Adafruit_SH1106.h” can be downloaded from this link and “DHT.h” can be downloaded from this link.
#include <SoftwareSerial.h>
#include <Wire.h>
#include <Adafruit_SH1106.h>
#include "DHT.h"
Then, the OLED I2C address is defined, which is can be either OX3C or OX3D, which is OX3C in my case. Often, the address of 1.3-inch OLED is OX3C. Also, the Reset pin of the display has to be defined. In my case, it is defined as -1, as the display is sharing Arduino’s Reset pin.
#define OLED_ADDRESS   0x3C
#define OLED_RESET -1
Adafruit_SH1106 display(OLED_RESET);
Now, an object is declared in DHT Class type which can be used throughout the code.
DHT dht;
int humidity=0;
Inside setup(), as we know, the initializations need to done here for Serial communication, OLED display initializations, etc. Here, for Software serial communication, default baud rate is defined which is 9600. Here SH1106_SWITCHCAPVCC is used to generate display voltage from 3.3V internally and display.begin function is used to initialize the display.
void setup()
{
  Serial.begin(9600);
  dht.setup(2);
  pinMode(6,OUTPUT);
  pinMode(11,OUTPUT);
  display.begin(SH1106_SWITCHCAPVCC, OLED_ADDRESS);
  display.clearDisplay();
}
To read the humidity value from sensor, getHumidity() function is used and stored in a variable. Then it is displayed on the OLED using respective functions for selecting Text size and Cursor positions as shown below.
  delay(dht.getMinimumSamplingPeriod());
  humidity = dht.getHumidity();
  display.setTextSize(1);
  display.setTextColor(WHITE);
  display.setCursor(27, 2);
  display.print("CIRCUIT DIGEST");
  display.setTextSize(1);
  display.setCursor(35, 20);
  display.print("HUMIDITY(%)");
  display.display();
  display.setTextSize(2);
  display.setCursor(55, 40);
  display.print(humidity);
  display.display();
  delay(50);
  display.clearDisplay();
Finally, to trigger the Humidifier, the humidity value is compared with a reference humidity level, below which the relay is triggered which turn ON the humidifier and Fan.
  if(humidity<88 )
  {
    digitalWrite(6,HIGH);
    digitalWrite(11,HIGH);
  }
  else
  {
    digitalWrite(6,LOW);
    digitalWrite(11,LOW);
  }
}
Testing the Portable Humidifier
Once the code and Hardware are ready, we can test how this humidifier performs when placed in a close room. For that, follow the steps given below:
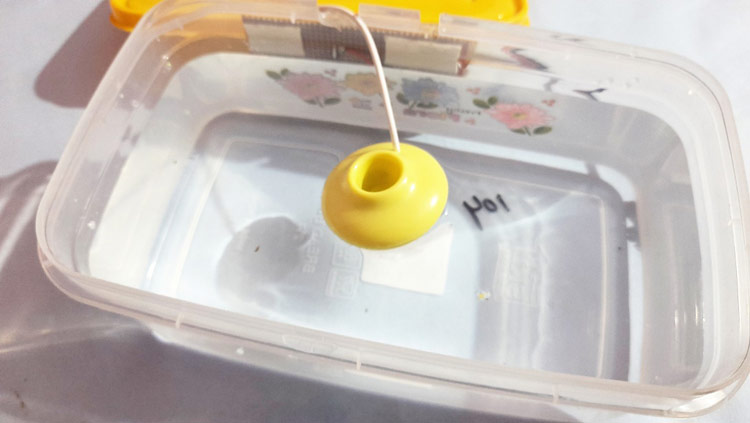
- Fill the container with fresh water up to 3/4th of the container and then float the humidifier on it as shown below:
- Power ON the Adapter to switch ON the circuit and now we should see the humidity levels on OLED.
- Then if the humidity level is less than Reference, then the Humidifier should start producing mists and the Fan should be turned ON.
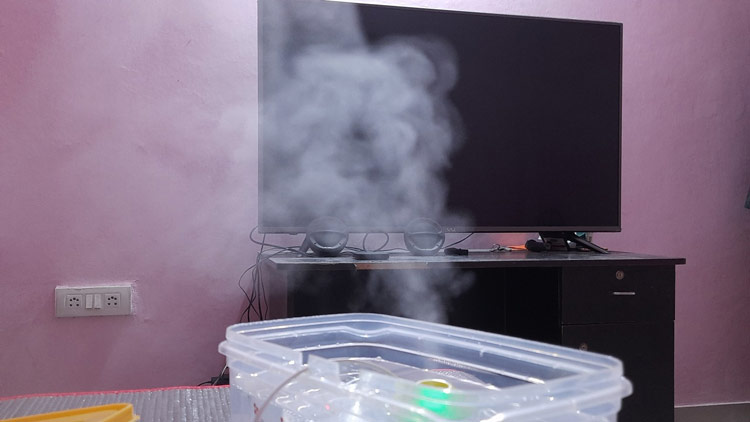
The complete working of this homemade humidifier is also explained in the video given at the end of the document. If you have any questions, you can leave them in the comment section below.
#include <SoftwareSerial.h>
#include <Wire.h>
#include <Adafruit_SH1106.h>
#define OLED_ADDRESS 0x3C
#define OLED_RESET -1
Adafruit_SH1106 display(OLED_RESET);
#include "DHT.h"
DHT dht;
int humidity=0;
void setup()
{
Serial.begin(9600);
dht.setup(2);
pinMode(6,OUTPUT);
pinMode(11,OUTPUT);
display.begin(SH1106_SWITCHCAPVCC, OLED_ADDRESS);
display.clearDisplay();
}
void loop()
{
delay(dht.getMinimumSamplingPeriod());
humidity = dht.getHumidity();
display.setTextSize(1);
display.setTextColor(WHITE);
display.setCursor(27, 2);
display.print("CIRCUIT DIGEST");
display.setTextSize(1);
display.setCursor(35, 20);
display.print("HUMIDITY(%)");
display.display();
display.setTextSize(2);
display.setCursor(55, 40);
display.print(humidity);
display.display();
delay(50);
display.clearDisplay();
if(humidity<85)
{
digitalWrite(6,HIGH);
digitalWrite(11,HIGH);
}
else
{
digitalWrite(6,LOW);
digitalWrite(11,LOW);
}
}

