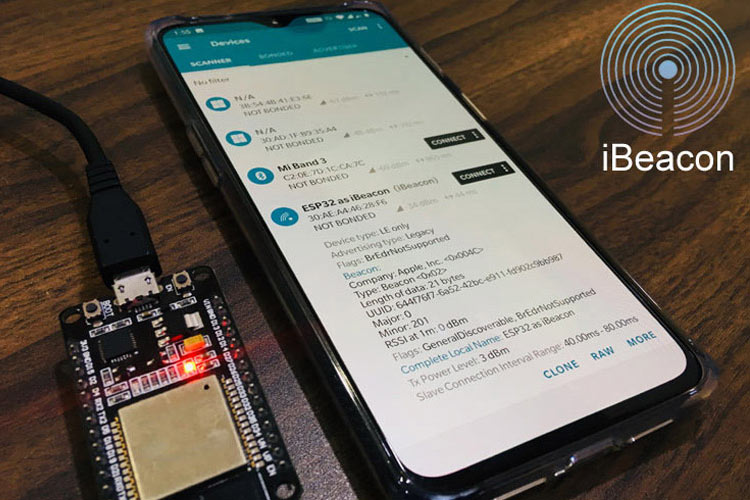
ESP32 is really a powerful IoT device having inbuilt support for Bluetooth and WiFi. The ESP32 is advanced version of its predecessor ESP8266 with extra features like RAM, ROM, GPIO Pins etc. The ESP32 module supports both classic Bluetooth and Bluetooth Low Energy (BLE), the classic Bluetooth can be used to transfer songs or files and the BLE option can be used for battery optimized applications like Bluetooth beacons, fitness bands, proximity advertisements etc. It is also possible to use ESP32 as a serial Bluetooth like the HC-05 or HC-06 modules for simple microcontroller projects.
As we know the BLE can operate in two different modes - Server mode and Client mode. Both the modes have been discussed in our previous ESP32 Tutorials:
- ESP32 BLE Server - GATT Service for Battery Level Indication
- ESP32 BLE Client – Connecting to Fitness Band to Trigger a Bulb
In this tutorial we will build a BLE iBeacon using ESP32 where ESP32 will act as a server and smartphone will act as a client. I assume that you are already familiar on how to use the ESP32 board with Arduino IDE, if not fall back to the getting started with ESP32 tutorial.
You can also know more about what is Beacon/iBeacon Technology by going through our previous Bluetooth iBeacon projects using Raspberry Pi and HM-10 BLE iBeacon.
Components Required
Hardware:
- ESP32 Development Board
- Micro USB Cable
Software:
- Arduino IDE
- Android App: nRF Connect for Mobile (By Nordic Semiconductor)
There are many BLE scanner apps, one of them we have used in our previous project of How to Use HM-10 BLE Module with Arduino. This BLE scanner app provides good Graphical Interface (GUI) but lacks in additionally information so in this project we are using NRF Connect for Mobile app.
Using the nRF Connect Android App for ESP32 iBeacon
1. Download the nRF Connect app from Google Play Store and Open it.
![]()
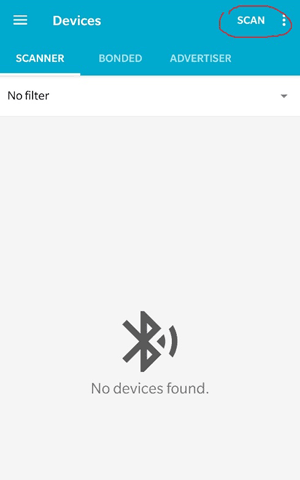
2. The screen looks like below. The Useful options for this project will be ‘Scan’, ‘Scanner’ and ‘Info’ when devices gets found.
The ‘Scan’ option will be used to see all the available iBeacons. To start searching for the iBeacon either pull down the screen or go to the ‘Scan’ option on the top right corner of the Screen. This will start searching for the available iBeacons.

3.After searching the iBeacon, you will be able to see the RSSI, UUID, Major and Minor of iBeacon. The RSSI will change if you take the mobile or iBeacon away from each other. Here in this screen, the RSSI is (-37). Other than this there are some details such as Dummy Company Name, Device Type, Length of the Bytes, The Local Name of ESP32. Here it is “ESP32 as iBeacon”. You can change local name in the sketch.
![]()
4. After taking away the smartphone from iBeacon, the RSSI value changes from -37 to -58. These values will keep on changing if you move one of the devices.
![]()
The RSSI signal acceptable values are as follow:
| Signal Strength | TL;DR | Required for | |
|---|---|---|---|
| -30 dBm | Amazing | Max achievable signal strength. The client can only be a few feet from the AP to achieve this. Not typical or desirable in the real world. | N/A |
| -67 dBm | Very Good | Minimum signal strength for applications that require very reliable, timely delivery of data packets. | VoIP/VoWiFi, streaming video |
| -70 dBm | Okay | Minimum signal strength for reliable packet delivery. | Email, web |
| -80 dBm | Not Good | Minimum signal strength for basic connectivity. Packet delivery may be unreliable. | N/A |
| -90 dBm | Unusable | Approaching or drowning in the noise floor. Any functionality is highly unlikely. | N/A |
Programming ESP32 to work as BLE iBeacon
There is sample program of ESP32 BLE iBeacon available when you install the ESP32 Board in Arduino IDE. But we have slightly edited this sketch in this tutorial, the complete edited version of the sample program is given at the end of this tutorial.
To open the Sample Program of ESP32 BLE_iBeacon just follow below Steps.
- Open Arduino IDE and Select “ESP32 Dev Module”. (If you don’t find this board then please check if you have installed the ESP32 Board Package)
- Go to File > Examples > ESP32 BLE Arduino > BLE_iBeacon
- Open “BLE_iBeacon” Sketch.
Now there is a slight modification in the code which is done in this tutorial. The ESP32 Name will also be updated in this sketch. So start with inclusion of necessary Libraries which will be used in Creating BLE Server and iBeacon.
#include "sys/time.h"
This is a time library to get the current system time. This contains functions such as tv_sec, gettimeofday() etc. For more information, you can visit official UNIX release of ‘sys/time.h’.
Then the ESP32 BLE libraries are included which contains many functions used to make ESP32 in different configurations such as BLE Client or BLE Server.
#include "BLEDevice.h"
#include "BLEUtils.h"
#include "BLEServer.h"
The iBeacon library is included which sets the ESP32 as iBeacon. Along with this, the deep sleep library is included for ESP32. The library will be used to send ESP32 in deep sleep mode for a defined period of time.
#include "BLEBeacon.h"
#include "esp_sleep.h"
Define the sleep duration for ESP32. Here the ESP32 will be in deep sleep for duration of 10 seconds and it will advertise and then again go to deep sleep for 10 seconds.
#define GPIO_DEEP_SLEEP_DURATION 10
Here the RTC_DATA_ATTR is defined. Note that if you define a global variable with RTC_DATA_ATTR attribute, the variable will be placed into RTC_SLOW_MEM memory. So the structure declared as RTC_DATA_ATTR and copying the dynamic memory to this structure before a deep sleep helps recovering this into dynamic memory after wake up. In simple words we are saving the time in static memory from dynamic memory to recover it again after a deep sleep. Here the two variables are defined. The ‘last’ is used to get the last time when the ESP32 went to deep sleep and bootcount is used count number of resets.
RTC_DATA_ATTR static time_t last;
RTC_DATA_ATTR static uint32_t bootcount;
Then define the BLE Advertising Type. The definition is done as follows.
BLEAdvertising *pAdvertising;
The timeval is defined as structure to access the current time.
struct timeval now;
Also the UUID is defined. The UUIDs can be generated from this link.
#define BEACON_UUID "87b99b2c-9XXd-11e9-bXX2-526XXXX64f64"
Now create a function which will contain iBeacon attributes such as UUID, Major, Minor, Etc. In this function create an instance for BLE as iBeacon, and set a fake manufacturer ID, UUID, major and minor for ESP32 as iBeacon.
void setBeacon() {
BLEBeacon oBeacon = BLEBeacon();
oBeacon.setManufacturerId(0x4C00);
oBeacon.setProximityUUID(BLEUUID(BEACON_UUID));
  oBeacon.setMajor((bootcount & 0xFFFF0000) >> 16);
  oBeacon.setMinor(bootcount & 0xFFFF);
Set the flag as 0x04 so that it will output BrEdrNotSupported in the scanner.
oAdvertisementData.setFlags(0x04);
Set advertising data for publishing.
std::string strServiceData = "";
Add the string one after other to advertise.
  strServiceData += (char)26;     // Len
  strServiceData += (char)0xFF;   // Type
  strServiceData += oBeacon.getData();
  oAdvertisementData.addData(strServiceData);
Start the advertising by publishing data.
  pAdvertising->setAdvertisementData(oAdvertisementData);
  pAdvertising->setScanResponseData(oScanResponseData);
Begin the serial monitor at 115200 baud rate and get the time. Also increment the bootcount to store the number of Resets.
  Serial.begin(115200);
  gettimeofday(&now, NULL);
  Serial.printf("start ESP32 %d\n", bootcount++);
Store the current time in the static memory.
last = now.tv_sec;
Create a BLE device and name it as you want. Here the ESP32 is named as “ESP2 as iBeacon”. Note that the, the names can be long but this version of code has started the support for long names.
BLEDevice::init("ESP32 as iBeacon");
Create BLE server to advertise and start advertisement.
BLEServer *pServer = BLEDevice::createServer();
 pAdvertising = BLEDevice::getAdvertising();
 BLEDevice::startAdvertising();
Then set the ESP32 in iBeacon mode.
setBeacon();
Start advertising then stop advertising and go to deep sleep for 10 seconds.
pAdvertising->start();
 pAdvertising->stop();
esp_deep_sleep(1000000LL * GPIO_DEEP_SLEEP_DURATION);
Finally Plug the ESP32 Development Board with your Laptop using a Micro USB cable and upload the code into ESP32 using Arduino IDE. Then open the nRF Connect Android App in your smartphone and start scanning. You will find ESP32 as iBeacon broadcast as shown in the below picture:
![]()
This is how ESP32 can be used as BLE Beacon to advertise UUID, Major and Minor. If you want to know more about iBeacon then follow our previous tutorial on HM10 as iBeacon. Also if you have any doubt then comment below or ask questions in forums.
Complete Code with a working video is given below.
#include "sys/time.h"
#include "BLEDevice.h"
#include "BLEUtils.h"
#include "BLEServer.h"
#include "BLEBeacon.h"
#include "esp_sleep.h"
#define GPIO_DEEP_SLEEP_DURATION 10 // sleep x seconds and then wake up
RTC_DATA_ATTR static time_t last; // remember last boot in RTC Memory
RTC_DATA_ATTR static uint32_t bootcount; // remember number of boots in RTC Memory
// See the following for generating UUIDs:
// https://www.uuidgenerator.net/
BLEAdvertising *pAdvertising; // BLE Advertisement type
struct timeval now;
#define BEACON_UUID "87b99b2c-90fd-11e9-bc42-526af7764f64" // UUID 1 128-Bit (may use linux tool uuidgen or random numbers via https://www.uuidgenerator.net/)
void setBeacon() {
BLEBeacon oBeacon = BLEBeacon();
oBeacon.setManufacturerId(0x4C00); // fake Apple 0x004C LSB (ENDIAN_CHANGE_U16!)
oBeacon.setProximityUUID(BLEUUID(BEACON_UUID));
oBeacon.setMajor((bootcount & 0xFFFF0000) >> 16);
oBeacon.setMinor(bootcount & 0xFFFF);
BLEAdvertisementData oAdvertisementData = BLEAdvertisementData();
BLEAdvertisementData oScanResponseData = BLEAdvertisementData();
oAdvertisementData.setFlags(0x04); // BR_EDR_NOT_SUPPORTED 0x04
std::string strServiceData = "";
strServiceData += (char)26; // Len
strServiceData += (char)0xFF; // Type
strServiceData += oBeacon.getData();
oAdvertisementData.addData(strServiceData);
pAdvertising->setAdvertisementData(oAdvertisementData);
pAdvertising->setScanResponseData(oScanResponseData);
}
void setup() {
Serial.begin(115200);
gettimeofday(&now, NULL);
Serial.printf("start ESP32 %d\n", bootcount++);
Serial.printf("deep sleep (%lds since last reset, %lds since last boot)\n", now.tv_sec, now.tv_sec - last);
last = now.tv_sec;
// Create the BLE Device
BLEDevice::init("ESP32 as iBeacon");
// Create the BLE Server
BLEServer *pServer = BLEDevice::createServer(); // <-- no longer required to instantiate BLEServer, less flash and ram usage
pAdvertising = BLEDevice::getAdvertising();
BLEDevice::startAdvertising();
setBeacon();
// Start advertising
pAdvertising->start();
Serial.println("Advertizing started...");
delay(100);
pAdvertising->stop();
Serial.printf("enter deep sleep\n");
esp_deep_sleep(1000000LL * GPIO_DEEP_SLEEP_DURATION);
Serial.printf("in deep sleep\n");
}
void loop() {
}


hi Im Muhammad Taqwa from Malaysia, i am asking for your opinion about utiliziing the iBeacon functionality.so here are the questions:
1. Can we make/ modify the arduino program code for the IBeacon to provide alarm trigger function,when it reaches certain distance required?
2. Can we connect the smartphone bluetooth to the esp 32 IBeacon? as i have tried to connect to my smartphone,it always say "connection failed" but the IBeacon information were displayed accordingly
really hope that you can help me on these questions,as i am doing this for my final year project,thanks alot in advance :D