In today's digital world, electronic circuits play an important role in the devices that we use daily. All the Integrated Circuits ranging from basic IC’s (OR gate, AND gate, NOT gate, Flip Flops, Latches, Counters, ALU’s) to complex circuits like Microprocessor, FPGA, Microcontrollers, SOC, Motherboards are designed by combining billions and billions of transistors in a single chip. All electronic gadgets like Smartphones, Tablets, Desktops, Laptops, GPUs, CPUs use these IC circuits for their basic functioning. Being an electronic enthusiast, it is important to know how these circuits are built using VLSI and VHDL which is the vital driving force of the electronics industry and the gadgets that we use in our day-to-day life.
In this tutorial series, you will be taught how to design circuits using VHDL Programming ranging from simple circuits to ALU’s. Each tutorial has theoretical and their corresponding Codes and Simulation. You are required to know the basics of the programming language as a prerequisite. So, let's start the first tutorial on VHDL programming and installation of Modelsim Software.
Very Large Scale Integration (VLSI)
Very Large-Scale Integration (VLSI) refers to the technique of amalgamating millions of Transistor operating in a single chip. In 1959, Mohamed M Atalia and Dawon Kahng at Bell Labs successfully implemented VLSI using MOS transistor. General Microelectronics was the first to manufacture commercially available MOS integrated circuits in 1964. This genesis of IC’s paved the way for VLSI in the 1970s, which consisted of more than ten thousand transistors to millions/billions of transistors at present. The diverse application of IC’s has led to the development of Microprocessors, High-Performance Computing processors, GPUs (Graphics Processing Unit), Microcontrollers, FPGAn(Field Programmable Array Logic), and many more electronic circuit devices. The recent research and development have led to AI accelerated FPGA/Microprocessors, FPGA/Microprocessor for AI/Machine Learning applications.
Hardware Description Language (HDL)
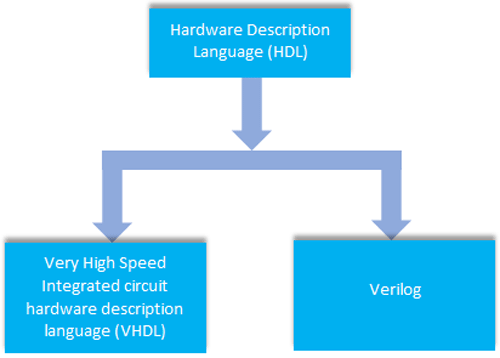
To automate the IC’s design, Hardware Description Language is used for describing the behavior and structure of the electronic circuit. The most common HDL languages used in electronic design automation are VHDL and Verilog. These languages can not only be used for designing but also for testing the precision of digital logic circuits using appropriate test benches. VHDL and Verilog are used to design and simulate Microprocessors, FPGA. These languages can be used to configure the FPGAs, which is an IC whose internal connections can be modified using VHDL and Verilog. This technology can pave way for engineers to engrain the design in the hardware to verify its proper functionality.
VHDL (Very High-Speed Integrated Circuit Hardware Description Language)
VHDL code is a hardware scripting language that can be used to simulate the electronic circuits in software. VHDL code can generate the signals/outputs in a waveform graph as the same as the signal/output in physical hardware. This enables the IC Designers to determine the output signal of an IC when certain inputs are given before the fabrication of the IC (i.e. the physical hardware). This assists in preventing faults in the designed circuits, verifying the functionality of the circuit before the fabrication which involves high cost.
VHDL was first developed by the U.S Department of Defense in 1983. It is HDL for designing and simulation Digital logic circuits in the EDA tool before fabrication. This language was developed according to the IEEE standard. Later on, it went on numerous revisions and the IEEE 1164 VHDL Multivalue logic standard is currently used. So, on getting to know the basics of VLSI and VHDL, let us gear up for scripting the electronic circuits using VHDL. In this tutorial, we are going to learn how to use VHDL for designing circuits using EDA tools. The tutorials will consist of Codes, Simulation Results, and theoretical background so that learners can easily adapt to the upcoming topics.
General Structure of VHDL Code
There are four cardinal components of a VHDL Code. The four components are:
- Importing Library
- Declaring the entity (Entity is the name of the hardware)
- Configuring the inputs and outputs
- Describing the architecture.
A sample VHDL code of AND Gate is given below for understanding the components of VHDL code.
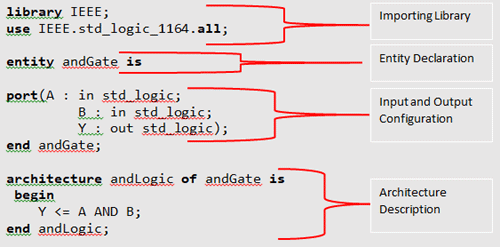
Importing Library: As mentioned above, IEEE 1164 VHDL Multivalue logic standard is currently used, the library is imported, which uses IEEE 1164 VHDL Multivalue logic standard. The “std_logic” refers to the basic digital logic signal which corresponds to 1 and 0.
library IEEE;
use IEEE.std_logic_1164.all;
Declaring the entity: Entity is nothing but the name of our circuit/design is declared. Since the design is AND gate, the entity is given as andGate. The entity name can be any name, depending upon the learner's choice.
entity andGate is
Configuring the inputs and outputs: The inputs and the outputs of the circuit are declared.
port(A : in std_logic;
         B : in std_logic;
         Y : out std_logic);
end andGate;
Here “in std_logic” refers to the input and the “out std_logic” refers to the output. As mentioned earlier, std_logic refers to the standard digital logic signal. A and B are the inputs, and Y is the output of the AND gate.
Describing the architecture: Once the entity, input and output are declared, the next step is to define the architecture of the circuit. The architecture refers to defining the output function of the circuit. Since its AND gate, Y is the output, it is defined as the AND operation of two input signals A and B.
architecture andLogic(architecture name) of andGate(entity) is
 begin
    Y <= A AND B;
end andLogic;
Modeling of VHDL
VHDL modeling is important when designing a digital circuit. It is nothing but the structure or the way of writing the code changes depending upon the complexity of the circuit, making it an easier task for understanding and debugging. Certain circuits are complex and scripting with long statements/lines will make it a tedious task for understanding and mapping signals. So, modeling will help in optimizing the VHDL code for an easier way of designing circuits.
The VHDL code can be modeled in three different ways, depending on the digital circuit and its application. The three ways of modeling are:
- Data Flow Modeling
- Structure Modeling
- Behavioral Modeling
Data Flow Modeling: Data flow modeling is used to describe the data flow of the entity through a concurrent assignment of signals. In simpler terms, the signals are assigned/mapped to a Boolean value/function. The operators AND, OR, NOT, XOR,+, etc. are used to define the signals. The syntax for assigning the signals using operators is given below.
Y <= A AND B;
Here the Signal Y is mapped to the AND function of A and B values.
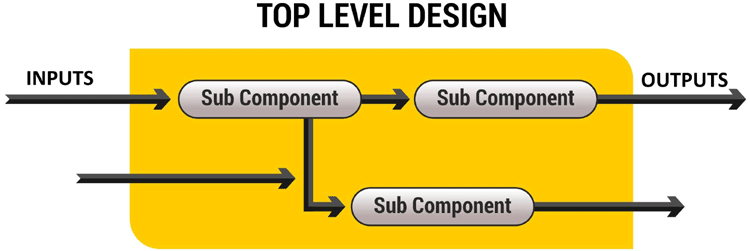
Structure Modeling: Structure Modeling is used when two or more sub-components are interconnected to form the Top-Level/entire design. This modeling is used in designing complex circuits which involve sub-components/entities to define the functionality of the circuit. The best example is that a Full Adder can be designed using 2 Half Adders and 1 OR Gate. So, here the half adder and the OR gate are the sub-components/entities which are interconnected, defines the logic function of the full adder which is the Top-Level/entire design.
Behavioral Modeling: Behavioral Modeling is used to describe the entity upon which the circuit behaves depending upon the given statements/cases. In simpler terms, different cases are defined and their corresponding outputs are mapped. In this type of modeling, the statements are executed in sequential order. The statements include IF, WAIT, CASE, etc.
All these types of modelings will be used in designing circuits, which will be taught in the forthcoming tutorials.
Testbench in VHDL: Testbench in VHDL is used to verify the functional correctness of the designed digital circuit with different input vectors and comparing the corresponding outputs with the Truth Table/Functional Logic of the circuit. In the forthcoming tutorials, the procedures for scripting the Testbench will be taught.
Now that we know the basics of VHDL, we can get started with ModelSim; an EDA (Electronic Design Automation) Tool for scripting and simulating the VHDL.
Installation and Getting Started with ModelSim
ModelSim is an EDA tool that is used for writing the VHDL code and simulating the waveforms. In this section, how to install the ModelSim is explained. The free version of the software is available at the link given below. Please click the link and install the software as given below.
ModelSim Software: ModelSim - Intel FPGA Edition (includes Starter Edition)
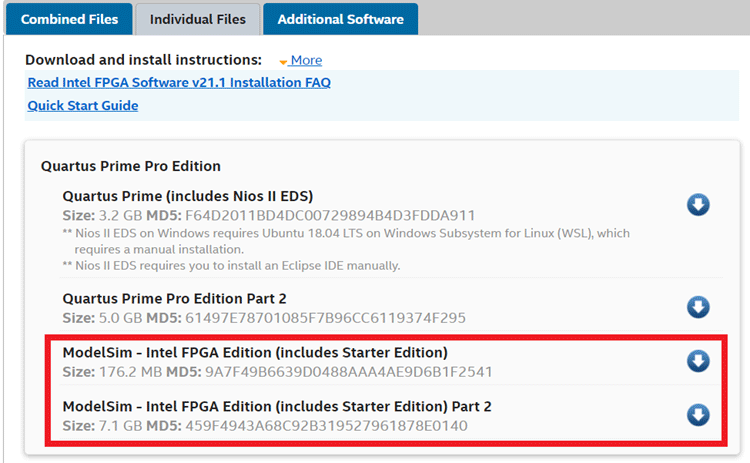
Step 1: Click the above link and download the “ModelSim - Intel FPGA Edition (includes Starter Edition) and ModelSim - Intel FPGA Edition (includes Starter Edition) Part 2”. Download both the files. The files that are available in the link are shown in the figure given below.
Step 2: Click the installation file “ModelSimproSetup-20.4.0.75-windows.exe” in the download folder of your desktop as shown below.

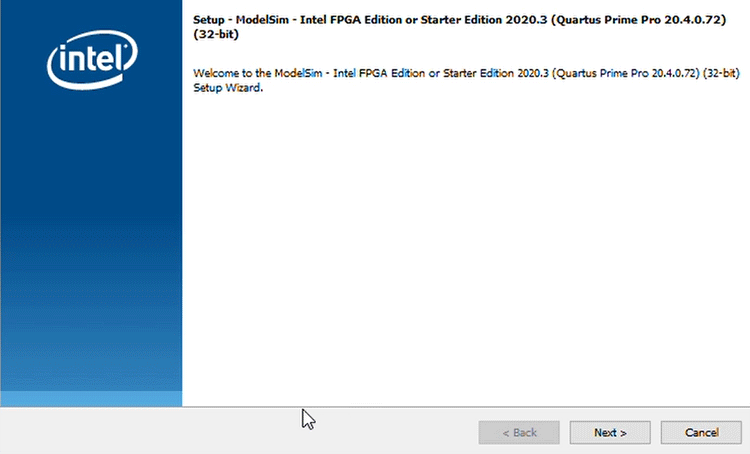
Step 3: After clicking the installation file, a new screen will pop up as shown below. Click Next.
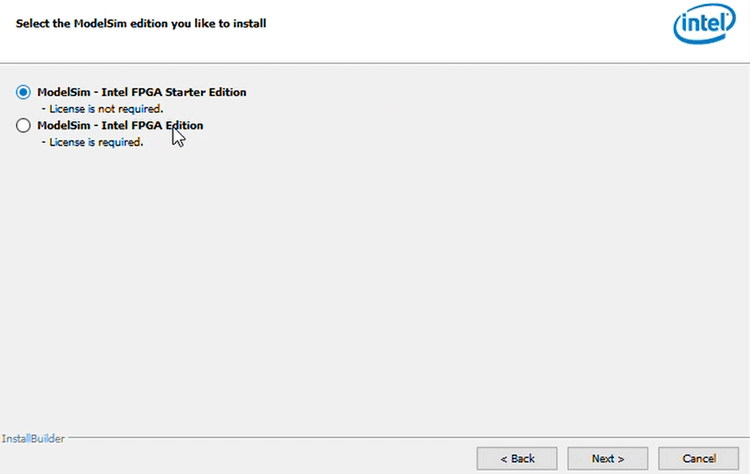
Step 4: Choose ModelSim FPGA Started edition without license option, as shown below in the figure. Click Next.
Step 5: Click Next and accept the terms and conditions.

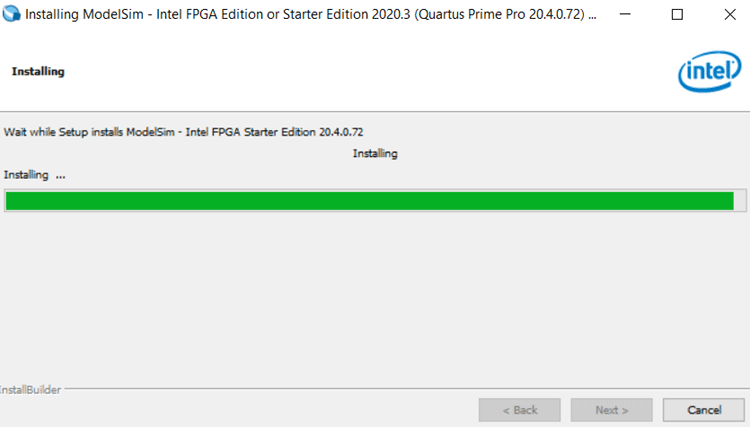
Step 6: The installation process will start as shown below.
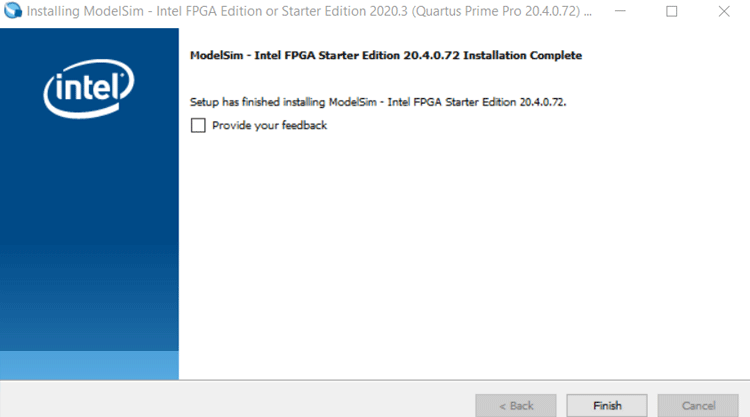
Step7: Then Click Finish.
Step 8: Go to Start Menu and search for “Modelsim-Intel FPGA Starter Edition”.

Step 9: Once you click on it, the ModelSim Application opens up as shown below.
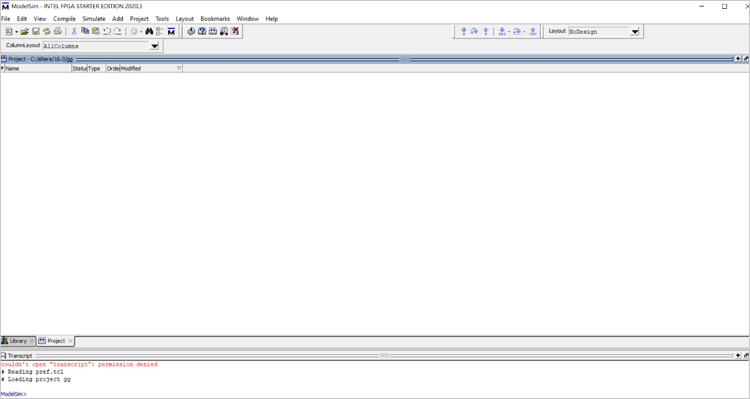
The steps for installation for ModelSim are also explained in the below-given video. On successful installation of ModelSim and familiar with VHDL concepts from the next tutorial, we can start our first VHDL Programming for designing and simulating the digital circuits.
library IEEE;
use IEEE.std_logic_1164.all;
-- Entity declaration
entity andGate is
port(A : in std_logic;
B : in std_logic;
Y : out std_logic);
end andGate;
-- Architecture definition
architecture andLogic of andGate is
begin
Y <= A AND B;
end andLogic;

