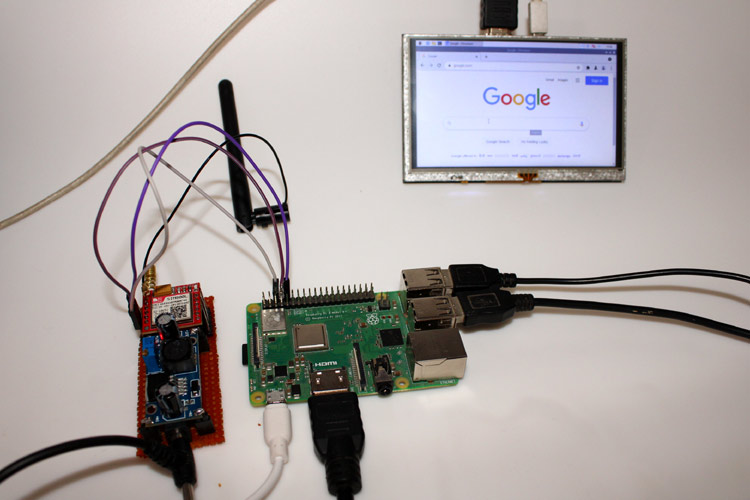
Internet connection is now becoming the most important thing after power supply for Raspberry Pi based projects and when we talk about a true IoT project then it becomes a must thing to consider. So, today we will try to interface GSM SIM800L for providing internet to our Pi just like a modem using GSM GPRS. For this project, we are using Point to Point Protocol (PPP) and node to node communication for communicating with the GSM serially. After doing this project you’ll not need to connect your pi with Wi-Fi or ethernet.
Components Required for Tether Internet on Raspberry Pi
|
Component |
Qty. |
|
Raspberry Pi 3 (You can use Any) |
1 |
|
GSM SIM800L Module |
1 |
|
Jumper Wires F-F |
As req. |
|
Working networked SIM card |
1 |
|
2596 buck converter with adaptor |
1 each |
Here we are using a 2596 buck converter for providing a constant voltage of 4.2 Volts as the GSM SIM800L module is a power hungry device that will require more current while using the GPRS. To know more about the GSM with raspberry pi you can visit our website.
Tether Internet on Raspberry Pi Circuit Diagram
|
GPS Module |
Raspberry Pi 3 |
|
Rx |
Tx of the Raspberry Pi |
|
Tx |
RX of the Raspberry Pi |
|
GND |
GND of the Raspberry Pi |
|
GND of the Buck |
|
|
VCO |
4.2 V (2596 Ic output) |
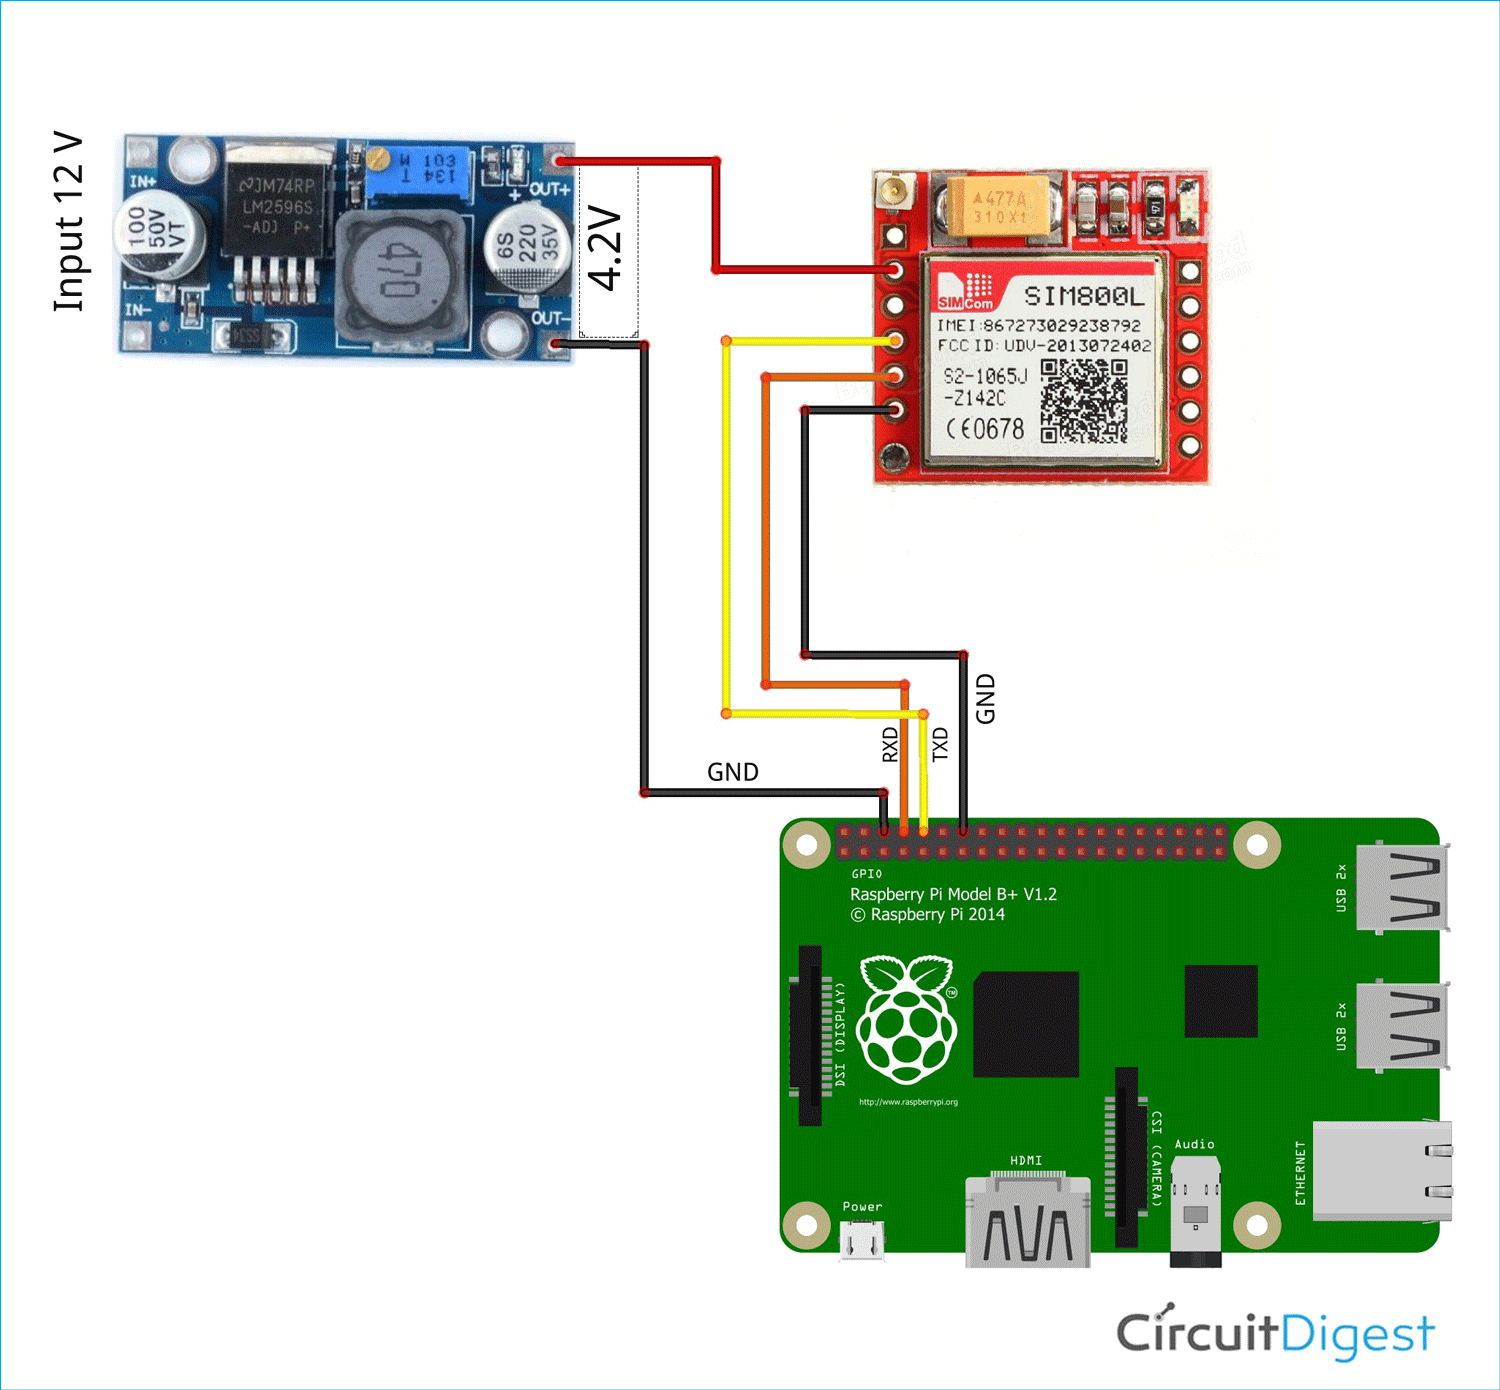
Hence we have connected all the pins accordingly. For a better understanding, I am attaching a connection diagram below.
So, you can see that the connections are not complex. You have to keep the power supply reliable as GSM modules need current when connected to the Internet and Access point. I have used a 2596 Buck Converter Module for my project. You can use any.
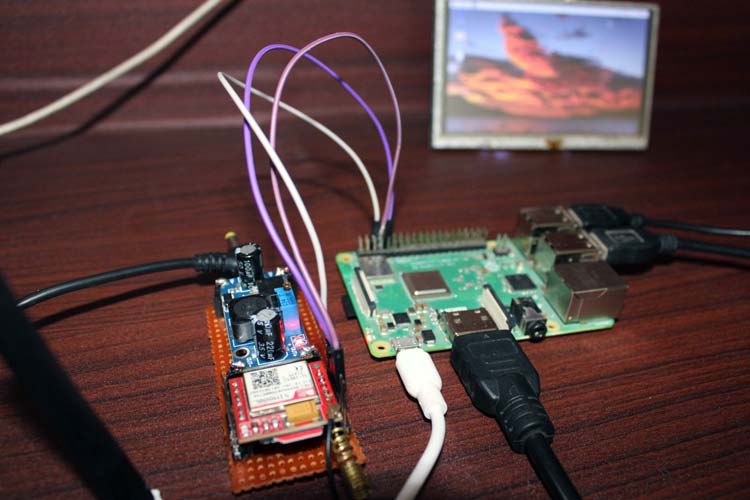
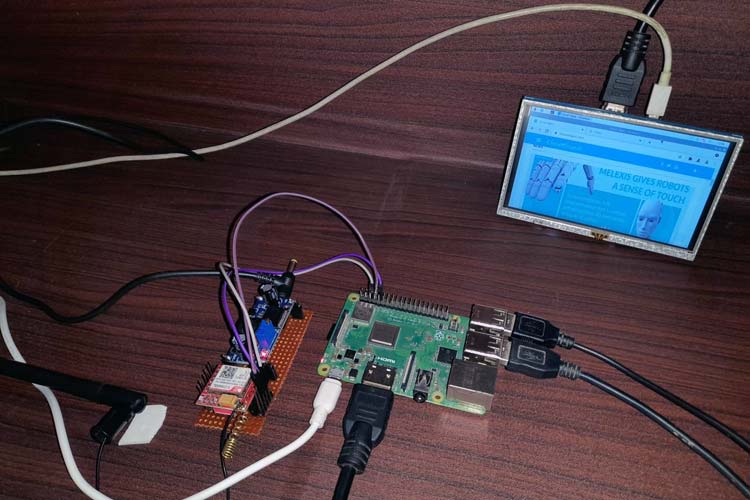
The Actual Setup that I had done is shown below.
Installing Library and Programming Raspberry Pi
Before going further, please check the GSM with AT commands and confirm whether the GSM is responding to the AT commands or not. This can be done in the following way,
- Enable the Serial Port
- Check the Serial Port
- Run the following check_commands.py script
- It must return ‘OK’ in response to your code, if not, please check the connections of RX_TX and repeat the steps.
import time
import serial
import os, time
cmd=''
ser = serial.Serial('/dev/serial0', 9600, timeout=1)
ser.reset_input_buffer()
while True:
    smd=input("please enter a command: ")
    smd=smd+'\n'
    smds=smd.encode('utf-8')
    ser.write(smds)
    print("smd value is:",smd)
    line = ser.read(10).decode('utf-8').rstrip()
    print(line)
Note: Since I am using python 3 on raspberry Pi hence I should be concerned about encoding and decoding of the data under “utf-8”.
Now the above code will send a command from your terminal and display the response on the terminal. In the beginning, write “AT” and then press ‘Enter’, it must return the “OK” message. You can try out some more AT commands for fun. Now we will install a PPP library that will help us in using the Internet through the GSM module.
Write the following command in the terminal so that we can have the latest update on our Pi.
sudo apt-get upgrade
sudo apt-get install ppp screen elinks
This way you will download and install the ppp library. Now go to the sudo -i by typing the same on the terminal. Then you will have to go to the peers folder by using the following command.
cd /etc/ppp/peers*
Then type “nano rnet” so that you can create a file named ‘rnet’ in the ‘peers’ folder. There you have to write the following lines of the code. (just copy and paste it)
 #code start
#imis/internet is the apn for idea connection
connect "/usr/sbin/chat -v -f /etc/chatscripts/gprs -T airtelgprs.com"
# For Raspberry Pi4 use /dev/ttyS0 as the communication port:
/dev/ttyS0
# Baudrate
115200
# Assumes that your IP address is allocated dynamically by the ISP.
noipdefault
# Try to get the name server addresses from the ISP.
usepeerdns
# Use this connection as the default route to the internet.
defaultroute
# Makes PPPD "dial again" when the connection is lost.
persist
# Do not ask the remote to authenticate.
noauth
# No hardware flow control on the serial link with GSM Modem
nocrtscts
# No modem control lines with GSM Modem
local
#code end
Since I am using the Airtel network sim card hence, we should know the APN of the same. As of now, it is “airtelgprs.com”. You can easily find out yours on Google.
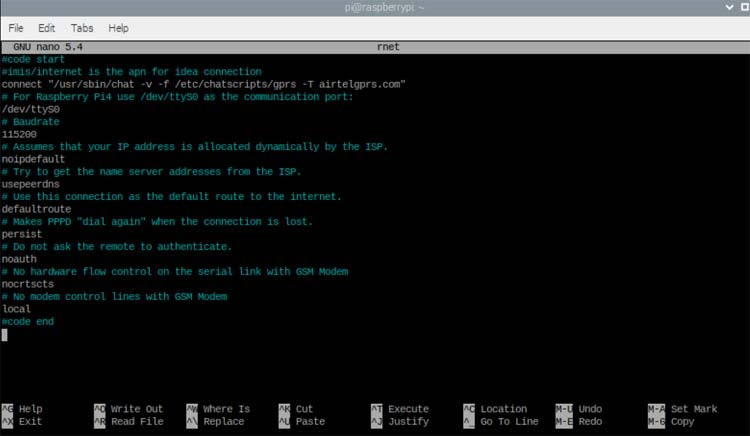
Here you will have to change your APN in the line ‘connect’. Mine is “airtelgprs.com”. Also, my Serial port is “ttyS0” hence I have mentioned it. Please note that you do not need to change the Baud rate. Then save it and close it by pressing “Ctrl+X”.
Now restart the terminal. Then, in the terminal type “ifconfig” and press enter.
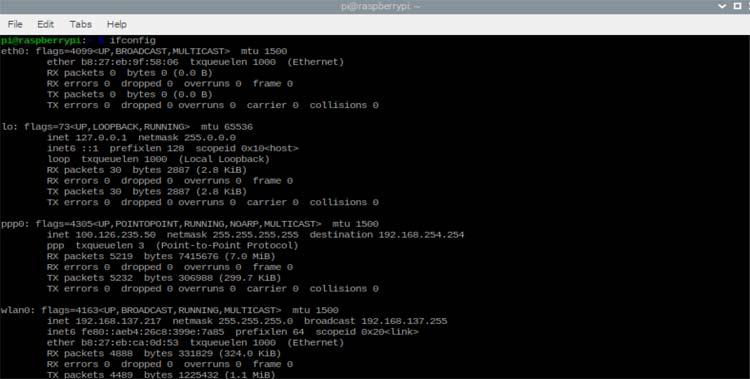
Now, let the fun begins by entering the following command i.e. “sudo pon rnet”. Nothing will happen on the screen but the behavior of your GSM LED will change. This time the frequency of toggling the LED on and off will increase. Here you can stop the internet by entering “sudo poff rnet”. Now you can enjoy the GPRS net on your Raspberry Pi. Although the internet speed is not so good in my case due to some signal strength, that can be neglected if you want to make an IoT project.
Conclusion
Hence we have provided GPRS internet to our Raspberry Pi through point to point protocol (PPP) with the help of the GSM SIM800L Module. You can automatically start your GPRS connection through GSM using crontab or any scheduled script runner. Since we are using GPRS technology hence we cannot expect high speed internet but it can be considered to push and pull through APIs for our IoT projects. If you have any doubt or queries then ask in the comment section below or you can also write all your technical questions on forums to start a discussion.
#code start
#imis/internet is the apn for idea connection
connect "/usr/sbin/chat -v -f /etc/chatscripts/gprs -T airtelgprs.com"
# For Raspberry Pi4 use /dev/ttyS0 as the communication port:
/dev/ttyS0
# Baudrate
115200
# Assumes that your IP address is allocated dynamically by the ISP.
noipdefault
# Try to get the name server addresses from the ISP.
usepeerdns
# Use this connection as the default route to the internet.
defaultroute
# Makes PPPD "dial again" when the connection is lost.
persist
# Do not ask the remote to authenticate.
noauth
# No hardware flow control on the serial link with GSM Modem
nocrtscts
# No modem control lines with GSM Modem
local
#code end



thank you for this guide,
I have tried with a RPi 3 and a Sim800l and Sim800C. Unfortunately, at the end the module does not manage to connect to the internet. I would just like to be able to send Emails.
can you help me?