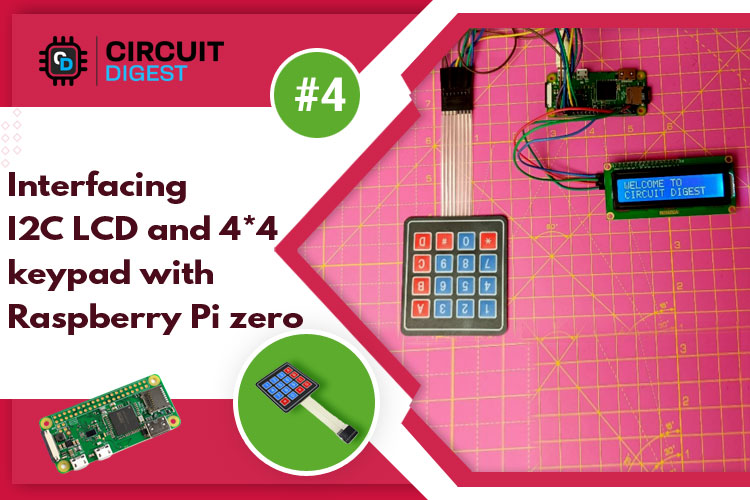
The Raspberry Pi Zero W is the new and improved upgrade of Raspberry Pi Zero family. In this getting started series for Raspberry Pi Zero W, we have previously controlled an LED with Pi GPIO, interfaced a 3.5-inch TFT display with Raspberry Pi Zero W and in this tutorial, we are going to interface I2C 16x2 LCD and 4x4 keyboard with Raspberry Pi zero W. Throughout this tutorial, we will discuss about basics of I2C display and 4x4 display and how to interface it with Pi Zero. Here, we are going to perform one task in which we will print values in LCD screen by using 4*4 keyboard.
Component Required
- I2C 16x2 display
- 4x4 keyboard
- Raspberry pi zero W
- Jumper wires
Circuit Diagram and Working
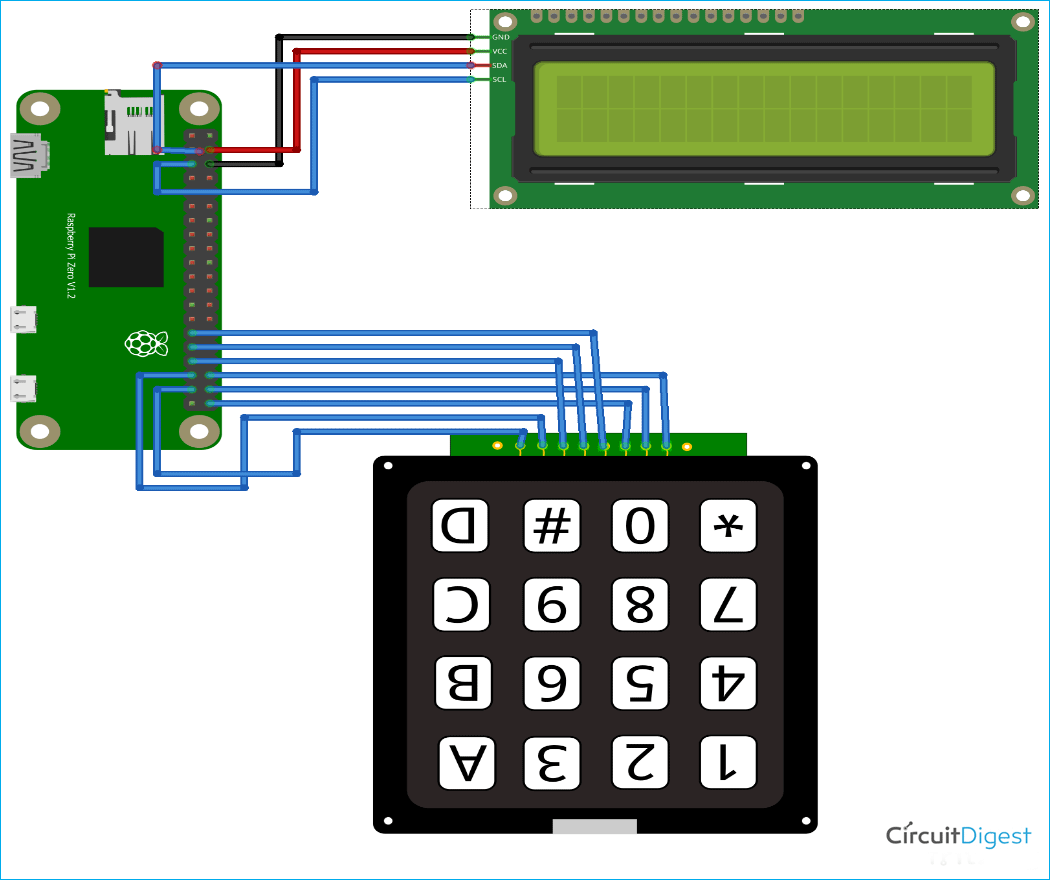
Complete schematic for interfacing I2C LCD and 4x4 keypad with Raspberry Pi zero W is shown in below image:
First, we will discuss about 4x4 keyboard. The matrix of the keypad has four rows and four columns. Each row and column on the keypad correspond to a specific key on the keypad. The pins can be joined in any way you like. Here's how we've gone about it for example - ROWS at: 5, 16, 20, 21 and COLUMNS at: 6, 13, 19, 26. Here you can see image of 4x4 keyboard.
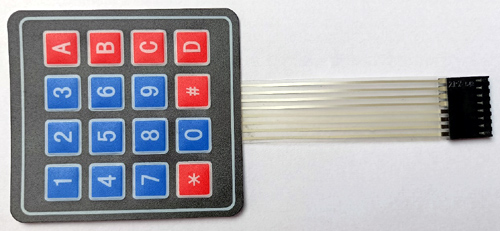
You can enter values in any task using 4x4 matrix. It has a total of 8 terminals, which are driven out of the module's 16 buttons. We have connected these 8 terminals with Raspberry Pi zero according to the circuit diagram. When a user presses a button associated with a line that is currently pulled high, the accompanying column is also pushed high. By looking at the line and column pairs, you can figure out what's going on. You’ll have to figure out which key was pressed. Because a functional keypad does not require power, it can be connected to any 8 pins.
Now, we will discuss about I2C 16x2 LCD. I2C LCD is a multifunctional electronic module with a 16-character per line display capability (this module has 2 such lines). It is inexpensive and simple to use. Here, you can see image of I2C LCD display.
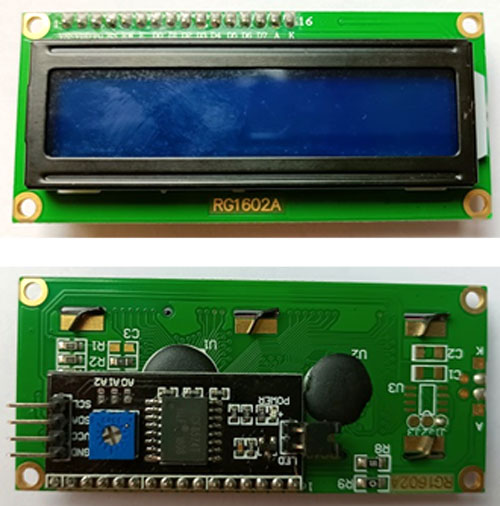
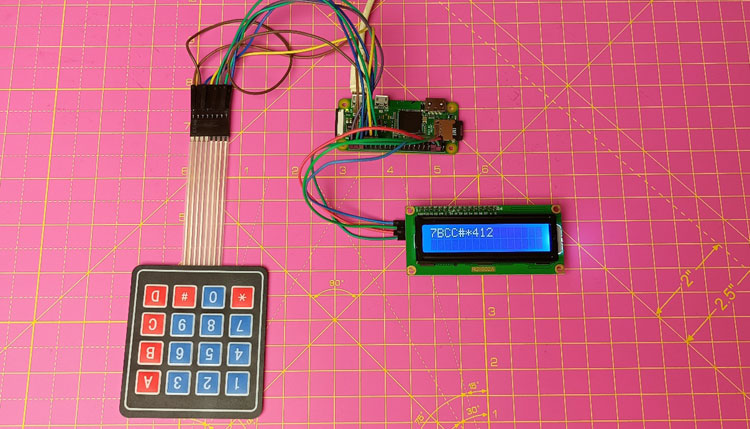
We are using I2C module, which is soldered with LCD. I2C module is a bi-directional general-purpose I/O port expander that converts 8-bit data from I2C serial to 8-bit parallel. This module has the advantage of just requiring two GPIO lines, which saves a lot of hardware resources. The address of this I2C module is 0x27. The I2C module's current address is 0x27. The ground terminal is connected to the black wire in the circuit, whereas Vcc is connected to the red wire (5V).Data communication is handled by the SDA and SCL pins 3 and 5, respectively. Here, you can see actual image of hardware setup.
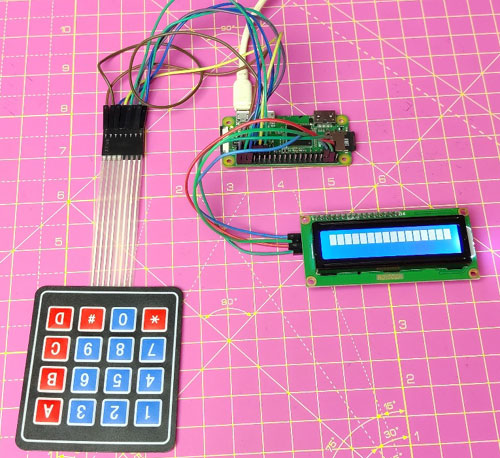
Setting up Raspberry Pi zero for I2C LCD and 4x4 keyboard
After you've connected the I2C LCD and 4x4 keyboard to the Raspberry Pi zero W, power on the Raspberry Pi zero. Open the Pi's terminal window and begin making the necessary adjustments. Here, we are going to use MobaXterm software for connecting Raspberry Pi zero W but you can use putty or any software which is most comfortable for you.
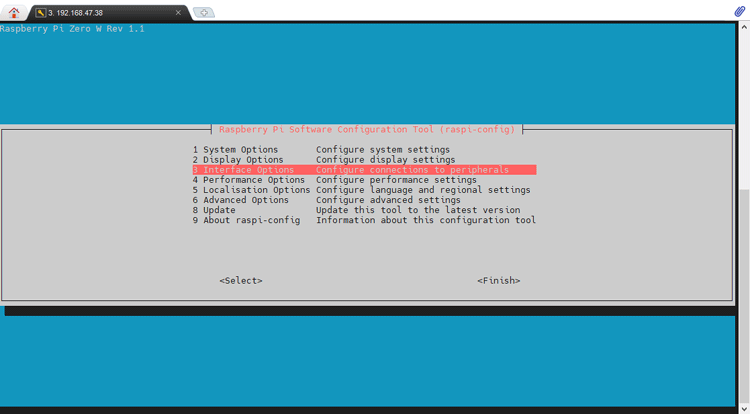
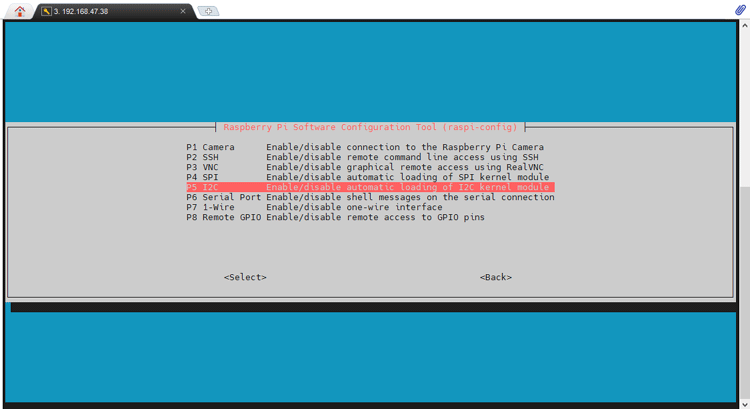
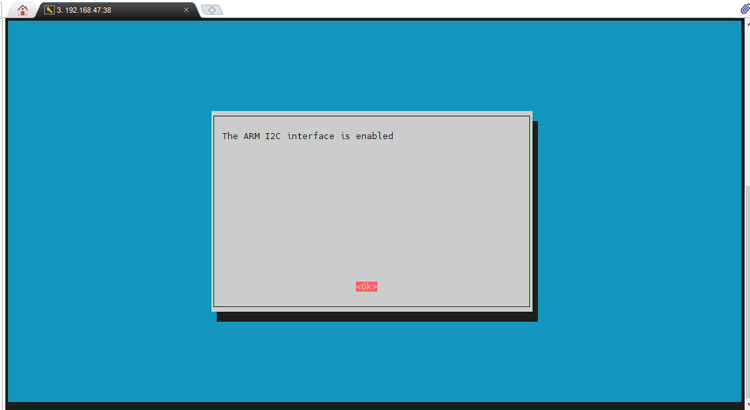
Before programming Raspberry Pi, we first have to enable the I2C interfacing on configuration window. For that Open the terminal window of Raspberry Pi zero W and open configuration window by using sudo raspi-config command. Now, first select the ‘Interface options’, and then select ‘I2C option’. Then click on yes to enable I2C interfacing.
Programming Raspberry Pi zero W for I2C LCD and 4x4 keyboard
Before programming Pi zero for LED and Keypad, we first have to install library for I2C LCD display. To install library first we create one file using command nano RPi_I2C_driver.py then paste library code in the file that is given in this link and save the code. Then run the library code using command python RPi_I2C_driver.py. Now, we will write code for this project.
Code explanation:
Here, we are going to explain code line by line. In the code below I used the RPi_I2C_driver library to establish the I2C communication with the LCD. The RPi.GPIO library is used as GPIO to call the respective GPIO pins of the Raspberry Pi Zero. The time library is the build-in library of the python. This time library is used to generate the time delays. Then the RPi_I2C_driver.lcd() is used to create the "mylcd" object which can be used to call the desire LCD functions from the RPi_I2C_driver library. The mylcd.backlight(1) is used to turn on the backlight of the LCD. You can provide "0" instead of "1" to turn off the backlight of the LCD. I used the mylcd.lcd_clear() to clear the LCD screen during start-up. The time.sleep() is used to provide delay in seconds.
import RPi_I2C_driver
import RPi.GPIO as GPIO
import time
mylcd = RPi_I2C_driver.lcd()
mylcd.backlight(1)
mylcd.lcd_clear()
time.sleep(1)
L1 = 16
L2 = 20
L3 = 21
L4 = 5
C1 = 6
C2 = 13
C3 = 19
C4 = 26
The GPIO.setwarnings(False) is used to turn off any kind of warnings from the Raspberry Pi gpios. The GPIO.setmode(GPIO.BCM) is used to set the mode of the respective pins. We have two modes "GPIO.BCM" and "GPIO.BOARD" to mention the pins as the "GPIO number" and the "Pin Number" respectively. The GPIO.setup() is used to initialize the GPIO pin by providing the GPIO.OUT or GPIO.IN followed by the Pin number or the GPIO number.
GPIO.setwarnings(False)
GPIO.setmode(GPIO.BCM)
GPIO.setup(L1, GPIO.OUT)
GPIO.setup(L2, GPIO.OUT)
GPIO.setup(L3, GPIO.OUT)
GPIO.setup(L4, GPIO.OUT)
GPIO.setup(C1, GPIO.IN, pull_up_down=GPIO.PUD_DOWN)
GPIO.setup(C2, GPIO.IN, pull_up_down=GPIO.PUD_DOWN)
GPIO.setup(C3, GPIO.IN, pull_up_down=GPIO.PUD_DOWN)
GPIO.setup(C4, GPIO.IN, pull_up_down=GPIO.PUD_DOWN)
The readLine() function is used to read the GPIOs which are connected to the columns of the KeyPad. This function contains two parameters. i.e. "line" and "characters". Here we are reading the each column of the KeyPad and if we get any High signal, we are displaying the respective character from the "characters" list. IN the while loop below, we are looping through each row of the KeyPad and displaying the pressed key on the LCD by using the readLine() function.
def readLine(line, characters):
    GPIO.output(line, GPIO.HIGH)
    if(GPIO.input(C1) == 1):
        mylcd.lcd_write_char(ord(characters[0]))
    if(GPIO.input(C2) == 1):
        mylcd.lcd_write_char(ord(characters[1]))
    if(GPIO.input(C3) == 1):
        mylcd.lcd_write_char(ord(characters[2]))
    if(GPIO.input(C4) == 1):
        mylcd.lcd_write_char(ord(characters[3]))
    GPIO.output(line, GPIO.LOW)
try:
    while True:
        readLine(L1, ["1","2","3","A"])
        readLine(L2, ["4","5","6","B"])
        readLine(L3, ["7","8","9","C"])
        readLine(L4, ["*","0","#","D"])
        time.sleep(0.3)
except KeyboardInterrupt:
    print("\nProgram is stopped")
We will save this code and to run this code, we will use command python example.py. Here, we have given file name example but you can give any name with yourself.
With this, Interfacing of I2C LCD and 4x4 keyboard has been completed. Now, whatever you type on keypad will be displayed on LED display. Here in below image, you can see that we have printed some characters in LCD screen using 4*4 keyboard.
This is how you can interface Raspberry Pi Zero W with I2C LCD and 4x4 keyboard. In our next tutorials, we are going to interface different sensors with Raspberry Pi zero and you will see some amazing DIY project by using Raspberry pi zero W. Hope you enjoyed the project and learned something useful, if you have any questions, please leave them in the comment section below or use our forum to start a discussion on this.
import RPi_I2C_driver
import RPi.GPIO as GPIO
import tim
mylcd = RPi_I2C_driver.lcd(
mylcd.backlight(1)
mylcd.lcd_clear()
time.sleep(1)
L1 = 16
L2 = 20
L3 = 21
L4 =
C1 = 6
C2 = 13
C3 = 19
C4 = 2
GPIO.setwarnings(False)
GPIO.setmode(GPIO.BCM
GPIO.setup(L1, GPIO.OUT)
GPIO.setup(L2, GPIO.OUT)
GPIO.setup(L3, GPIO.OUT)
GPIO.setup(L4, GPIO.OUT
GPIO.setup(C1, GPIO.IN, pull_up_down=GPIO.PUD_DOWN)
GPIO.setup(C2, GPIO.IN, pull_up_down=GPIO.PUD_DOWN)
GPIO.setup(C3, GPIO.IN, pull_up_down=GPIO.PUD_DOWN)
GPIO.setup(C4, GPIO.IN, pull_up_down=GPIO.PUD_DOWN
def readLine(line, characters):
GPIO.output(line, GPIO.HIG)
if(GPIO.input(C1) == 1):
print(characters[0])
mylcd.lcd_write_char(ord(
if(GPIO.input(C2) == 1):
print(characters[1])
mylcd.lcd_write_char(ord(
if(GPIO.input(C3) == 1):
print(characters[2])
mylcd.lcd_write_char(ord(
if(GPIO.input(C4) == 1):
print(characters[3])
mylcd.lcd_write_char(ord(
GPIO.output(line, GPIO.LOW
try:
while True:
readLine(L1, ["1","2","3","A"])
readLine(L2, ["4","5","6","B"])
readLine(L3, ["7","8","9","C"])
readLine(L4, ["*","0","#","D"])
time.sleep(0.3
except KeyboardInterrupt:
print("\nProgram is stopped"

