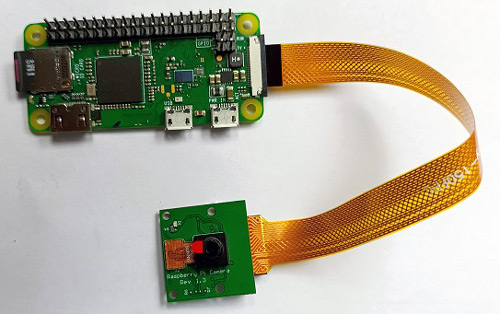
Raspberry Pi camera module is a tiny board that can be interfaced with Raspberry Pi for capturing pictures and streaming videos. In our previous tutorials, we used Pi camera module with Raspberry 3 & 4 to build many OpenCV based projects. In this tutorial, we are going to interface the Pi camera module with Raspberry Pi Zero W and try taking pictures and record video. Pi camera module is attached with Raspberry Pi zero by CSI interface. This interface makes use of the specific CSI interface, which was created with cameras in mind. The CSI bus can handle exceptionally high data rates and is only used to transport pixel data. The camera communicates with the Raspberry Pi's BCM2835 processor through CSI bus, a higher-bandwidth link that relays pixel data from the camera to the processor. This bus follows the ribbon cable that connects the camera board to Raspberry Pi.
Introduction Pi Camera Module
The Raspberry Pi Camera board connects directly to the Raspberry Pi's CSI connection. It allows users to capture images with a 5MP resolution and shoot 1080p HD video at 30 frames per second. Its latest version ie. version 1.3 is now available. The Raspberry Pi Camera Board is a fixed focus module with a 5MP (2592*1944 pixels) Omnivision 5647 sensor custom designed and manufactured by the Raspberry Pi Foundation. In the images given below, you can see the front and back view of the Pi camera.
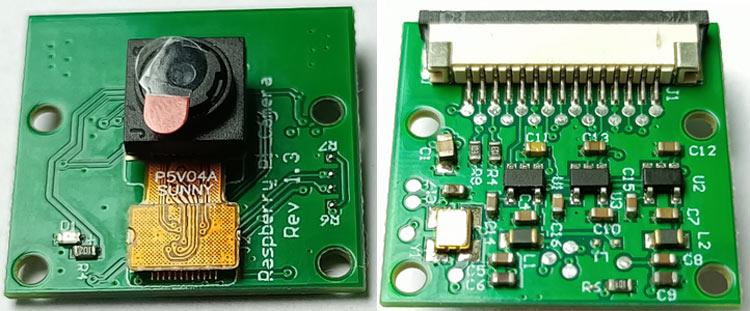
The module connects to the Raspberry Pi via a 15-pin ribbon cable to the unique 15-pin MIPI Camera Serial Interface (CSI), which was created specifically for camera interface. CSI bus transfers data at a very high speed, and it is also used to carry pixel data to the BCM2835 processor. The board is small, measures roughly 25mm x 20mm x 9mm and weighs just over 3g. Its compact size makes it ideal for mobile phones and other applications where size and weight are critical. The sensor itself features a fixed focus lens and a native resolution of 5 megapixels. The camera can capture static photos with a resolution of 2592 x 1944 pixels. It also supports 1080p @ 30fps, 720p @ 60fps, and 640x480p 60/90 video recording. We should install the latest version of raspbian operating system to operate the Pi camera module.
Features of Pi Camera Module:
1. It is fully compatible with both model A & B and Pi zero Raspberry Pi family.
2. 5MP Omnivision 5647 Camera Module
3. Still Picture Resolution: 2592 x 1944
4. Video: Supports 1080p @ 30fps, 720p @ 60fps and 640x480p 60/90 Recording
5. There is a different cable for Pi zero family.
Connecting Pi Camera with Raspberry Pi Zero W
Now, we are going to interface Pi camera with Raspberry Pi zero W but before interfacing you have to select proper cable for Raspberry Pi zero W. In the image given below, you can see 15 pin Pi camera cable. This cable has same number of pins at both the ends and it is used to connect Raspberry Pi 3 & 4 with Pi camera.
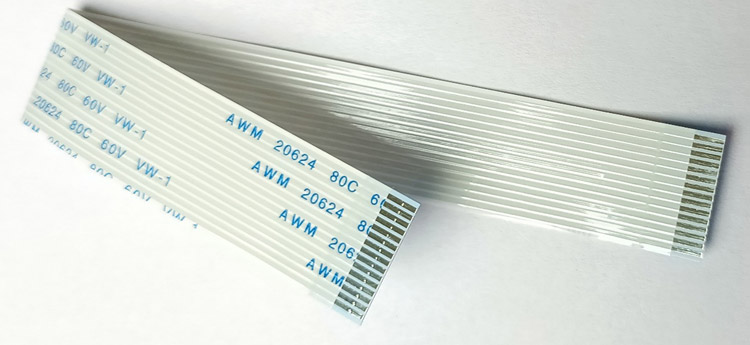
But we cannot use this cable for Raspberry Pi zero family boards. There is a different cable for Raspberry Pi zero family. In the image given below, you can see camera cable for Pi zero family. This cable does not have the same width at both ends and has lower width at Pi zero board side.
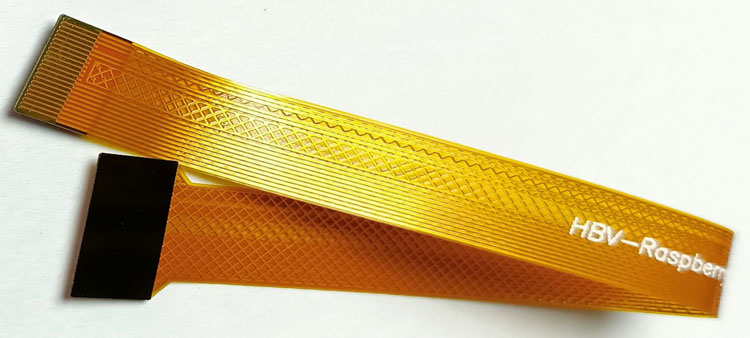
After selecting the proper cable, we will connect pi camera with pi zero W board. First, we will connect cable to Raspberry Pi zero board. In the below image, you can see proper connection of Raspberry Pi zero with the camera cable.
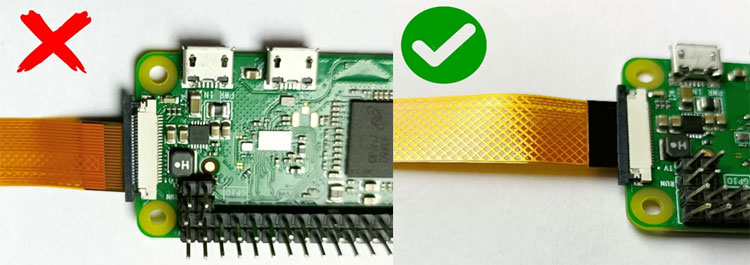
Now, we will connect Pi camera with cable. In the image given below, you can see proper connection of Pi camera with cable.

Finally, you can follow the steps given below to connect your Pi camera and Raspberry Pi zero W.
1. Insert wider end of cable into the Pi camera module and conductors should face the same direction as camera lens.
2. Finally, gently lift the collar at the board's edge (be careful as these are more fragile than the collars on ordinary CSI ports) and insert the smaller end of the adapter with the conductors towards the rear of the Pi Zero.
Final connection of Pi with Pi zero will look like:
Setting up Raspberry Pi Zero W for Pi Camera
Now, we are going to interface Pi camera with Raspberry Pi zero W. For this, connect Pi camera to Raspberry Pi zero W and power on the Raspberry pi zero W by connecting micro-USB cable.
1. After booting your Raspberry Pi, open VNC viewer and click on Raspberry Pi configuration. Thereafter, enable the camera module.
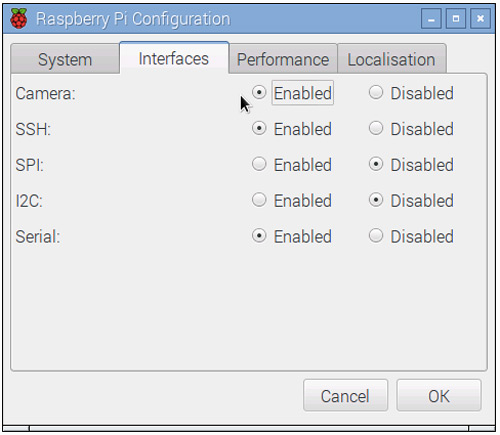
2. Open the terminal window and type below command. This command is used for capturing image from your Pi camera.
Raspistill –o imgae.jpg
Now, camera will start and it will capture the image, this image will be saved as image.jpg. You can give any name to your image like Raspistill –o xyz.jpg.
3. Now, in this step, we will write a python code to capture image. For that, open the terminal window and create a file by using command nano image1.py then paste the below lines in this file and save the changes.
from time import sleep
from picamera import PiCamera
camera = PiCamera()
camera.resolution = (1024, 768)
camera.start_preview()
sleep(2)
camera.capture('xyz.jpg')
Run this code by using command python image1.py. Image will be captured as soon as the code is launched. Here, we have shown some images that is captured using Pi camera module.
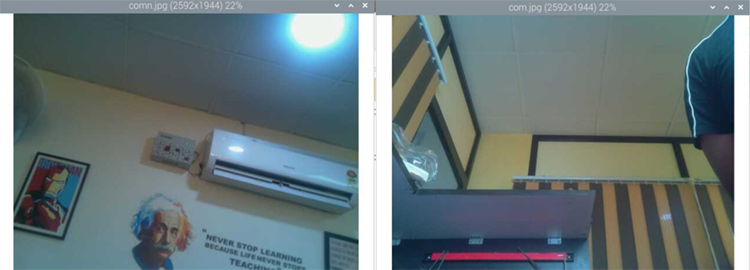
4. Now, we are going to record video by using Pi camera. The command line application "raspivid" allows you to capture video with your camera module. You can recode video by using the below command.
raspivid -o video.h264 -t 10000
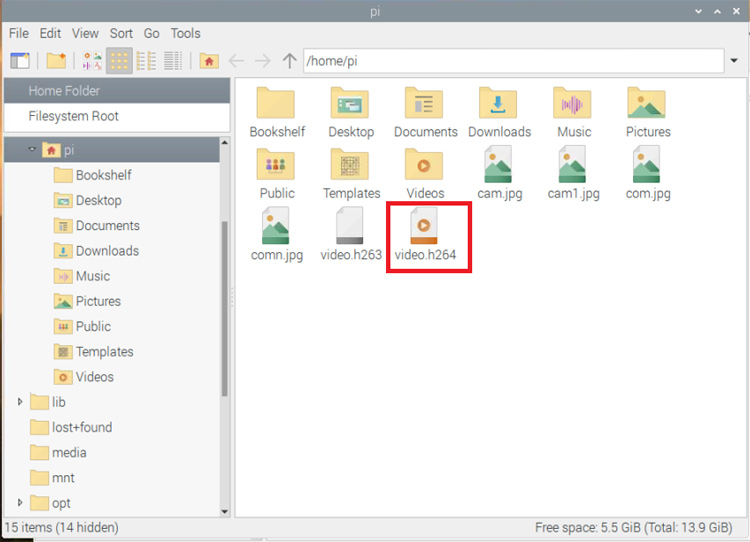
Run the above command to capture a 10-second movie using your Raspberry Pi camera module. We have recorded video for 10 seconds, so we have used 10000 here. The recorded video will be saved to home directory of Pi Zero W.
That’s all about Pi camera interfacing with Raspberry pi zero W. In our next tutorial, we will make surveillance camera by using pi camera and Raspberry Pi zero W and you will see some amazing DIY project by using Raspberry Pi zero W. Hope you enjoyed the project and learned something useful, if you have any questions, please leave them in the comment section below or use our forum to start a discussion on this.

