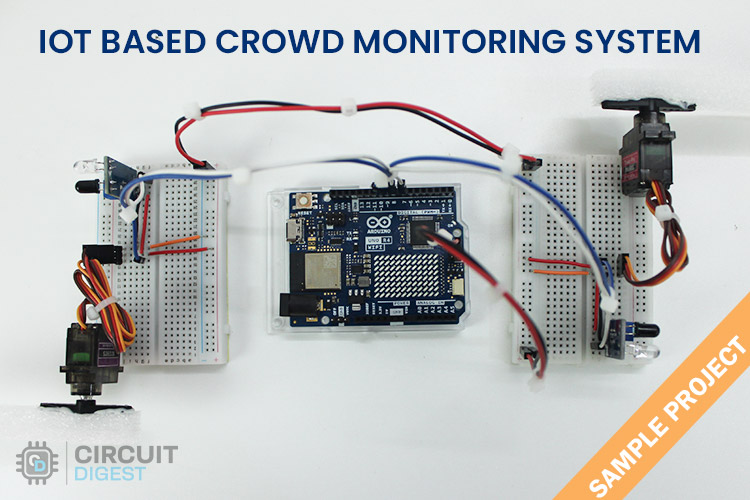
This sample project was built for the IoT and Edge AI Project Contest 2024. More details can be found on our contest page.
The main objective of this project is to monitor the crowd inside specific premises that have entry and exit pathways. This project integrates Arduino Cloud, enabling easy remote monitoring. Let's discuss this project in more detail.
Impact Statement
The idea is to use the Arduino Cloud Platform for programming and the IoT dashboard to monitor the crowd. An IR sensor will detect a person, and a servo motor will open and close a barrier. This setup will be installed at both the entry and exit points of the area. Whenever a person crosses the IR sensor at the entry, the servo barrier gate will open, and the count of people inside the area will be incremented. Similarly, when a person crosses the IR sensor at the exit, the exit barrier gate will open, and the count will be decremented.
The main microcontroller board I chose for this project is the Arduino UNO R4 WiFi. A 12*8 LED matrix will display the current people count inside the area. Additionally, the built-in ESP32 will connect to a hotspot, providing internet access to the device, which will then connect to Arduino Cloud to update the people count.
Components Used
- Arduino UNO R4 WiFi - 1
- MG90S Servo Motor - 2
- IR Sensor - 2
- Breadboard Mini - 2
- Connecting Jumper Wires - Required Quantity
- Power Supply - 2S Li-ion battery pack or any power supply between 6V - 24V DC
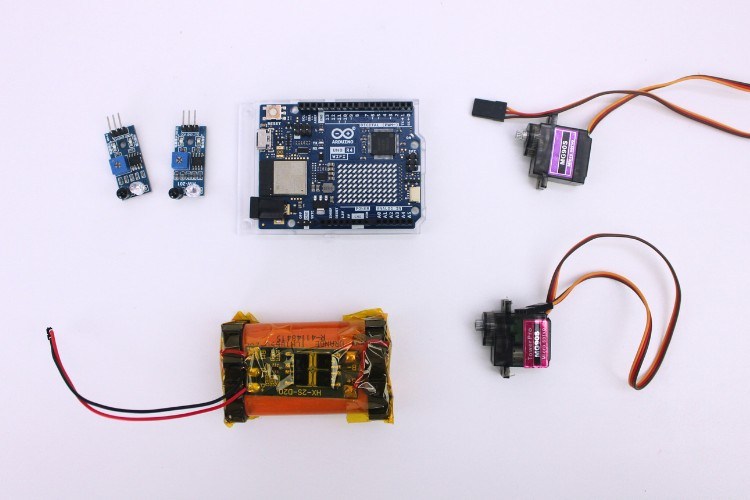
Above you can see the image of the selected components.
Circuit Diagram Explanation
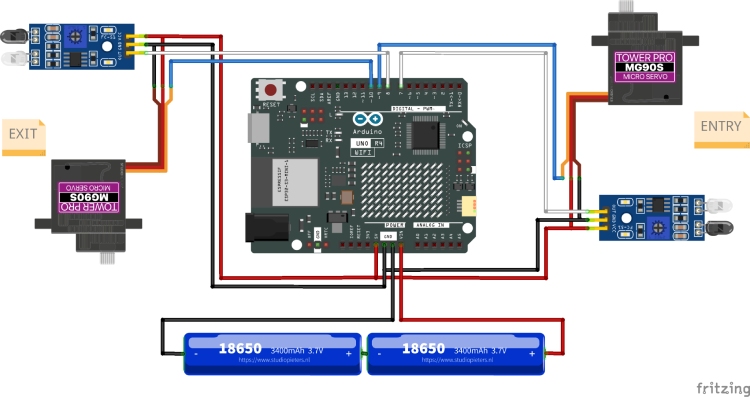
Next, let's look at the connections used in this project. The circuit diagram is straightforward.
I used Fritzing to create the circuit diagram. Everything is powered by 5V from the Arduino board. The IR sensors are connected to the 7th and 8th pins of the Arduino, and the servo motors are connected to the 9th and 10th pins of the Arduino.
For power input, I am using a 2S Li-ion battery pack, which provides an average voltage of 7.4V. This is connected to the Vin pin of the Arduino UNO Board.
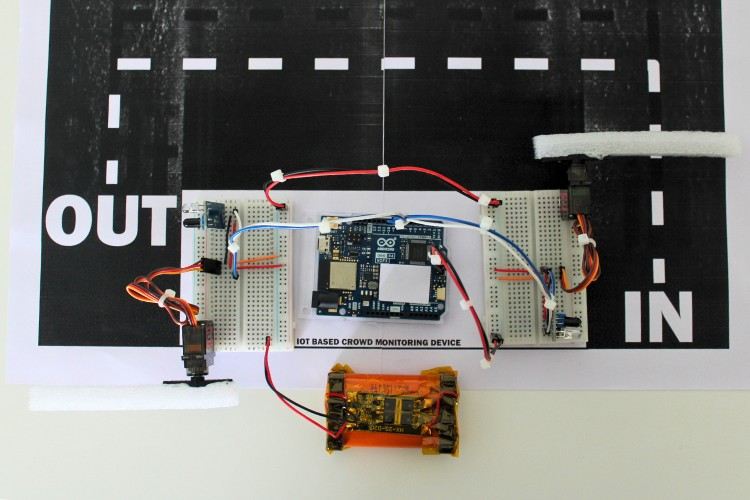
Above, you can see the assembled image of the project as per the circuit diagram. Since this is a demo, I have printed a road-like design on paper and placed it in the background. I have also added a small white paper cutout on the LED matrix display for better visibility of characters on the display. As mentioned earlier, I have included a 2S Li-ion battery pack along with the Battery Management System (BMS).
You can observe that I have attached the servo motor to the edge of the breadboard. To act as a barrier gate, I have attached a foam sheet to the shaft of the servo motor using hot glue. An IR sensor is placed near the servo motor so that a person must first cross the sensor before approaching the barrier.
This setup effectively demonstrates how the crowd-monitoring system functions, with each component playing its part in ensuring accurate monitoring and control.
The next step is to write and upload the code to the Arduino board.
Code Explanation
The coding part is really simple as most of the complex things were handled by the Arduino Cloud Platform itself. For Better Explanation let's split the code into three parts: setup, loop, and supporting functions.
Part 1: Setup
The setup part initializes the necessary components and configurations.
#include "thingProperties.h"
#include "ArduinoGraphics.h"
#include "Arduino_LED_Matrix.h"
#include <Servo.h>

#define In_Servo_Pin 9
#define In_Sensor_Pin 7
#define Out_Servo_Pin 10
#define Out_Sensor_Pin 8

ArduinoLEDMatrix matrix;

Servo inServo;
Servo outServo;

int personCount = 0;
int gateOpenDelay = 3000;

const uint32_t happy[] = {
    0x19819,
    0x80000001,
    0x81f8000
};

void setup() {
    Serial.begin(9600);
    delay(1500);

    pinMode(In_Sensor_Pin, INPUT);
    pinMode(Out_Sensor_Pin, INPUT);

    inServo.attach(In_Servo_Pin);
    outServo.attach(Out_Servo_Pin);

    matrix.begin();
    matrix.loadFrame(happy);
    delay(1000);

    updateDisplay();
    initProperties();

    ArduinoCloud.begin(ArduinoIoTPreferredConnection);
    setDebugMessageLevel(2);
    ArduinoCloud.printDebugInfo();
}
- Includes and Defines: Includes necessary libraries and defines pin numbers for sensors and servos Motors.
- Global Variables: Declares global variables for the LED matrix, servos, person count, and gate delay.
- Setup Function: Initializes serial communication, configures pin modes, attaches servos to pins, initializes the LED matrix, and connects to Arduino IoT Cloud.
Part 2: Loop
The loop part continuously checks for sensor inputs and updates the person count.
void loop() {
    ArduinoCloud.update();

    // Check for incoming person
    if (digitalRead(In_Sensor_Pin) == LOW) {
        openGate(inServo);
        personCount++;
        updateDisplay();
        delay(gateOpenDelay);
        closeGate(inServo);
        crowdCount = personCount;
    }

    // Check for outgoing person
    if (digitalRead(Out_Sensor_Pin) == LOW) {
        openGate(outServo);
        personCount--;
        updateDisplay();
        delay(gateOpenDelay);
        closeGate(outServo);
        crowdCount = personCount;
    }
}
- Loop Function: Continuously checks if someone is entering or exiting.
- Incoming Person: If the incoming sensor is triggered, opens the gate, increments the person count, updates the display and cloud variable, and closes the gate.
- Outgoing Person: If the outgoing sensor is triggered, opens the gate, decrements the person count, updates the display and cloud variable, and closes the gate.
Part 3: Supporting Functions
These functions support the setup and loop functions by handling specific tasks.
void openGate(Servo &servo) {
    servo.write(0);
}

void closeGate(Servo &servo) {
    servo.write(90);
}

void updateDisplay() {
    matrix.clear();
    matrix.beginDraw();
    matrix.stroke(0xFFFFFFFF);
    matrix.textScrollSpeed(55);

    // Display the count
    char text[20];
    snprintf(text, sizeof(text), "%d", personCount);
    matrix.textFont(Font_5x7);
    matrix.beginText(0, 1, 0xFFFFFF);
    matrix.println(text);
    matrix.endText(NO_SCROLL);

    matrix.endDraw();
    crowdCount = personCount;
}
- Open and Close Gate: These functions open and close the servos at specified angles.
- Update Display: This function updates the LED matrix with the current person count.
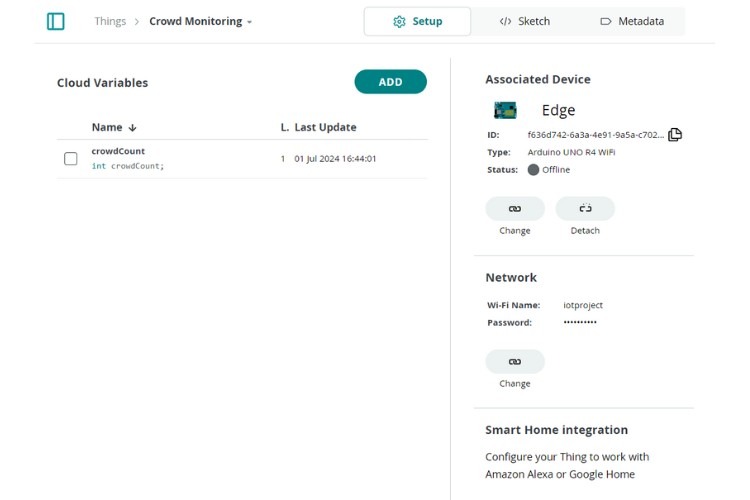
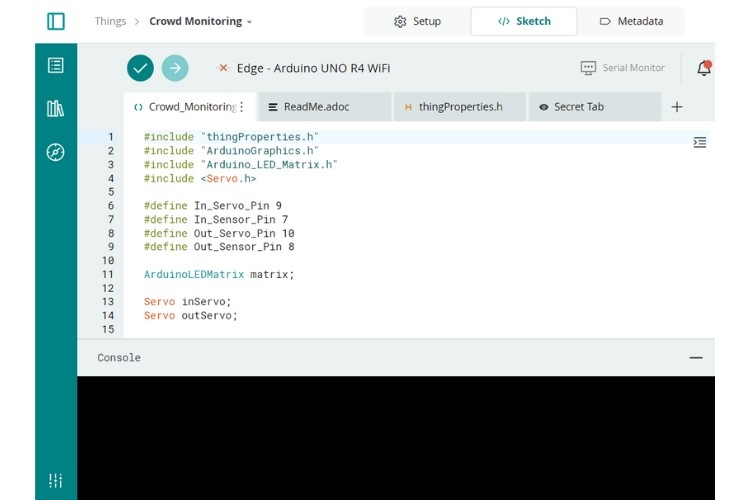
Other than these three parts, the overall cloud integrations are managed through the Arduino Cloud UI, including connecting to WiFi and communicating with the ESP32.
Next, let's see the overall working of the project.
Working Demonstration
After uploading the code to the Arduino UNO R4 WiFi board, I turned on the hotspot and waited for the system to connect to the network. After some time, it connected successfully and began updating the fields in the Arduino Cloud dashboard.
Below, you can see the working image of the project.
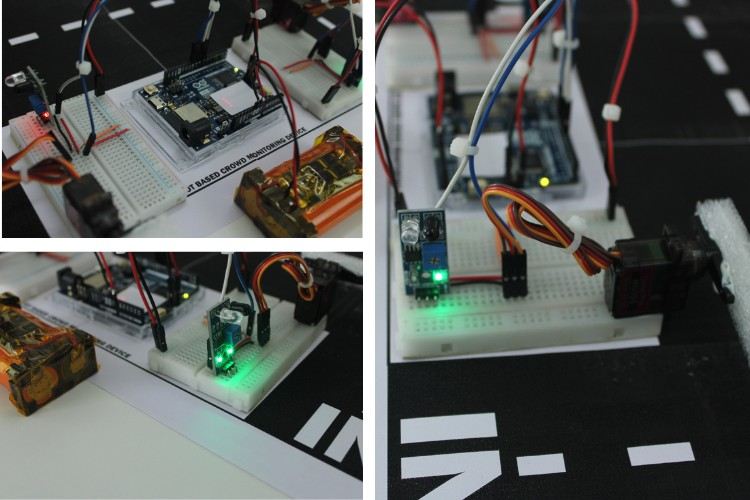
Now, let's look at the IoT side of the project, which involves the Arduino Cloud Platform dashboard. The image below shows the Arduino Cloud dashboard.
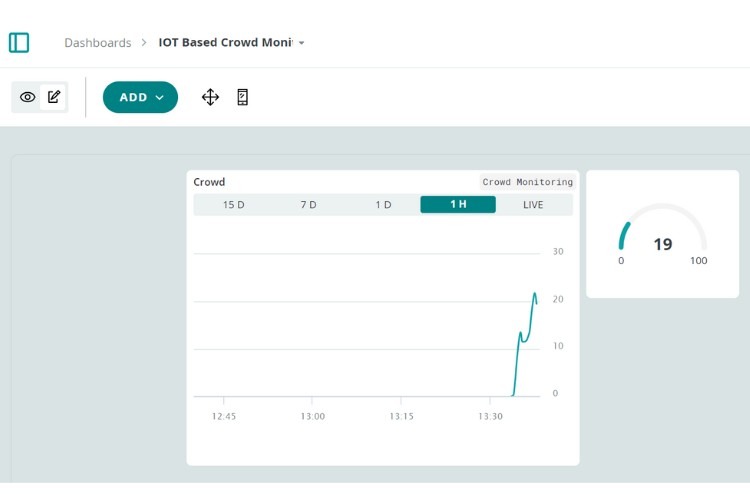
On the Arduino Cloud Platform dashboard, I have added two widgets: a graph and a gauge meter. The graph plots the number of people over time, while the gauge meter shows the last updated value. There are many other widgets available, allowing for further customization based on your needs.
The two images below show the setup and sketch part of the Arduino Cloud Things for your reference.
So, that’s it about the working of this project.
Github
Below, you can find the link to the GitHub repository, which includes the code used in this project.
#include "thingProperties.h"
#include "ArduinoGraphics.h"
#include "Arduino_LED_Matrix.h"
#include <Servo.h>
#define In_Servo_Pin 9
#define In_Sensor_Pin 7
#define Out_Servo_Pin 10
#define Out_Sensor_Pin 8
ArduinoLEDMatrix matrix;
Servo inServo;
Servo outServo;
int personCount = 0;
int gateOpenDelay = 3000;
const uint32_t happy[] = {
0x19819,
0x80000001,
0x81f8000
};
void setup() {
Serial.begin(9600);
delay(1500);
pinMode(In_Sensor_Pin, INPUT);
pinMode(Out_Sensor_Pin, INPUT);
inServo.attach(In_Servo_Pin);
outServo.attach(Out_Servo_Pin);
matrix.begin();
matrix.loadFrame(happy);
delay(1000);
updateDisplay();
initProperties();
ArduinoCloud.begin(ArduinoIoTPreferredConnection);
setDebugMessageLevel(2);
ArduinoCloud.printDebugInfo();
}
void loop() {
ArduinoCloud.update();
// Check for incoming person
if (digitalRead(In_Sensor_Pin) == LOW) {
openGate(inServo);
personCount++;
updateDisplay();
delay(gateOpenDelay);
closeGate(inServo);
crowdCount = personCount;
}
// Check for outgoing person
if (digitalRead(Out_Sensor_Pin) == LOW) {
openGate(outServo);
personCount--;
updateDisplay();
delay(gateOpenDelay);
closeGate(outServo);
crowdCount = personCount;
}
}
void openGate(Servo &servo) {
servo.write(0);
}
void closeGate(Servo &servo) {
servo.write(90);
}
void updateDisplay() {
matrix.clear();
matrix.beginDraw();
matrix.stroke(0xFFFFFFFF);
matrix.textScrollSpeed(55);
// Display the count
char text[20];
snprintf(text, sizeof(text), "%d", personCount);
matrix.textFont(Font_5x7);
matrix.beginText(0, 1, 0xFFFFFF);
matrix.println(text);
matrix.endText(NO_SCROLL);
matrix.endDraw();
crowdCount = personCount;
}

