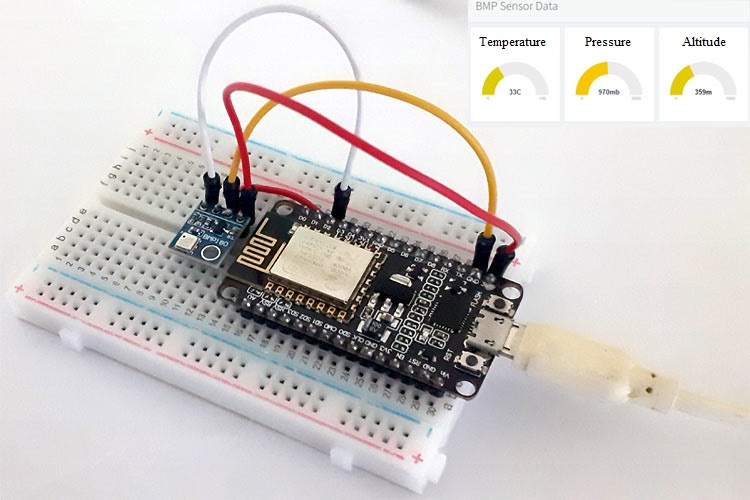
We previously used NodeMCU to log temperature data in the Google sheet. Now here we are going to send data to Thinger.io IoT cloud and display it in an attractive graphical format. A BMP180 sensor is interfaced with NodeMCU ESP8266 to collect the temperature, humidity, and altitude data, which will be sent to the Thinger.io platform. In this tutorial, we will learn how to manage different features of the thinger.io platform, like devices, endpoints, data buckets, or access tokens.
Components Required
- NodeMCU ESP8266
- BMP180 Pressure sensor
- Jumper Wires
- Breadboard
Circuit Diagram
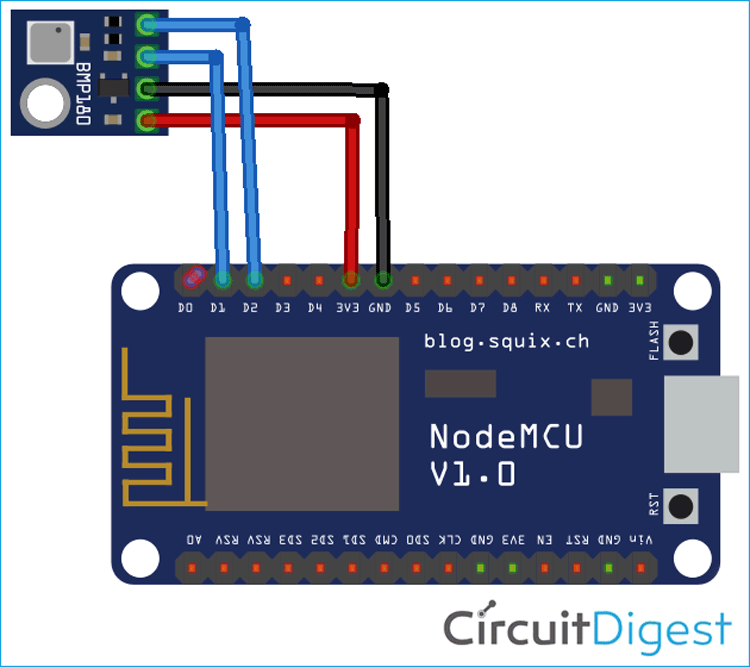
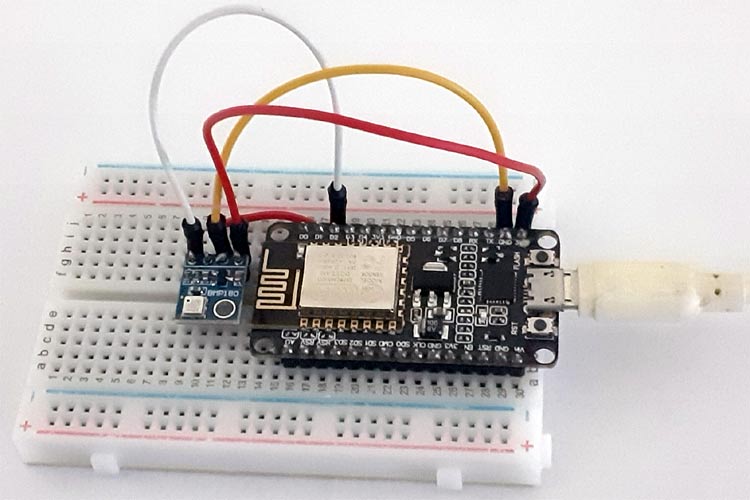
Circuit Diagram for this ESP8266 data logger is very straightforward, here only the BMP180 sensor is interfaced with NodeMCU.
The BMP180 sensor uses the I2C communication protocol. So you need to connect the SCL and SDA pins of BMP180 to SCL and SDA pins (D1 and D2) of NodeMCU. Also, connect the VIN and GND pin of BMP180 to 3.3V and GND of NodeMCU. Do not connect the Sensor directly to 5V because it can damage the Sensor permanently.
To learn more about NodeMCU, check various IoT projects based on NodeMCU ESP8266.
Thinger.io Setup for ESP8266 Temperature Logger
Thinger.io is an Open-Source Platform for the Internet of Things. It provides every needed tool to prototype, scale, and manage connected products in a very simple way. Thinger.io provides three essential tools i.e. Data Bucks, Dashboard, and Endpoint to work with devices data; these tools can be used to visualize the device data and extend the interoperability of the devices.
Data Bucks: Data Bucks tool can be used to store device data in a scalable way, programming different sampling intervals or recording events raised by devices.
Dashboard: Dashboard tool has some Panels with customizable widgets that can be created within minutes using drag and drop technology to visualize the real-time and stored data.
Endpoints: Endpoints can be used to integrate the platform with other services like IFTTT, custom Web Services, emails, or call other devices.
In this ESP8266 logging, we are going to explore these tools.
To send data to Thinger.io, you need to create a free account on the Thinger.io platform and follow the below steps to connect your device.
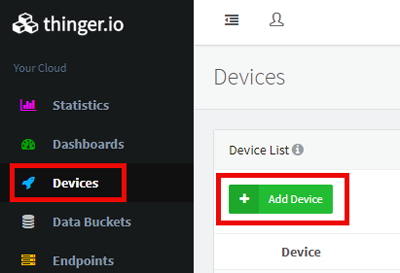
Step 1: The first step is to create a new device. To create a new device, click on Devices in the menu tab and then click on the Add Device button.
Then fill the form with the device ID, description, and Credentials or generate random credentials for your device and click on ‘Add Device.’
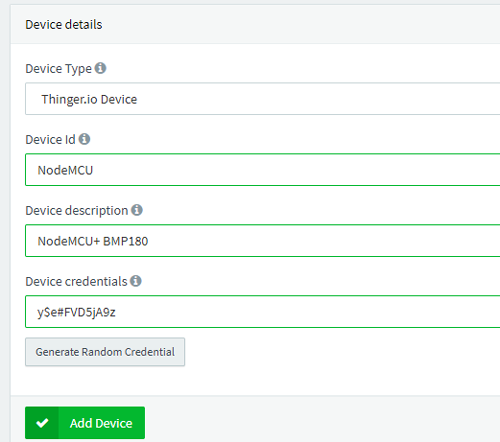
That’s all; your device is ready to connect. In the next step, we will program the NodeMCU to send the data to the Thinger.io platform.
IFTTT Setup for NodeMCU Data Logger
Here we are using IFTTT to send Email warnings when the temperature goes beyond a limit. IFTTT (If This Then That) is a web-based service by which we can create chains of conditional statements, called applets. Using these applets, we can send Emails, Twitter, Facebook notifications.
To use the IFTTT, login to the IFTTT account if you already have one or create an account.
Now search for ‘Webhooks’ and click on the Webhooks in Services section.
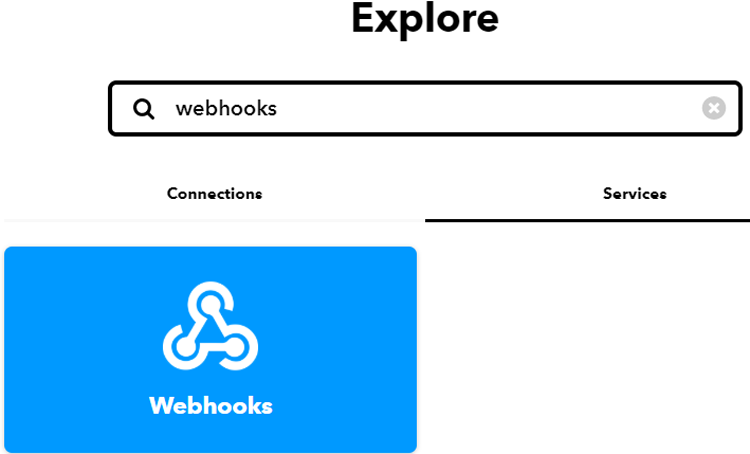
Then, in the Webhooks window, click on ‘Documentation’ in the upper right corner to get the private key. Copy this key, this key will be used while creating Endpoint in Thinger.io.
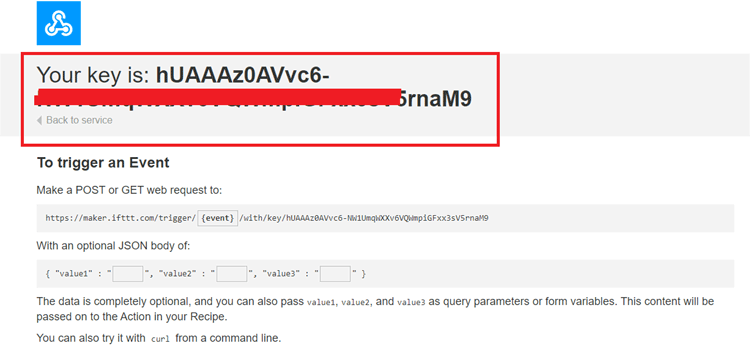
After that, create an applet using Webhooks and Email services. To create an applet, click on your profile and then click on ‘Create.’
Now in the next window, click on the ‘This’ icon. Now search for Webhooks in the search section and click on ‘Webhooks.’
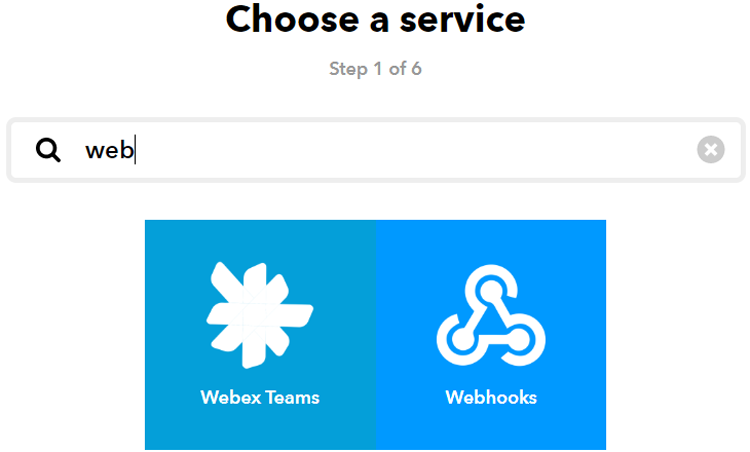
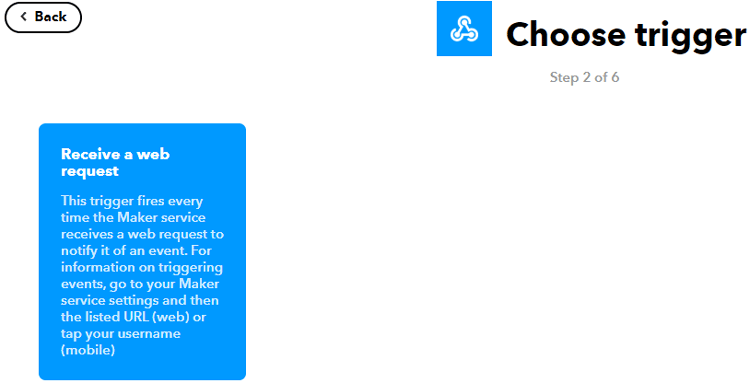
Now choose ‘Receive a Web Request’ trigger and enter the event name as a temp and then click on create a trigger.
After this, click on ‘Then That’ and then click on Email.
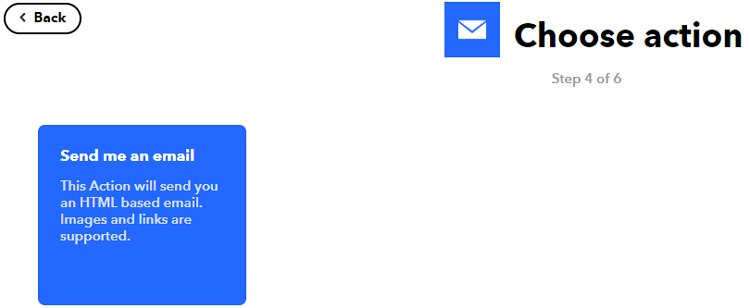
Now in email, click on ‘send me an email’ and enter the email subject and body and then click on create action. In the last step, click on ‘Finish’ to complete the Applet setup.
Programming NodeMCU for Data Logging
The complete code for sending data to Thinger.io is given at the end of the page. Here, we are explaining some important parts.
Start the code by including all the required libraries. The ThingerESP8266.h is used to establish a connection between the IoT platform and the NodeMCU while Adafruit_BMP085.h is used to read the BMP sensor data. You can install the ThingerESP8266.h library from the Arduino IDEs library manager.
#include <ThingerESP8266.h>
#include <ESP8266WiFi.h>
#include <Wire.h>
#include <Adafruit_BMP085.h>
Next, enter credentials in the code, so the device can be recognized and associated with your account.
#define USERNAME "Your account Username"
#define DEVICE_ID "NodeMCU"   //Your Device Name
#define DEVICE_CREDENTIAL "FcLySVkP8YFR"
Then, enter your endpoint name. The endpoint is used to integrate the platform with external services like IFTTT, HTTTP request, etc.
#define EMAIL_ENDPOINT "IFTTT"
Define the variables to store the Pressure, Temperature, and Altitude data.
int Pressure, Temperature, Altitude;
Inside the void loop (), read the sensor data. The pson data type can hold different data types. So the Pson data type is used to receive multiple values at the same time.
thing["data"] >> [](pson& out){
    out["Pressure"] = bmp.readPressure()/100;
    out["Altitude"]= bmp.readAltitude();
    out["Temperature"] = bmp.readTemperature();
     };
Use if condition to call the Endpoint if the temperature value goes past 15 degrees. Here data is the Endpoint name.
if(Temperature > 15){
      thing.call_endpoint( EMAIL_ENDPOINT,"data");}
  Serial.print("Sending Data");
Logging Data on Thinger.io from NodeMCU
Now connect the BMP sensor to NodeMCU and upload the code. The NodeMCU will use your account credentials to connect with the device that you created earlier. If it connects successfully, it will show connected, as shown in the below image:

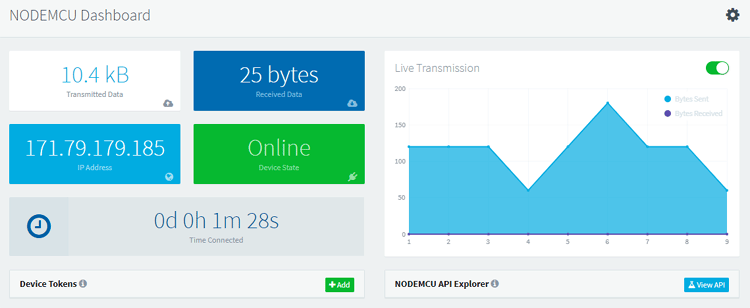
You can check your device statistics like Transmitted Data, Received Data, IP Address, Time Connected, etc. by just clicking on the device name from Devices menu.
As we are now receiving the data, we will create a dashboard to visualize the data using the widgets.
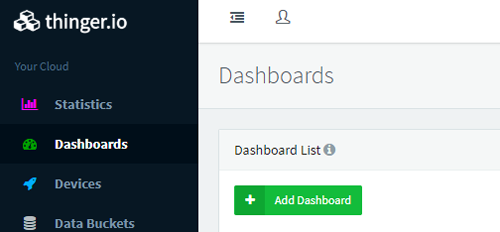
To create a Dashboard, click on Dashboards from the menu tab and then click on ‘Add Dashboard.’
Now in the next window, enter the dashboard details like dashboard name, ID, and Description and then click on Dashboard.
After this, access the new dashboard by clicking on the Dashboard name. By default, the dashboard will appear empty. To add the Widgets, you first need to enable the edit mode by clicking on the upper-right switch of the dashboard. Then click on the ‘Add Widget’ button.

When you click on the ‘Add Widget’ button, it will show a popup where you can select the widget type, background color, etc. In my case, I have selected the Gauge Widget.
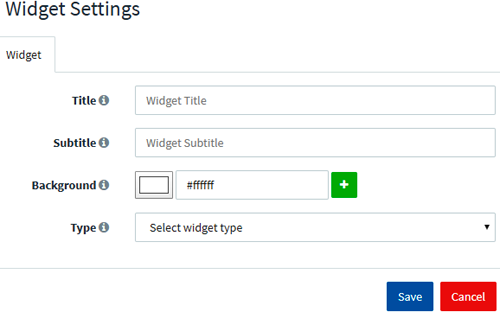
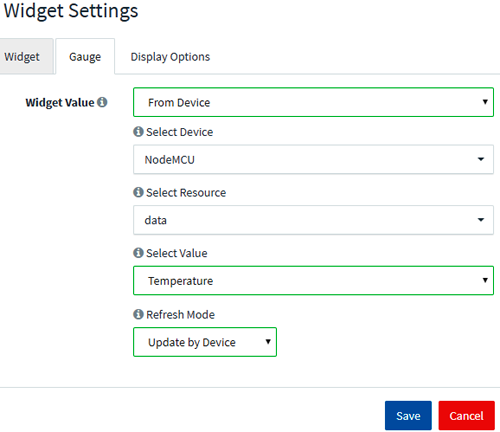
When you click on save, it will take you to the next screen where you need to select the Source Value, Device, Resource, Value, and Refresh mode. Select all the values and then click on the Save button.
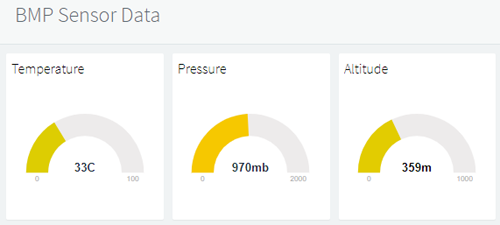
Now repeat the same procedure for the rest of the variables. My dashboard looked like this:
Creating Endpoint in Thinger.io to send Email Alert
Now we will create an Endpoint to integrate the Thinger.io with IFTTT. An endpoint can be called by the device to perform any action, like sending an email, send an SMS, call a REST API, interact with IFTTT, call a device from a different account, or call any other HTTP endpoint.
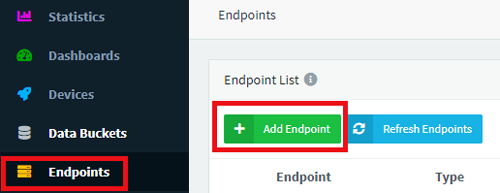
To create an Endpoint, click on the ‘Endpoint’ option from the menu tabs and then click on ‘Add Endpoint.’
Now in the next window, enter the required details. The Details are:
Endpoint Id: Unique identifier for your endpoint.
Endpoint Description: Write a description or detailed information about your Endpoint.
Endpoint Type: Select the Endpoint type from the given options.
Maker Event Name: Enter your IFTTT applet name.
Maker Channel Key: Your Webhooks secret key.
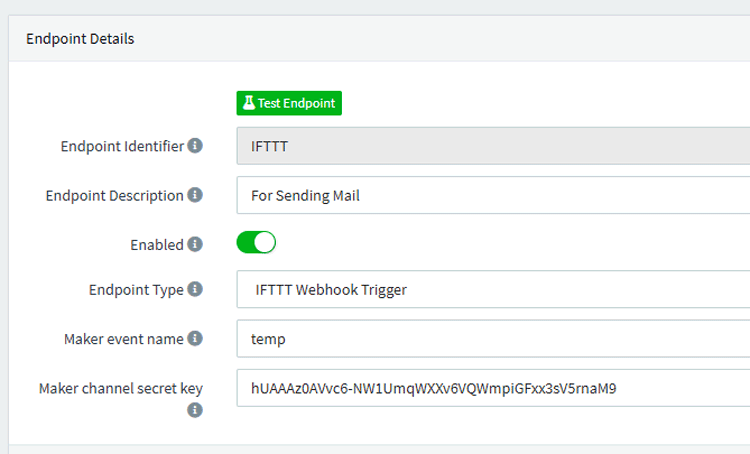
After this, click on Test Endpoint to check if everything is working. It should send you an email with a warning about the temperature data.
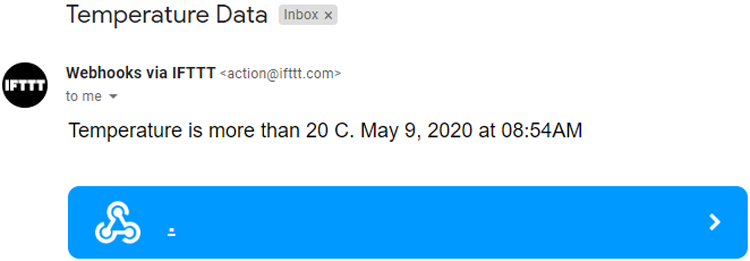
Instead of using IFTTT Webhook Trigger, you can send an Email or Telegram Message, or you can send an HTTP request using the Endpoint features.
This is how a NodeMCU ESP8266 can be used to log temperature, pressure, and altitude data from the BMP180 sensor to the internet.
A working video and complete code are given at the end of the page.
#include <ThingerESP8266.h>
#include <ESP8266WiFi.h>
#include <Wire.h>
#include <Adafruit_BMP085.h>
#define USERNAME "choudharyas"
#define DEVICE_ID "NodeMCU"
#define DEVICE_CREDENTIAL "FcLySVkP8YFR"
#define EMAIL_ENDPOINT "IFTTT"
#define SSID "Galaxy-M20"
#define SSID_PASSWORD "ac312124"
int Pressure, Temperature, Altitude;
Adafruit_BMP085 bmp;
ThingerESP8266 thing(USERNAME, DEVICE_ID, DEVICE_CREDENTIAL);
void setup() {
  Serial.begin(115200);
  thing.add_wifi(SSID, SSID_PASSWORD);
  if (!bmp.begin()) {
  Serial.println("Could not find a valid BMP085 sensor, check wiring!");
  while (1) {}
  }
}
void loop() {
  Temperature = bmp.readTemperature();
  thing["data"] >> [](pson& out){
    out["Pressure"] = bmp.readPressure()/100;
    out["Altitude"]= bmp.readAltitude();
    out["Temperature"] = bmp.readTemperature();
     };
  thing.handle();
  thing.stream(thing["data"]);
  if(Temperature > 40){
     thing.call_endpoint( EMAIL_ENDPOINT,"data");}
  Serial.print("Sending Data");
}
