In previous Raspberry Pi Tutorials, we have used many different programming languages and softwares to control Raspberry Pi including Python, embedded C, Flask etc. To expand the horizon of powerful Raspberry Pi board, today we will use a very popular JavaScript based environment (Node.js) to control Raspberry Pi GPIOs locally as well as globally by setting it up as webserver. Initially, Node.js was developed for Google Chrome but later it was open-sourced by Google.
In this tutorial, we will control an LED, connected to Raspberry Pi, using two methods
- First we will simply write a JavaScript code using Node.js to Blink the LED
- In second method, we will create a HTML page with two buttons to turn on and off the LED. This HTML web page will be hosted on raspberry pi and can be opened on any web browser. So here Raspberry Pi will act as webserver
Materials Required
- Raspberry pi board with Raspbian installed in it
- LED
In this tutorial I am using External Monitor using HDMI cable to connect with Raspberry Pi. If you don’t have monitor, you can use SSH client (Putty) or VNC server to connect to Raspberry pi using Laptop or computer. If you find any difficulty then follow our Getting stared with Raspberry Pi Guide.
Installing Node.js on Raspberry Pi
We will install Node.js in our board using the following commands.
Step 1:- First check for the arm version of your raspberry pi board using this command.
uname -m
In my case, version is 7.
Step 2:- Download the installer by copying this link in the terminal. Don’t forget to change the version in the link given below.
wget https://nodejs.org/dist/v4.6.1/node-v4.6.1-linux-armv[version]l.tar.gz
Step 3:- Extract the files using below command
tar -xvf node-v4.6.1-linux-armv[version]l.tar.gz
Step 4:- Finally, execute these commands to add the important files to local directories also.
cd node-v4.3.1-linux-armv[version]l
sudo cp -R * /usr/local/
Node.js is installed now in your Raspberry Pi. Check the version of node for confirmation using this command.
node –version
Before going to make a Node.js server, first we will see how to write an script to blink an LED using node.js (npm onoff package).
Blinking an LED using Node.js
To control the GPIO on the Raspberry Pi using Node.js, we will use onoff module.
We will use npm package manager to install onoff module using below command
npm install onoff
Now, we will write a script for blinking of led. Open nano editor and give the name to file using the command
nano blink_led.js
If you are a beginner in Node.js and it’s packages, you can the documentation of npm for better understanding of the script.
Node.js LED Blink script and Explanation
First, declare the variables for led, delay and GPIO. I am using Raspberry Pi GPIO 4 to connect the LED.
var Gpio = require('onoff').Gpio;
var LED = new Gpio(4, 'out');
var blinkInterval = setInterval(blinkLED, 500);
Now, we will make a function to start the blink.
function blinkLED() {
  if (LED.readSync() === 0) {
    LED.writeSync(1); //set output to 1 i.e turn led on
  } else {
    LED.writeSync(0); //set output to 0 i.e. turn led off

 }
}
Similarly, make a function to stop the blinking
function endBlink() {
  clearInterval(blinkInterval);
  LED.writeSync(0);

  LED.unexport(); // Unexport GPIO to free resources
}
setTimeout(endBlink, 10000);
Complete Node.js code for Blinking LED is given at the end of this tutorial. So copy and paste the code in the file led_blink.js, which we have created previously using nano command, save the file using Ctrl+x, then press Y and hit enter.
To run the script, open the terminal and type the below command:
node blink_led.js
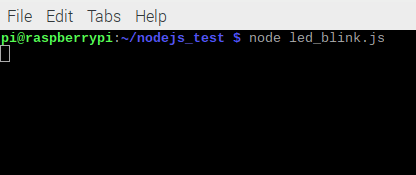
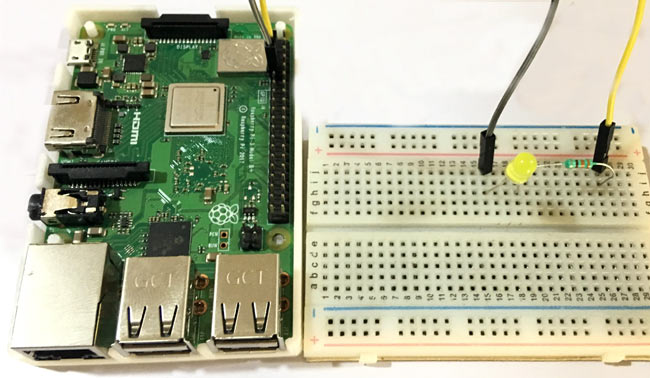
You will see that LED will blink for 10 seconds and after that it stop blinking. Check the complete working in the Video given in end of this tutorial.
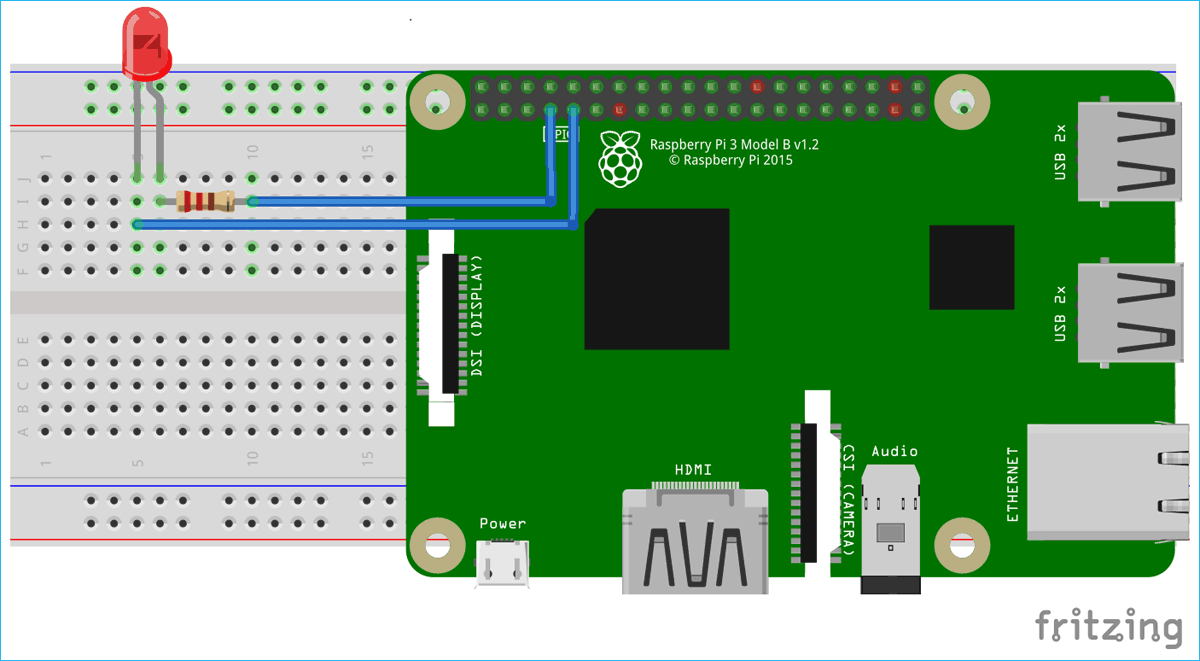
Circuit Diagram for Blinking an LED using Node.js
Raspberry Pi Webserver using Node.js
Now, come to the interesting part, here we are going to make our own web server from which we can control GPIO of Raspberry pi using a webpage.
For this, first we need to make an HTML page and write a script to perform back-end task i.e. to control the RPi GPIO.
Step 1:- Make a directory to store all the files at one place.
mkdir nodejs_server
Step 2:- Inside the nodejs_server folder make one more folder for saving the HTML file.
cd nodejs_server
mkdir views
Step 3:- If you want to add images to your html page, then you should make another folder named public inside the main directory i.e. in nodejs_server folder. In the public folder, make image folder and store all the images in this folder.
Step 4:- Now, we will make HTML page. For this, go to views directory and open nano text editor with filename index.ejs
There is nothing fancy in the script. It is just a HTML file to make On and Off button.
Copy paste the below HTML code in nano text editor and save it.
<meta name="viewport" content="width=500, initial-scale=1">

<div class="BorderMargin">
<image src = '/images/circuitdigest.jpg' alt="LED" style="width:500px;height:250px;" align="left">
<h1>Welcome to Nodejs Server</h1>

<form action="/led/on" method="post">
<button type="submit" class="button">LED On </button>

<button type="submit" formmethod="post" formaction="/led/off" class="button button3">LED Off</button>
</form>
<a>Led Status: <%=status %></a>
</div>
Step 5:- Now, we have to write JavaScript code. We are using node express framework to respond to http requests performed by the user.
You can follow the link to learn more about Node Express.
Open terminal and open nano text editor with index.js filename in nodejs_server folder, then copy and paste the below java script code and this file.
var express = require('express');
var app = express();
var path = require('path');
var gpio = require('rpi-gpio');

gpio.setup(7, gpio.DIR_OUT);
app.set('view engine', 'ejs');
app.use(express.static(path.join(__dirname, 'public')));
console.log(path.join(__dirname, 'public'));
app.get('/', function(req, res){
  res.render('index',{status:"Press Button"});
});

app.post('/led/on', function(req, res){
gpio.write(7, true, function(err) {

        if (err) throw err;
        console.log('Written True to pin');
console.log(path.join(__dirname, 'public'));
return res.render('index', {status: "Led is On"});
    });
});

app.post('/led/off', function(req, res){
gpio.write(7, false, function(err) {

        if (err) throw err;
        console.log('Written False to pin');
console.log(path.join(__dirname, 'public'));
return res.render('index',{status: "Led is Off"});
    });
});

app.listen(3000, function () {
  console.log('Server Started on Port: 3000!')
})
Step 6:- Inside the nodejs_server directory, we have to execute following command to install libraries of node.js
npm install
Step 7:- Now, your server is ready to work. To start the local server, run the following command inside the nodejs_server directory
node index.js
you will see a message in the terminal that your server is started at the defined port.

Step 8:- Now open your browser and open Raspberry Pi URL with port number i.e. raspberrypi:3000
Make sure that your raspberry pi and laptop in which you are opening the browser are connected with the same network.
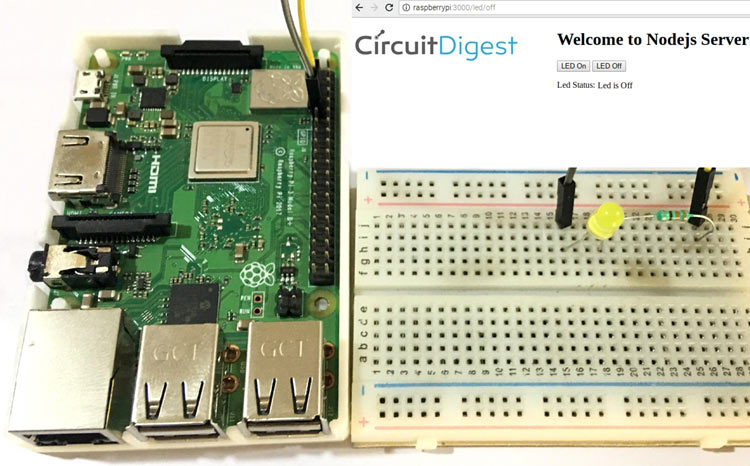
You will see the following page in the browser.
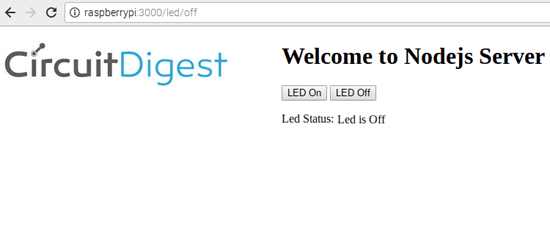
Now, press LED On button to turn on the LED and LED Off button to turn off the LED.
Code for blinking LED using Node.js
var Gpio = require('onoff').Gpio;
var LED = new Gpio(4, 'out');
var blinkInterval = setInterval(blinkLED, 500);
function blinkLED() {
if (LED.readSync() === 0) {
LED.writeSync(1); //set output to 1 i.e turn led on
} else {
LED.writeSync(0); //set output to 0 i.e. turn led off
}
}
function endBlink() {
clearInterval(blinkInterval);
LED.writeSync(0);
LED.unexport(); // Unexport GPIO to free resources
}
setTimeout(endBlink, 10000);
Code for blinking LED using Node.js webserver
var express = require('express');
var app = express();
var path = require('path');
var gpio = require('rpi-gpio');
gpio.setup(7, gpio.DIR_OUT);
app.set('view engine', 'ejs');
app.use(express.static(path.join(__dirname, 'public')));
console.log(path.join(__dirname, 'public'));
app.get('/', function(req, res){
res.render('index',{status:"Press Button"});
});
app.post('/led/on', function(req, res){
gpio.write(7, true, function(err) {
if (err) throw err;
console.log('Written True to pin');
console.log(path.join(__dirname, 'public'));
return res.render('index', {status: "Led is On"});
});
});
app.post('/led/off', function(req, res){
gpio.write(7, false, function(err) {
if (err) throw err;
console.log('Written False to pin');
console.log(path.join(__dirname, 'public'));
return res.render('index',{status: "Led is Off"});
});
});
app.listen(3000, function () {
console.log('Server Started on Port: 3000!')
})

