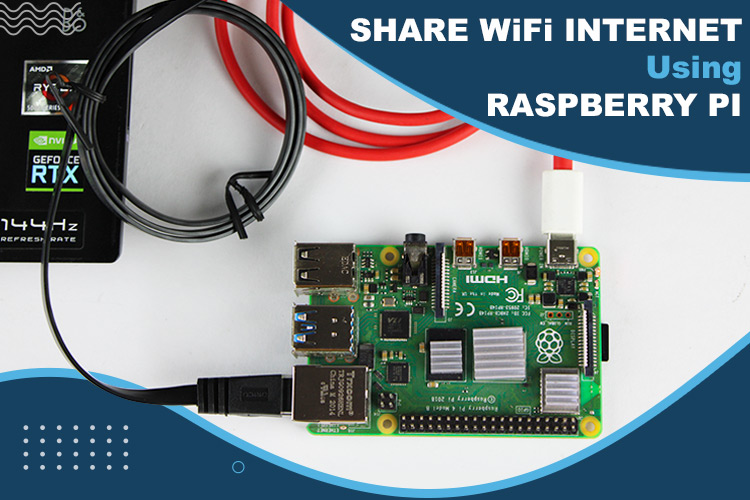
We often have discussions on how powerful of a tool the raspberry pi is, its ability to handle multiple interfaces while running of just 5 Volts in a minimal form factor is simply phenomenal. We have previously used RPi as an interface to connect to the internet, it was about time we did it again in another unique way. We would recommend having a read of the previous article on How to Turn A Raspberry Pi into a Wifi Router using OpenWrt and make sure you are aware of simple processes related to the Raspberry Pi like using SSH with a Raspberry Pi and using the angry IP scanner to scan for available nodes on your Wifi network.
In our last tutorial, we connected our RPi to a Wifi router using an ethernet cable and shared the router’s internet connection through our Raspberry Pi over Wifi. This allowed us to use our Raspberry Pi as a custom Wifi Router. The visual summarization of the process could be:
This time we will make a project that will serve similar interfacing objectives but in reverse.
Our aim will be to connect our Raspberry Pi to any Wifi and then share that WiFi’s internet over the LAN port of the Raspberry Pi. This will be specifically useful in providing a LAN Connection with Internet access to devices that do not have Wifi Cards like your PC. However this can be directly achieved by connecting a LAN cable from WiFi router to the device but this setup is useful when the router is installed far from the device and the device doesn't support WiFi.
Component Requirements:
- Raspberry Pi Module (3 series or the 4 series).
- Appropriate Power Supply to the Raspberry Pi.
- Ethernet LAN Cable.
- Access to a Stable Wifi Connection.
- SD Card and an SD Card Reader.
Raspberry Pi Manual Setup
As mentioned above that we won’t be installing any network-specific OS on our raspberry and will simply do some modifications on the widely used Raspberry Pi OS. Therefore, you can go ahead and download the latest release of the Raspberry Pi OS from the official website. We downloaded the full buster release.
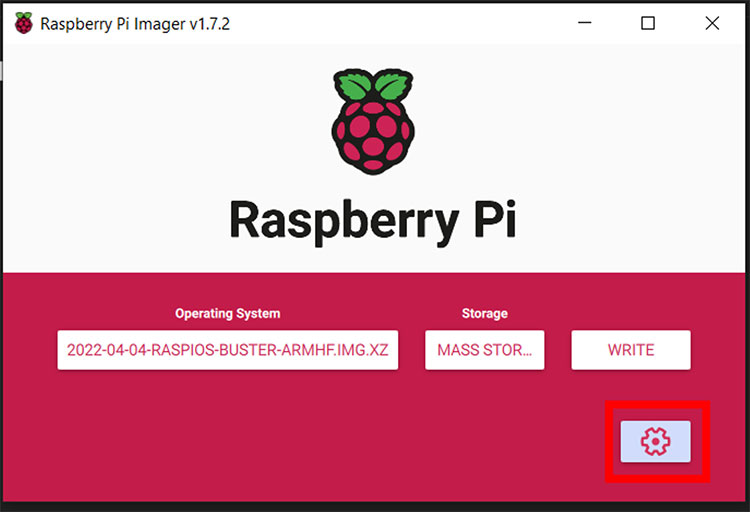
We will now install this on a clean SD Card using the Raspberry Pi Imager. Simply select the “Choose OS” button and scroll down to click on the “Use Custom” option.

Locate the OS file you downloaded and click on “Open”, then you can choose the storage as your SD Card.
Before moving to write the image, we need to enable the Wifi and SSH, to do that click on the “Settings” button on the bottom right of the window.
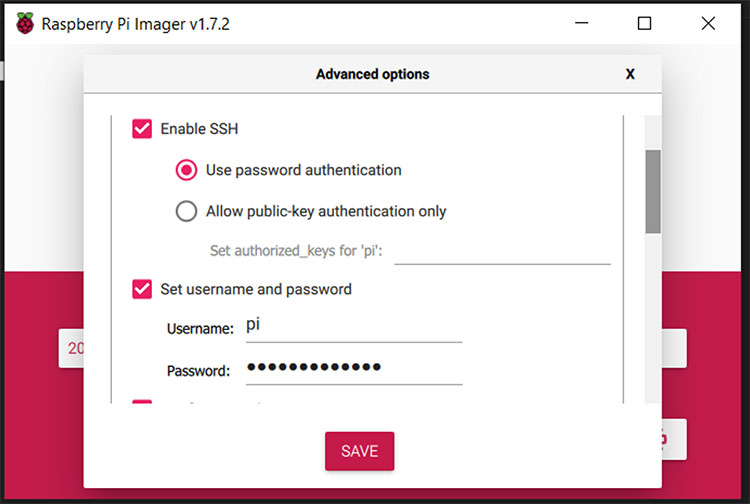
Enable ssh and write a suitable username and password.
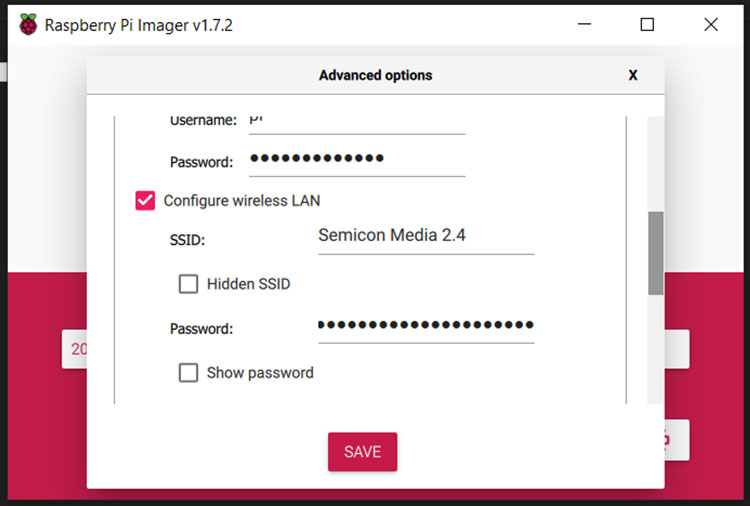
Enable wifi and fill in your wifi credentials. It is important that these are correct or you won’t be able to access the RPi for further configurations.
Once this is done, you can click on the “Write” option and wait for the Raspberry Pi Imager to flash the OS image on the SD Card.
You can now plug in your sd card to your Raspberry Pi and connect it to a power supply. This will boot the Pi and automatically connect it to the Wifi based on the Wifi Credentials you entered.
We will now access the Pi remotely by connecting to the same wifi and running a scan using the Angry IP Scanner to determine the IP of our Pi. Simply enter this IP in a SSH Tool like PuTTY and get SSH access to the Pi.
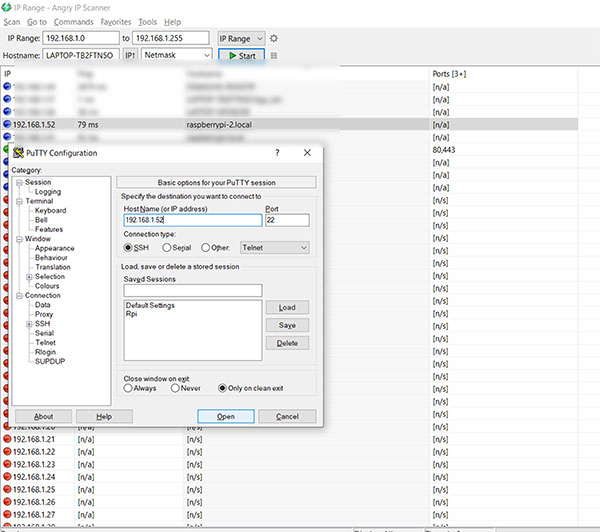
Our first two commands will be to update the firmware package.
sudo apt-get update
sudo apt-get upgrade
Once the update is done you can reboot your Pi with the command
sudo reboot
Once the reboot is done, we will log back into our Pi using SSH. We will now assign a static IP to our pi using dhcpcd. To do this enter the command:
sudo nano /etc/dhcpcd.conf
This will open the dhcpcd.conf file, scroll down until you find the interface eth0 and the interface wlan0 lines, and edit them to these values :
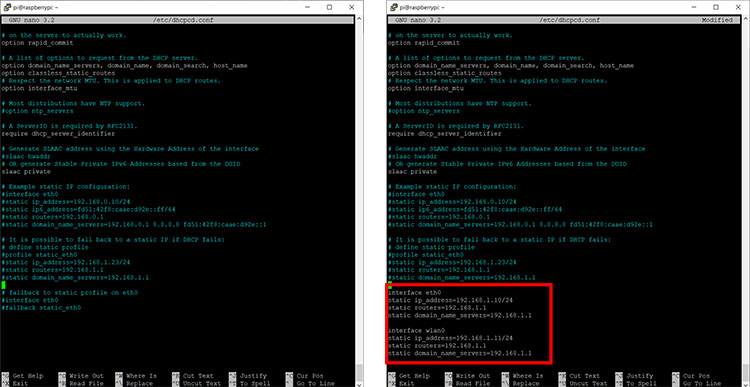
interface eth0
static ip_address=192.168.1.10/24
static routers=192.168.1.1
static domain_name_servers=192.168.1.1
interface wlan0
static ip_address=192.168.1.11/24
static routers=192.168.1.1
static domain_name_servers=192.168.1.1
Once this is done, press “Ctrl+S” and then “Ctrl+X” to save and exit the file. Perform a reboot with the command.
sudo reboot
To reconnect to our Pi via SSH, we will use the IP 192.168.1.11 on puTTY.
Let us now edit the interfaces file with the command
sudo nano /etc/network/interfaces
And simply paste the following lines at the end of the file.
auto eth0
iface eth0 inet static
    address 192.168.5.1
    netmask 255.255.255.0
    network 192.168.5.0
    broadcast 192.168.5.255
allow-hotplug wlan0
iface wlan0 inet static
    address 192.168.1.11
    netmask 255.255.255.0
    gateway 192.168.1.1
    dns-nameservers 192.168.1.1
    wpa-conf /etc/wpa_supplicant/wpa_supplicant.conf
Perform the save and exit procedure as mentioned previously.
We will now enable the networking service with the following commands:
sudo systemctl enable networking
sudo systemctl disable dhcpcd
We will further edit the dhcpcd.conf file with the command:
sudo nano /etc/dhcpcd.conf
And add the following two lines right above the interface eth0 line.
denyinterfaces eth0
denyinterfaces wlan0
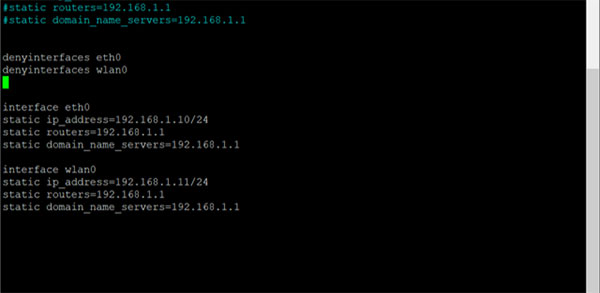
Once this is done, let's reboot our pi again.
sudo reboot
Before moving forward you can run the command:
ifconfig
You can see the IP of your LAN and WLAN interfaces, if they are assigned correctly, you’re good to go.
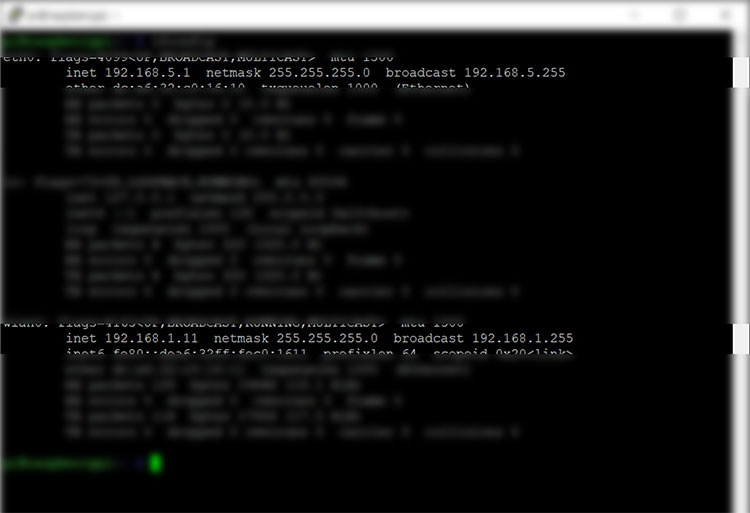
We will now install a DHCP server on our pi using the dnsmasq service, use the following command to install it:
sudo apt install dnsmasq
To configure it, we will have to stop the service first with the command:
systemctl stop dnsmasq
Before moving forward with the configuration let’s backup the file first with the command:
sudo mv /etc/dnsmasq.conf /etc/dnsmasq.conf.orig
Let’s configure the file with the command:
sudo nano /etc/dnsmasq.conf
Paste the following parameters in the file.
interface=eth0
listen-address=192.168.5.1
dhcp-range=192.168.5.50,192.168.5.100,12h
server=8.8.8.8
bind-interfaces
domain-needed
bogus-priv
Simply save and exit the file and start the service again with the command:
systemctl start dnsmasq
The final steps are to configure “Port Forwarding” and “iptables” so we can share our internet over the Ethernet Port. Enter the command:
sudo nano /etc/sysctl.conf
Simply remove the “#” character and uncomment the line
net.ipv4.ip_forward=1
Save and exit the file and run the command:
sudo sh -c "echo 1 > /proc/sys/net/ipv4/ip_forward"
We will now change the iptables with the following commands:
sudo iptables -t nat -A POSTROUTING -o wlan0 -j MASQUERADE
sudo iptables -A FORWARD -i wlan0 -o eth0 -m state --state RELATED,ESTABLISHED -j ACCEPT
sudo iptables -A FORWARD -i eth0 -o wlan0 -j ACCEPT
Save the changes by the following command:
sudo sh -c "iptables-save > /etc/iptables.ipv4.nat"
We will now edit the “rc.local” file with the command:
sudo nano /etc/rc.local
And on top of “exit 0” paste this line of code
iptables-restore < /etc/iptables.ipv4.nat
Save and exit this file and voila, we are done with our configuration, simply reboot your pi one last time with the command:
sudo reboot
Now connect Raspberry Pi to laptop ethernet and this will allow us to access the internet on Laptop via Raspberry Pi.
This is how a device or PC which doesn't have WiFi can access the internet via Raspberry Pi by connecting raspberry pi to pc via ethernet.


