You might have seen there are many types of liquid-level sensors available on the market. They are mostly used in automatic pump controls and industrial applications. The most common type of sensors that were used were the float switch type sensor or the conductive sensors. Even though they were used commercially each type comes with its own problems. For example, the float-type sensor can get stuck and give a false reading, and the major issues faced by the conductive-type sensor are corrosion corrosion and electrical interference. This is where the contactless sensors come in handy. Since they don’t have any moving parts, we don’t need to worry about them getting stuck and since they are contactless we don’t need to worry about corrotion. There are many types of contactless sensors available in the market, including capacitive sensors, ultrasonic sensors, radar sensors and optical sensors. In this article, we are going to look at a capacitive contactless liquid-level sensor XKC-Y26-V. We will go through its features and we will also see how to interface it with an Arduino.
XKC-Y26-V Contactless Liquid Level Sensor
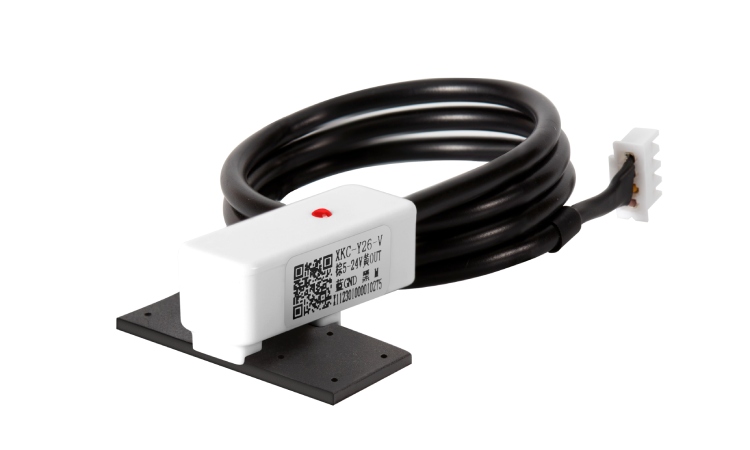
The XKC-Y2-V claims to be IP65 waterproof and has a detection range of 20mm with a precision of ±1.5mm. They are suitable for various non-metallic containers or pipelines. They can be operated with a wide range of input voltage ranging from 5V up to 24V. The sensor also features adjustable sensitivity and can be changed by simply adjusting the exposed adjustment screw.
XKC-Y26-V Contactless Liquid Level Sensor Specification
- Power Supply: 5~12V
- Output Mode: switch quantity (high-level output)
- Response Time: 500ms
- Operating Temperature: -5~105C
- Liquid Level Error: 1.5mm
- Thickness Range(TR): 20mm
- Suitable Container OD: 11mm
- Response Time: 500ms
- Waterproof Performance: IP65
XKC-Y26-V Contactless Liquid Level Sensor Features
- High stability and sensitivity
- Adjustable sensitivity
- Have a built-in status indicator
- Will not be affected by the type of liquid.
- Can detect the liquid level of boiling water
- Strong compatibility penetrates all kinds of non-metallic containers or pipes such as plastic, glass, ceramic, and others. The thickness of the pipe the sensor can detect reaches up to 20mm;
- Suitable for all types of curved or flat surfaces.
- 5~24V wide operating voltage range.
XKC-Y26-V Contactless Liquid Level Sensor Pinout
The XKC-Y26-V sensor has a total of 4 pins. Two power pins, one mode select pin, and one output pin. The pinout of the module is as follows:
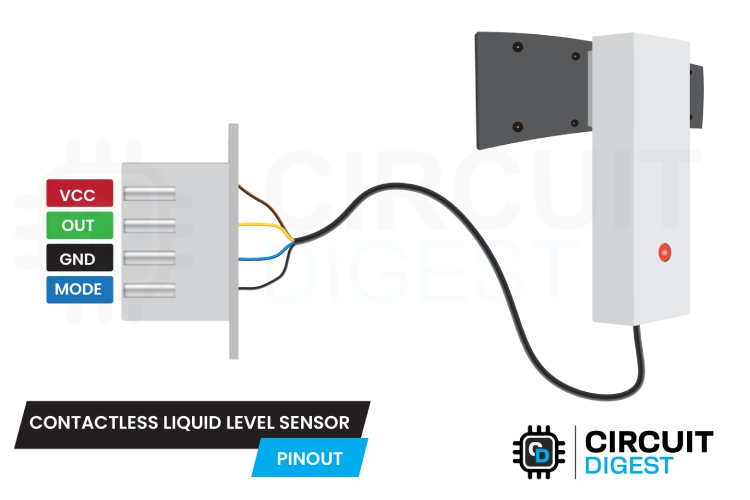
VCC Provides power for the module, connects to the 5V pin of the Arduino.
OUT Output pin
GND Ground pin, connects to the Ground pin of the Arduino.
MODE Mode select pin, Floating - Output high when liquid is detected, Connected to GND - Output is low when liquid is detected
How does the Contactless Liquid Level Sensor Work?
When there is no liquid near the sensor, there will be some certain static capacitance with respect to the ground. When the liquid level rises slowly to approach the sensor, the liquid will create a parasitic capacitance and it will be coupled to the static capacitance so that the final capacitance value will increase. This change in capacitance is then converted into an electrical signal for interfacing with microcontrollers and such. The below animations show the working of a contactless liquid level sensor.
With the Mode pin floating, the sensor will give a HIGH output when the sensor detects the liquid. When the Mode pin is connected to the ground pin, the sensor will give a HIGH output when there is no liquid and a LOW output when liquid is detected. Here is another image illustrates the same. The indicator on senor near the water level is on and the indicator on the sensor away from the water level is off.

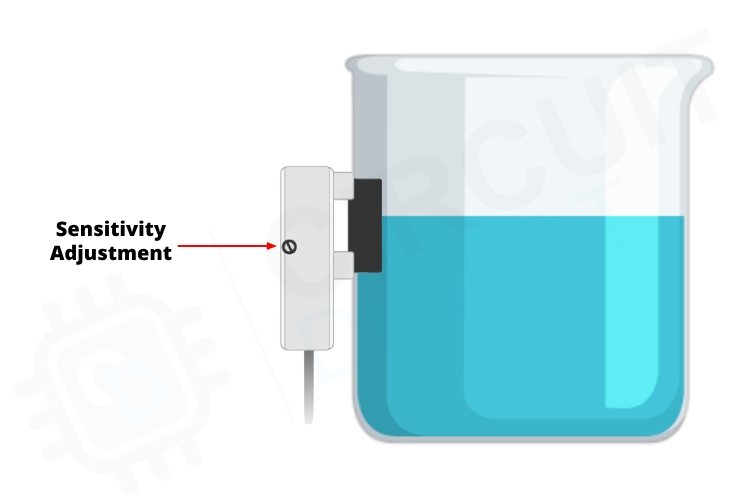
How to Adjust the Sensitivity?
To adjust the sensitivity there is an exposed top of a trimmer resistor on the side of the sensor.Use a small screw driver to rotate this to adjust the sensitivity.
Frequently Asked Questions
How does a capacitive liquid level sensor work?
The capacitive sensors, work based on the capacitance as mentioned in the name itself. The capacitance detected will change depending on whether the liquid is near the sensor or not. This change is then converted into a digital high or low state using a comparator circuit.
What is the function of a liquid-level sensor?
Liquid-level sensors are designed to change state when liquid is detected. They are used to determine if a liquid exists at a particular level in a container.
What are the benefits of using the non-contact liquid level sensor?
The non-contact liquid-level sensors are immune to corrosion or mechanical problems. This will ensure that the sensing unit will have a prolonged life.
How do we check the non-contact liquid level sensor?
You can check this particular sensor (XKC-Y26-V) but just providing the power supply and checking the output. Depending on the connection of the mode pin, the output will change when the sensor is near a liquid. You can also use the built-in indicator LED for debugging.
Circuit Diagram for Interfacing Contactless Liquid Level Sensor with Arduino
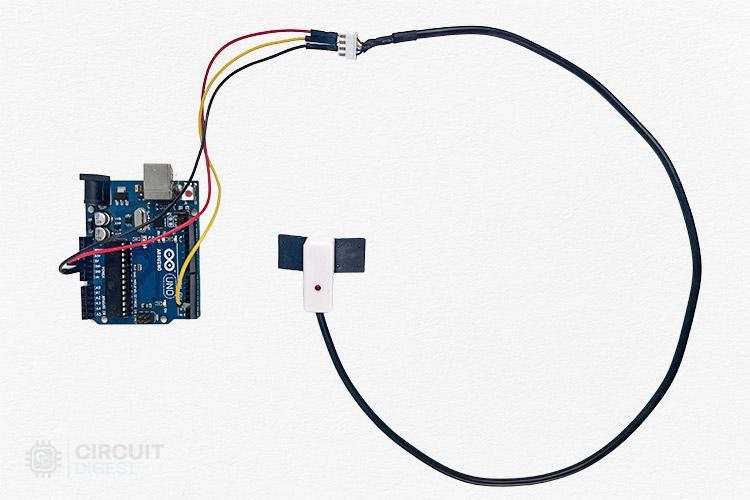
Now that we have understood how a sensor works, we can connect all the required wires to Arduino and write the code to get all the data out from the sensor. The following image shows the circuit diagram for interfacing the Contactless liquid level sensor with Arduino.

Connections are pretty simple and only a few wires. Connect the VCC and GND of the sensor to the 5V and GND pins of the Arduino. Then connect the output to the Arduino’s D2 pin. Here's how the real-life connection looks.
Arduino Code for Interfacing the Contactless Liquid Level Sensor
Just like the circuit diagram the code is also very simple. All you have to do is connect the sensor to a pin and monitor its status. Here is the code for interfacing the contactless liquid level sensor.
int SensePin = 2;  //Sensor input
void setup() {
 Serial.begin(9600);
 pinMode(SensePin, INPUT);
}
void loop() {
 if(digitalRead(SensePin)) {
   Serial.println("Liquid Detected");
 }
 else {
   Serial.println("No Liquid Available");
 }
 delay(1000);
}
At first, we initialized the serial port in the setup. Then we set the pin to which the sensor is connected to the Arduino as input. In the loop function, every second we are checking the status of the sensor pin and if it is high, i.e. the sensor output is high, we will serially print that liquid is detected. And if the pin is low, ie, no liquid is detected we will print no liquid is available.
Here’s the GitHub repo where you can find the complete code and the circuit diagrams that we have used in this tutorial.


int SensePin = 2; //Sensor input
void setup() {
Serial.begin(9600);
pinMode(SensePin, INPUT);
}
void loop() {
if(digitalRead(SensePin)) {
Serial.println("Liquid Detected");
}
else {
Serial.println("No Liquid Available");
}
delay(1000);
}