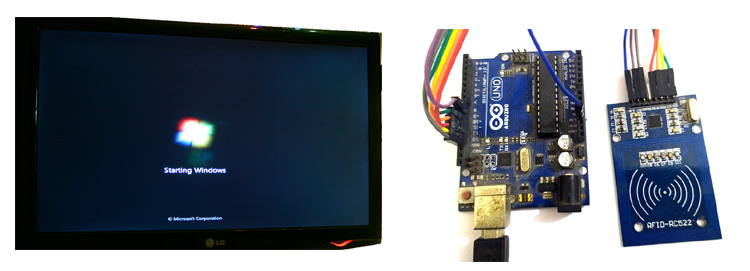
As many of us know computers were invented around 1871, but it was not until 1961 we had them password protected. Early in the 19’s we used pins and alphanumeric characters as passwords for our computers, today we have many types of verification methods like Password, Pin, Pattern, Gesture, Fingerprint recognition, Face recognition and much more. But still, it is a pain for me to log in to my office computer every time I get back to it after a short break.
So, in this project, we are going to learn how to unlock windows laptops by using RFID tags. The Arduino Board and RFID reader will always be connected to the computer and to unlock system I only need to swap my RFID tag over RFID reader. With this Arduino RFID windows Login Project I can unlock system very fast and without typing any passwords, also later I am planning to use my office ID card as the RFID tag since my ID card already has an RFID tag in it and I can program the Arduino to verify it. Sounds interesting right, so let’s get started……
Materials Required:
- Arduino UNO (any Arduino can be used)
- RC522 RFID reader
- RFID tags
- Connecting wires
- USB cable
RC522 RFID Module:
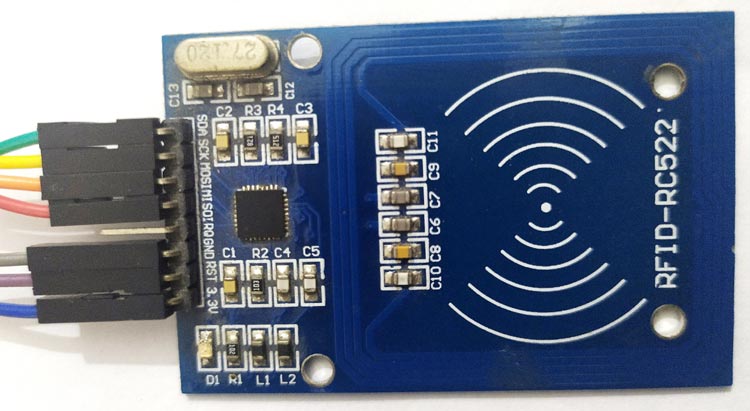
There are many types of RFID readers available in the market but in this project, we have used RC522 SPI based RFID module. This is cheap and easily available at online shopping websites. This is RFID has SPI, UART and I2C interface but by default, it comes with SPI interface. The MFRC522 RFID Reader module is shown below.
We have already used RFID modules with Arduino previously to build other cool RFID projects like
In this project, the RC522 RFID Module shown above is connected to Arduino and the Arduino itself is connected to the computer. When a RFID tag is placed near this reader, the Arduino reads the rfid tag ID number and sends it to computer.
Circuit Diagram:
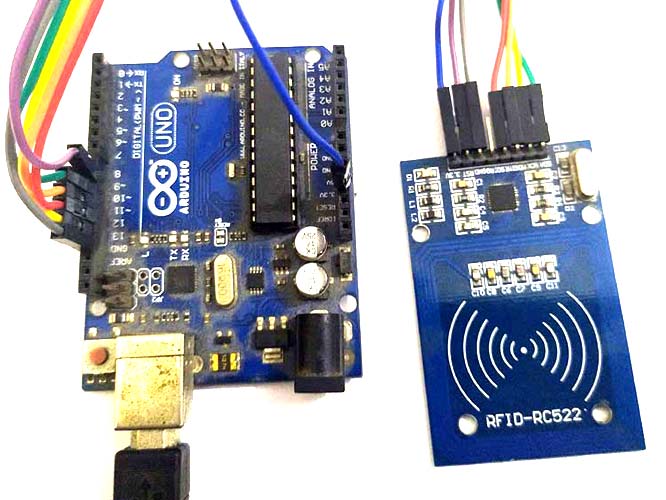
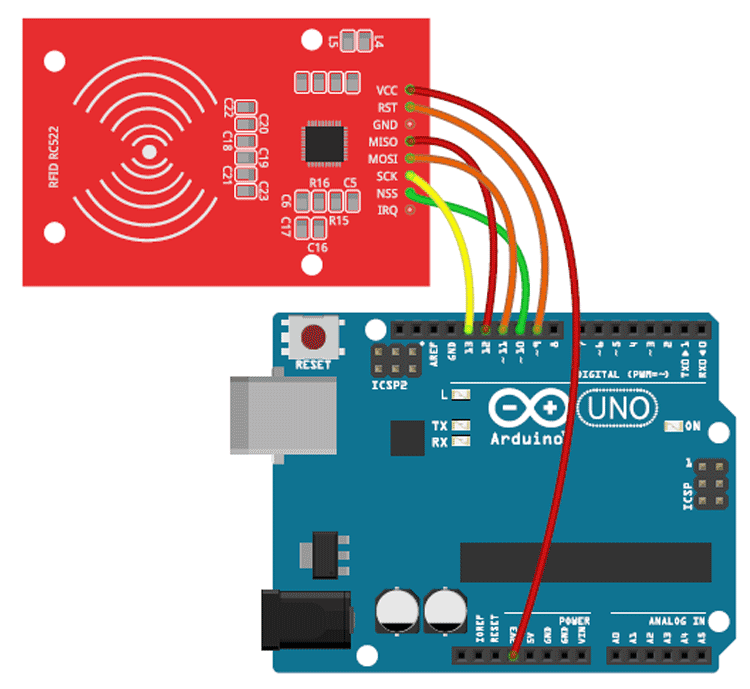
The complete circuit diagram to interface RFID RC522 with Arduino is given below.
As you can see the connections are pretty simple. Since the RFID module works with SPI communication we have connected the MISO,MOSI,SCK and NSS pin to the SPI pins of the Arduino Uno board. The RFID module is powered by the 5V pin of the Arduino. The Arduino UNO itself will be always connected to Laptop and hence we can get it powered by the laptop USB port. The connection details are listed in table below.
| RFID RC522 | ARDUINO |
| VCC | 3.3V |
| GND | GND |
| RST | D9 |
| MISO | D12 |
| MOSI | D11 |
| SCK | D13 |
| SDA/NSS | D10 |
Setting up the RFID Unlock System:
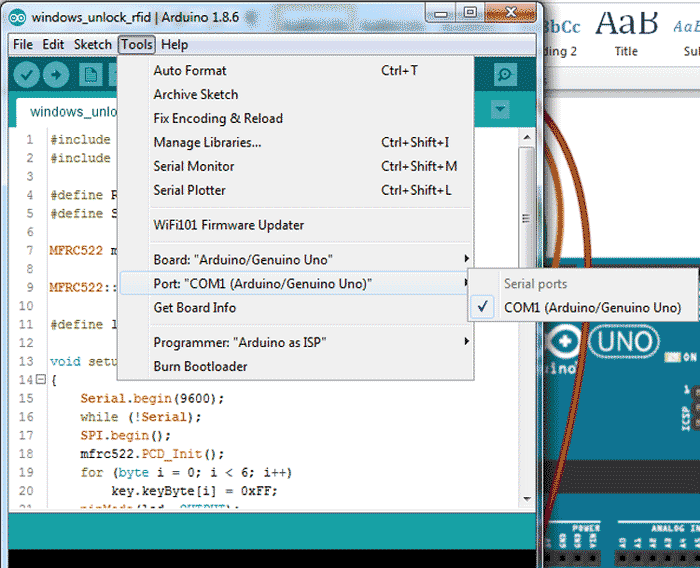
After the circuit is built, as shown above, connect the USB cable between Arduino and the system (laptop or PC). Now the user needs to find the com port for Arduino. To find com port you can either use device manager or you can find it in Arduino IDE as shown below. My COM port number here is 1; yours might be different make a note of this COM port number as it will be used later.
Now the user needs to upload the RC522 Arduino code to your Arduino module. The complete code is given at the bottom of this page; the explanation of the code will also be discussed later in this article. After the code is uploaded open the serial monitor. Then place the RFID tag over RFID reader and you will see the 5 values on the serial monitor. The user needs to copy it and close the serial monitor. My values are shown in the serial monitor snapshot below.
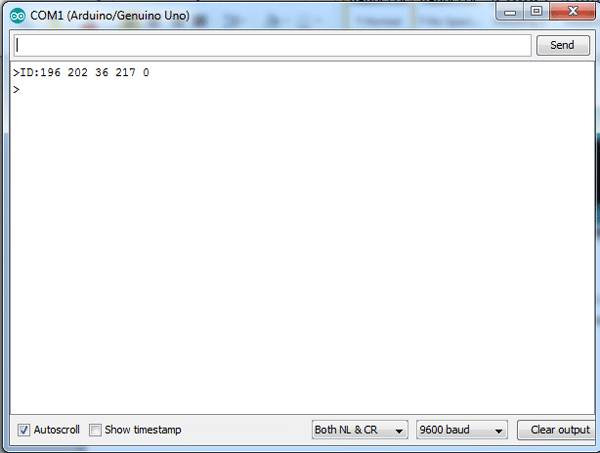
Download the rfid_configuration folder from the given link below. The link will download a ZIP file with four items in it.
Download rfid_configuration ZIP file
After extracting the ZIP file get into the folder named 32 bit or 64-bit folder (according to your operating system) and open the notepad named RFIDcredentials.txt. Paste the RFID values and update the system user name and password. If you want to add two cards then add the same credential in the second row as shown below.
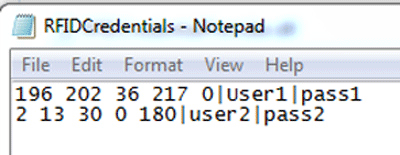
Then save and close this file. Now come back and open the RFIDCredSettings notepad and update the Arduino port in it then save and close. Again my COM port number is 1, update it with your COM port number. Leave the rest to default values as shown below.
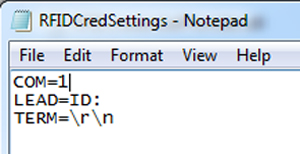
Now copy all four items and paste them in C:\Windows\System32. If it asks for any permission just give or click on yes. Now run register file to register the changes.

When you run the Register file you might get the following dialog box.
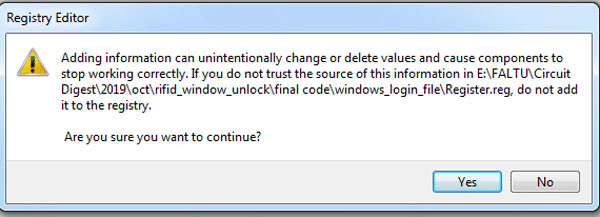
Press yes then ok. Now lock the system and the user will see another user option available with your current user.
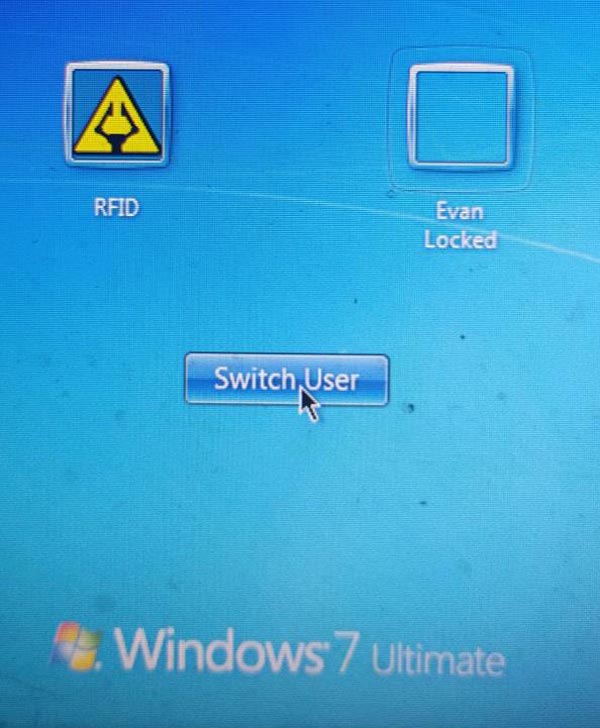
Now the user can unlock the system by using RFID card. Meaning, now we do not need to input the password, just place RFID tag over RFID reader and windows will be unlocked immediately.
RFID Arduino Code:
The coding part of this project is easy and simple; the explanation of the same is given. First of all, we need to include header files and define pins for RFID RST_PIN and SS_PIN. If you do not have the mfrc522 library installed already you can download and add it from the following link.
#include <SPI.h>
#include <MFRC522.h>

#define RST_PIN    9
#define SS_PIN     10

MFRC522 mfrc522(SS_PIN, RST_PIN);
MFRC522: : MIFARE_KEY;
Then in the void setup, we have initialized the serial and SPI communication and RFID reader
void setup()
{
serial.begin(9600);
while(!Serial);
SPI.begin();
mfrc522.PCD_Init();
for(byte i = 0; i < 6; i++)
Key.KeyByte[i] = 0xFF;
serial.print('>');
}
Now in loop function, we are waiting for the card.
void loop()
{
if( ! mfrc522.PICC_IsNewCardPresent() )
   return;
if( ! mfrc522.PICC_ReadCardSerial() )
   return;
send_tag_val (mfrc522.uid.uidByte, mfrc522.uid.size);
delay(1000);
}
If the card found send_tag_val called an RFID tag data will be transferred to the system using serial print. This serial print value will be compared with the file that we placed earlier and if it a match the windows will unlock itself.
void send_tag_val (byte *buffer, byte buffersize)
{
   serial.print("ID");
   for (byte i = 0; i < buffersize; i++)
{
   serial.print(buffer[i], DEC);
   serial.print(" ");
}
   serial.printIn(0, DEC);
    serial.print('>');
}
The complete working of the project is shown in the video given below. Hope you understood the project and enjoyed building it. If you have any problems leave them in the comment section. Also, feel free to use the forums for other technical questions.
#include <SPI.h>
#include <MFRC522.h>
#define RST_PIN 9
#define SS_PIN 10
MFRC522 mfrc522(SS_PIN, RST_PIN);
MFRC522::MIFARE_Key key;
void setup()
{
Serial.begin(9600);
while (!Serial);
SPI.begin();
mfrc522.PCD_Init();
for (byte i = 0; i < 6; i++)
key.keyByte[i] = 0xFF;
Serial.print('>');
}
void loop()
{
if ( ! mfrc522.PICC_IsNewCardPresent())
return;
if ( ! mfrc522.PICC_ReadCardSerial())
return;
send_tag_val(mfrc522.uid.uidByte, mfrc522.uid.size);
delay(1000);
}
void send_tag_val(byte *buffer, byte bufferSize)
{
Serial.print("ID:");
for (byte i = 0; i < bufferSize; i++)
{
Serial.print(buffer[i], DEC);
Serial.print(" ");
}
Serial.println(0, DEC);
Serial.print('>');
}
Comments
Project not working
Hi sir,
I am a student from andra pradesh- India. I have followed everything what you told in this. But i am unable to view the other account. Everything worked correct until the copy of registries and registry run, after that i am not getting anything. Please help me for getting successful in this project.
Windows 10
Does not work on Windows 10 for sure. Any thoughts. Thanks
not working
Hi there,
my case is like harry's
except i do not see the new icon on the lock screen
thanks
I have followed everything
I have followed everything what you told in this. But i am unable to view the other account. Please help me for getting this work.Im running win 7.



Hi, I followed everything as above, but it won't login to windows.
I can see the TAG ID, I've copied it to the txt file, I've changed the com port on the other text file, I've entered my username and password, everything is registered and the new icon is on the lock screen, but it does nothing when I use the tag?